
Building a CI pipeline for a web application using Jenkins
GitHub -> Jenkins -> Docker Hub


Introduction
Through this blog, I will tell you how to create a Continuous Integration(CI) pipeline. This pipeline will get triggered every time I make changes to code(of my portfolio website) stored in a GitHub repo.
Jenkins, then, will build the docker image of my web application, push it to the Docker hub to a specific repository, and update the version of the web application in the GitHub.
Prerequisites
It would be best if you have a basic understanding of the following:
Git and GitHub: How to commit changes
Docker: how to build an image and push it to DockerHub
Jenkins: How to write a Jenkinsfile
If you don't know anything about Jenkins, well, no need to worry. I have used screenshots for you to follow along. It will give you an idea of how Jenkins work.
Let's get started, shall we?
Aim
Problem:
I have built my portfolio website. It is a simple web application and contains only HTML, CSS, and a javascript file. Whenever I commit changes to GitHub, I build the image again and push it to the docker hub. I have to update the version of the index.html file as well.
I wanted to automate all of this.
Solution:
I need to create a CI pipeline to automate the task of building the docker image of the application and then pushing it to the docker hub. This pipeline will also update the version of the index.html file.
Desired result
The result that we aim to achieve:
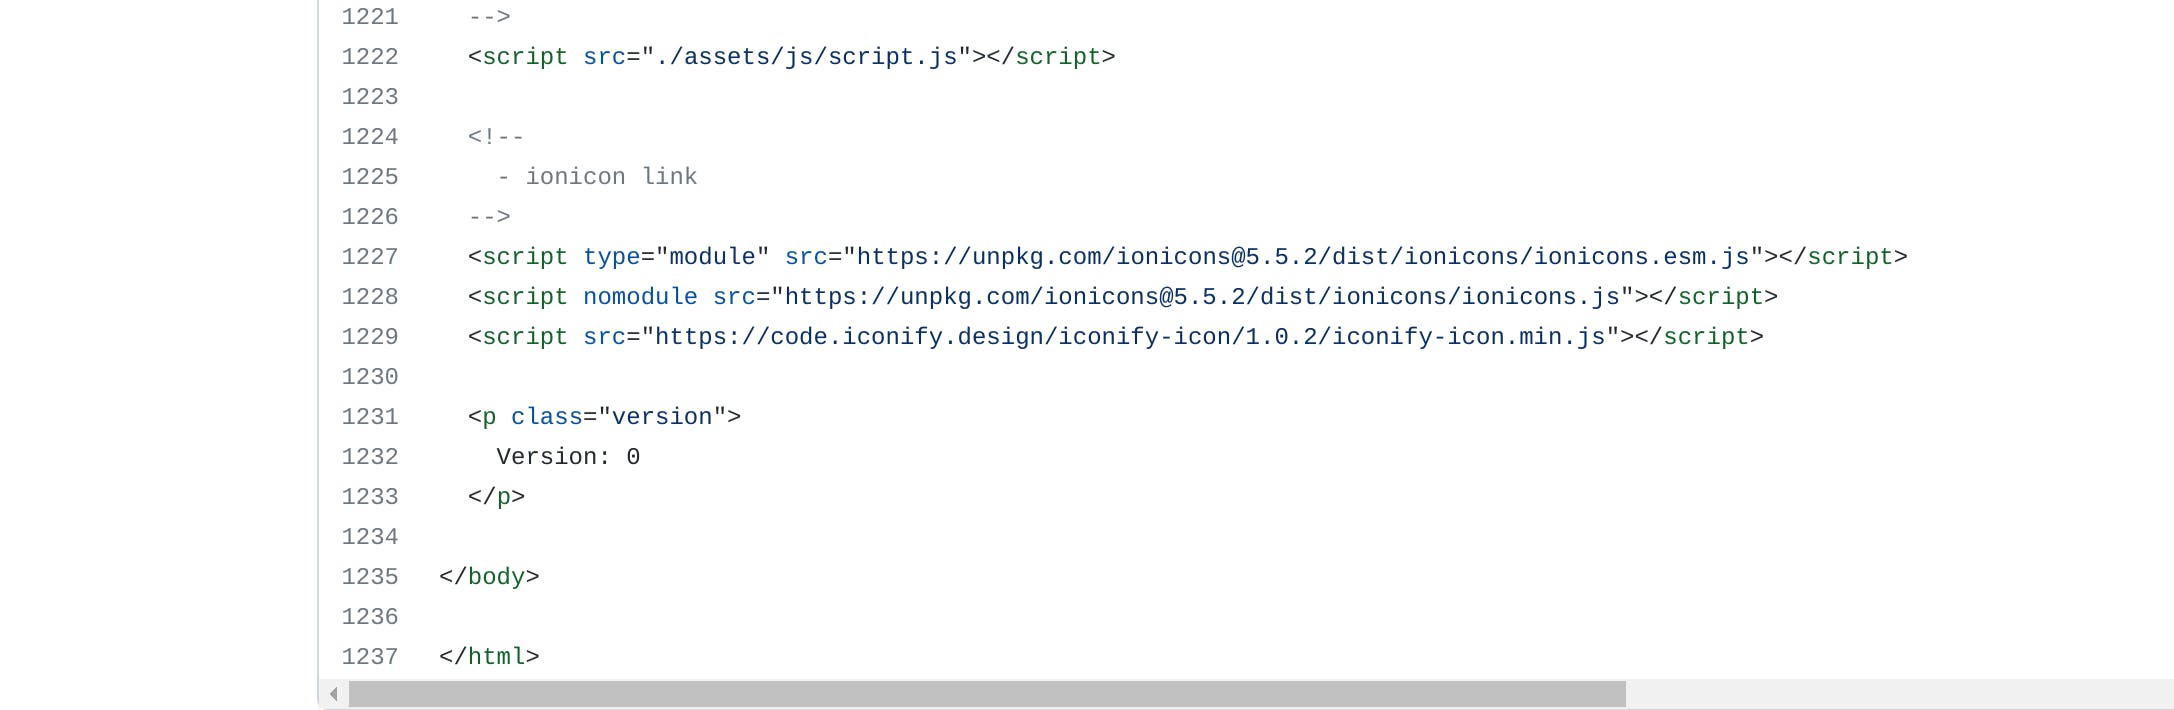
Before building the pipeline
The version is 0 in the index.html file.
After building the pipeline
- Successfully built the pipeline ✅
- Updated Version ✅
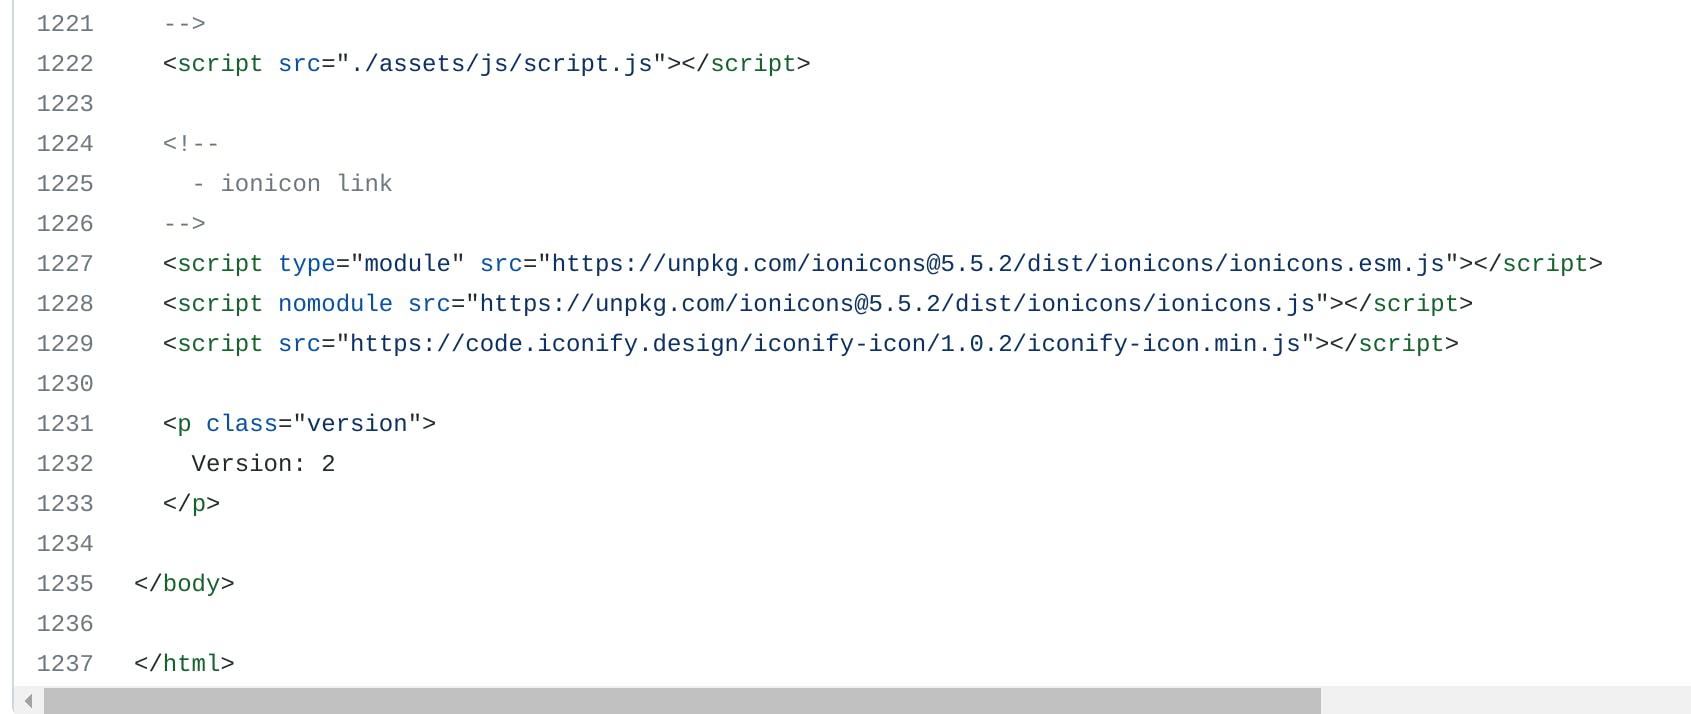
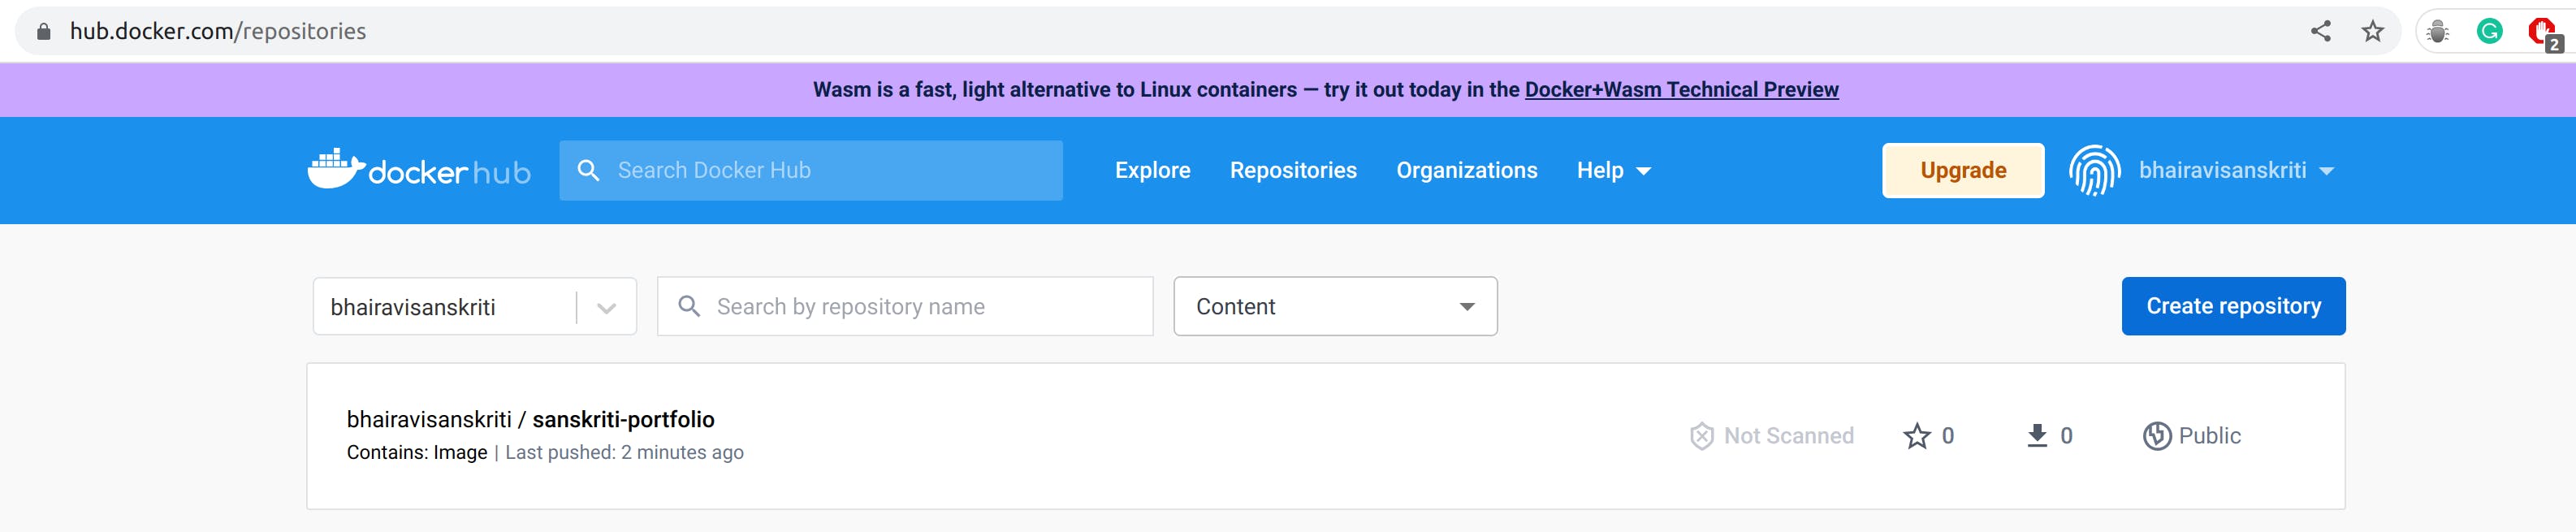
- Created an image with a new tag and pushed it to the docker hub repo ✅
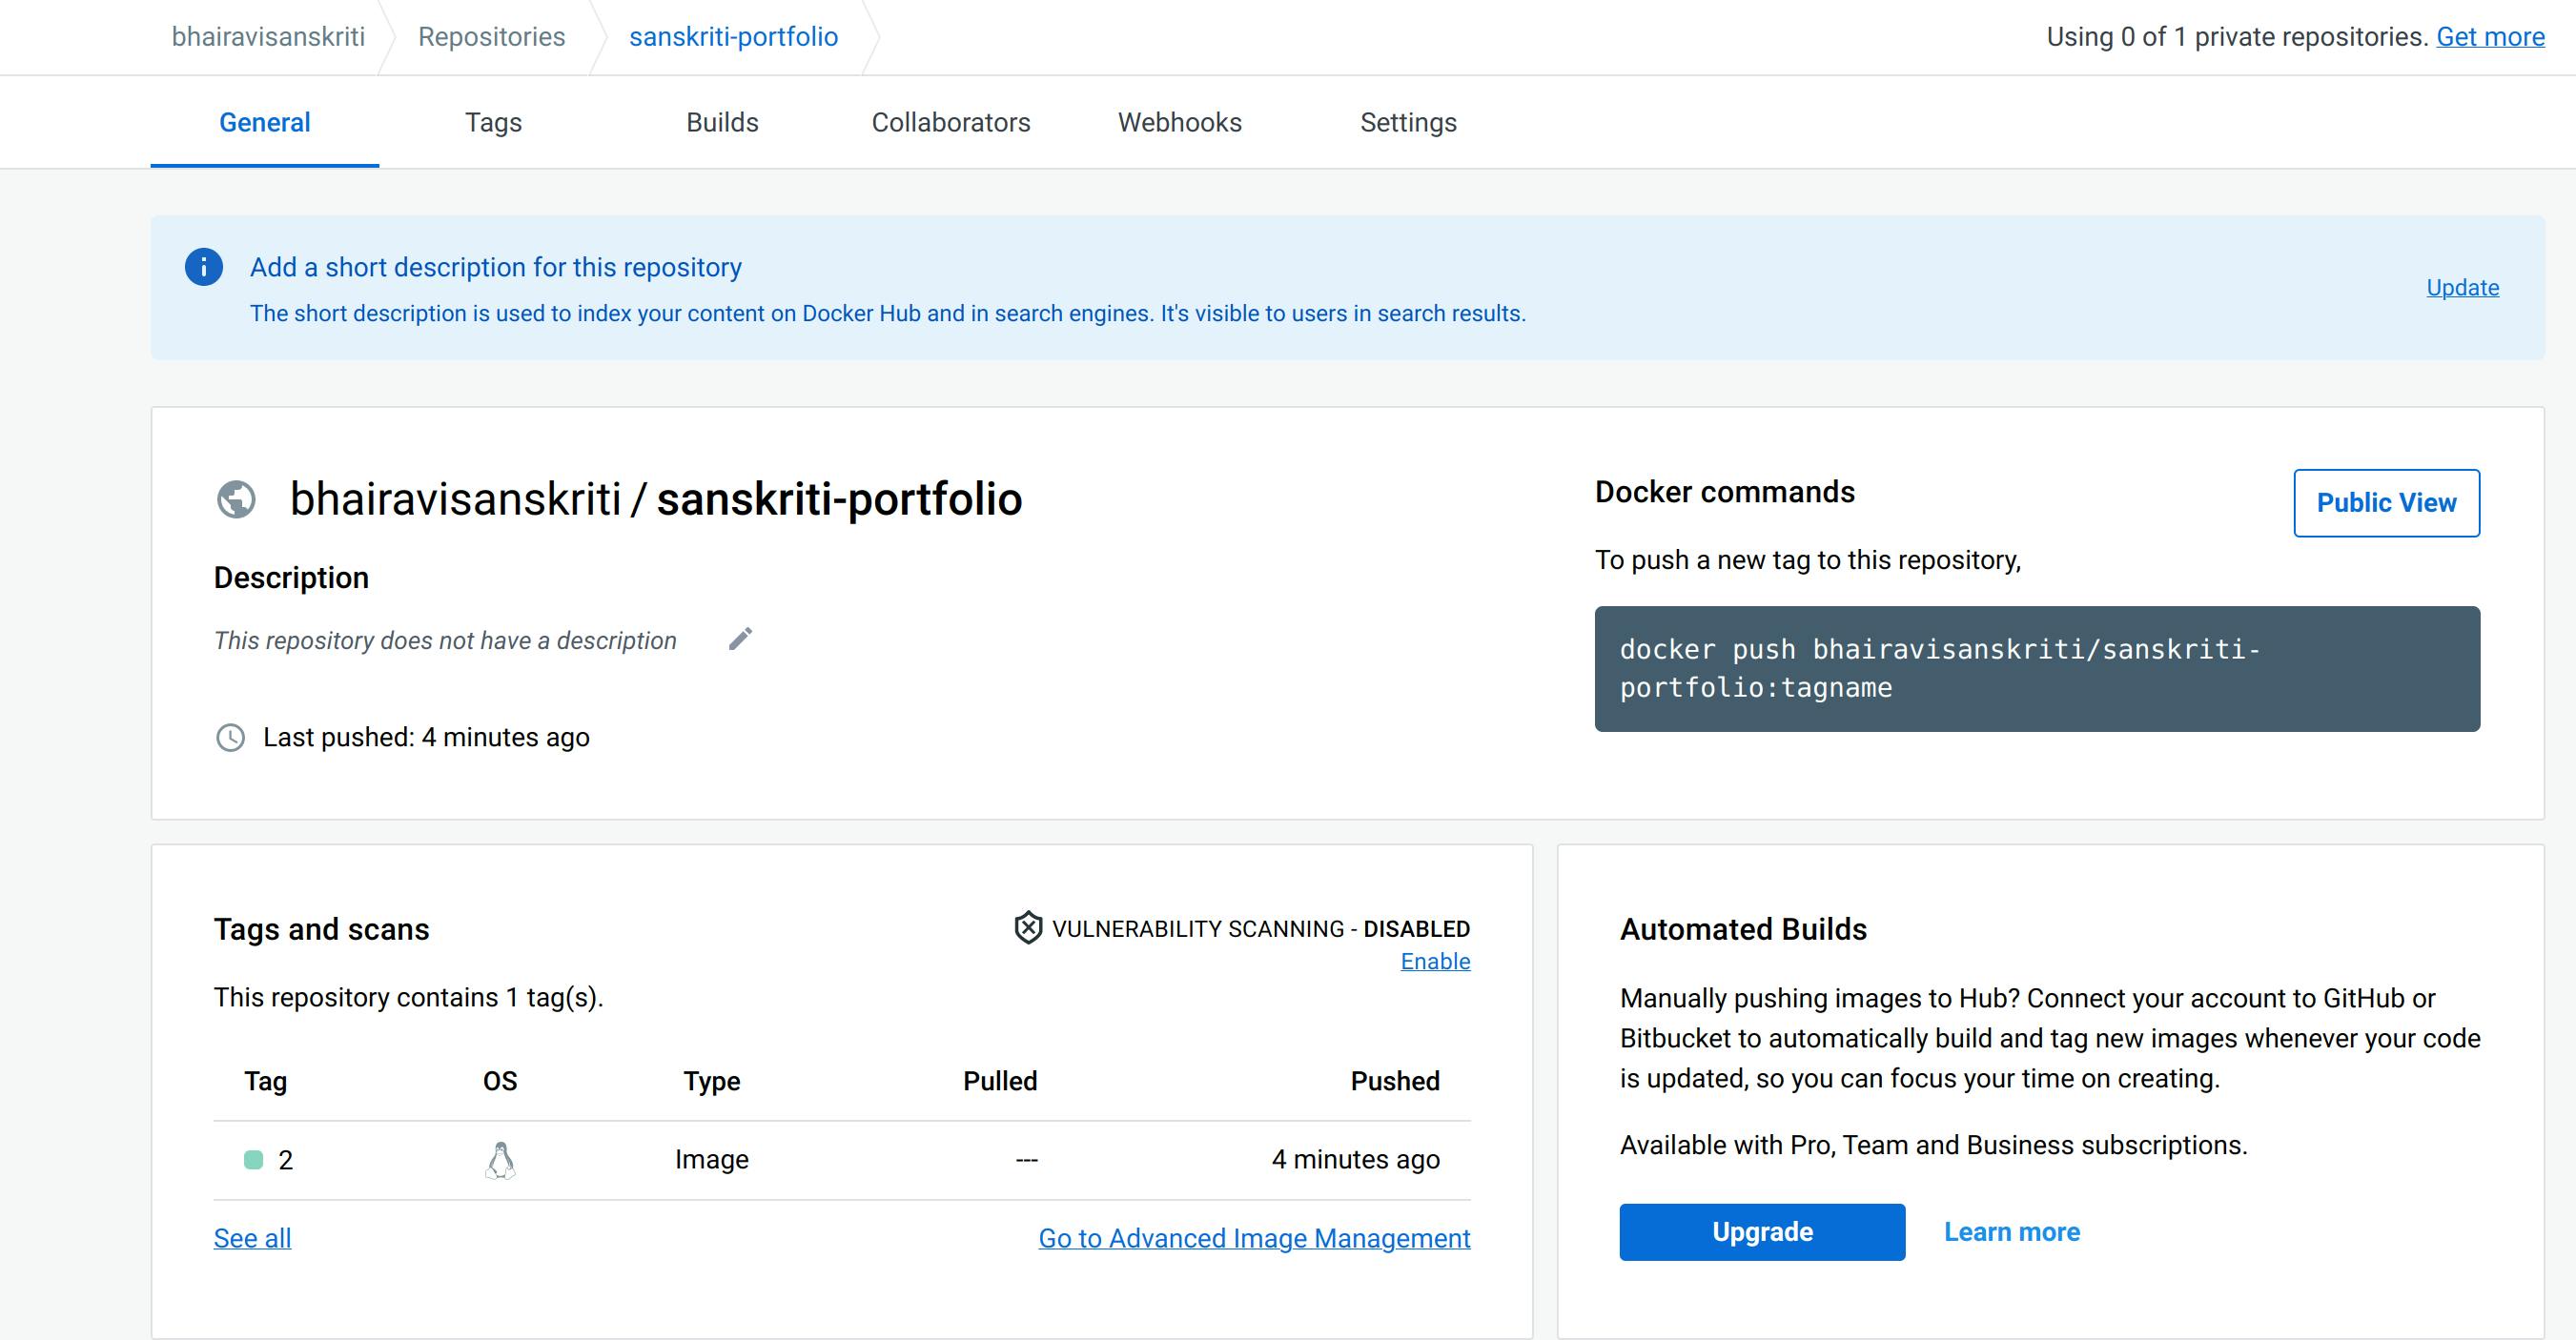
- Successfully built the pipeline ✅
Web Application
The first step is to write code for the portfolio application and push it to the GitHub repository. The Jenkinsfile and the script.groovy files that we will use to build the pipeline will also be stored in this repo.
Please go through both of these files for a better understanding of the project. Here's the link to the repo.
One more thing, the web application is pretty simple. If you are making a slightly complicated website, build the application accordingly.
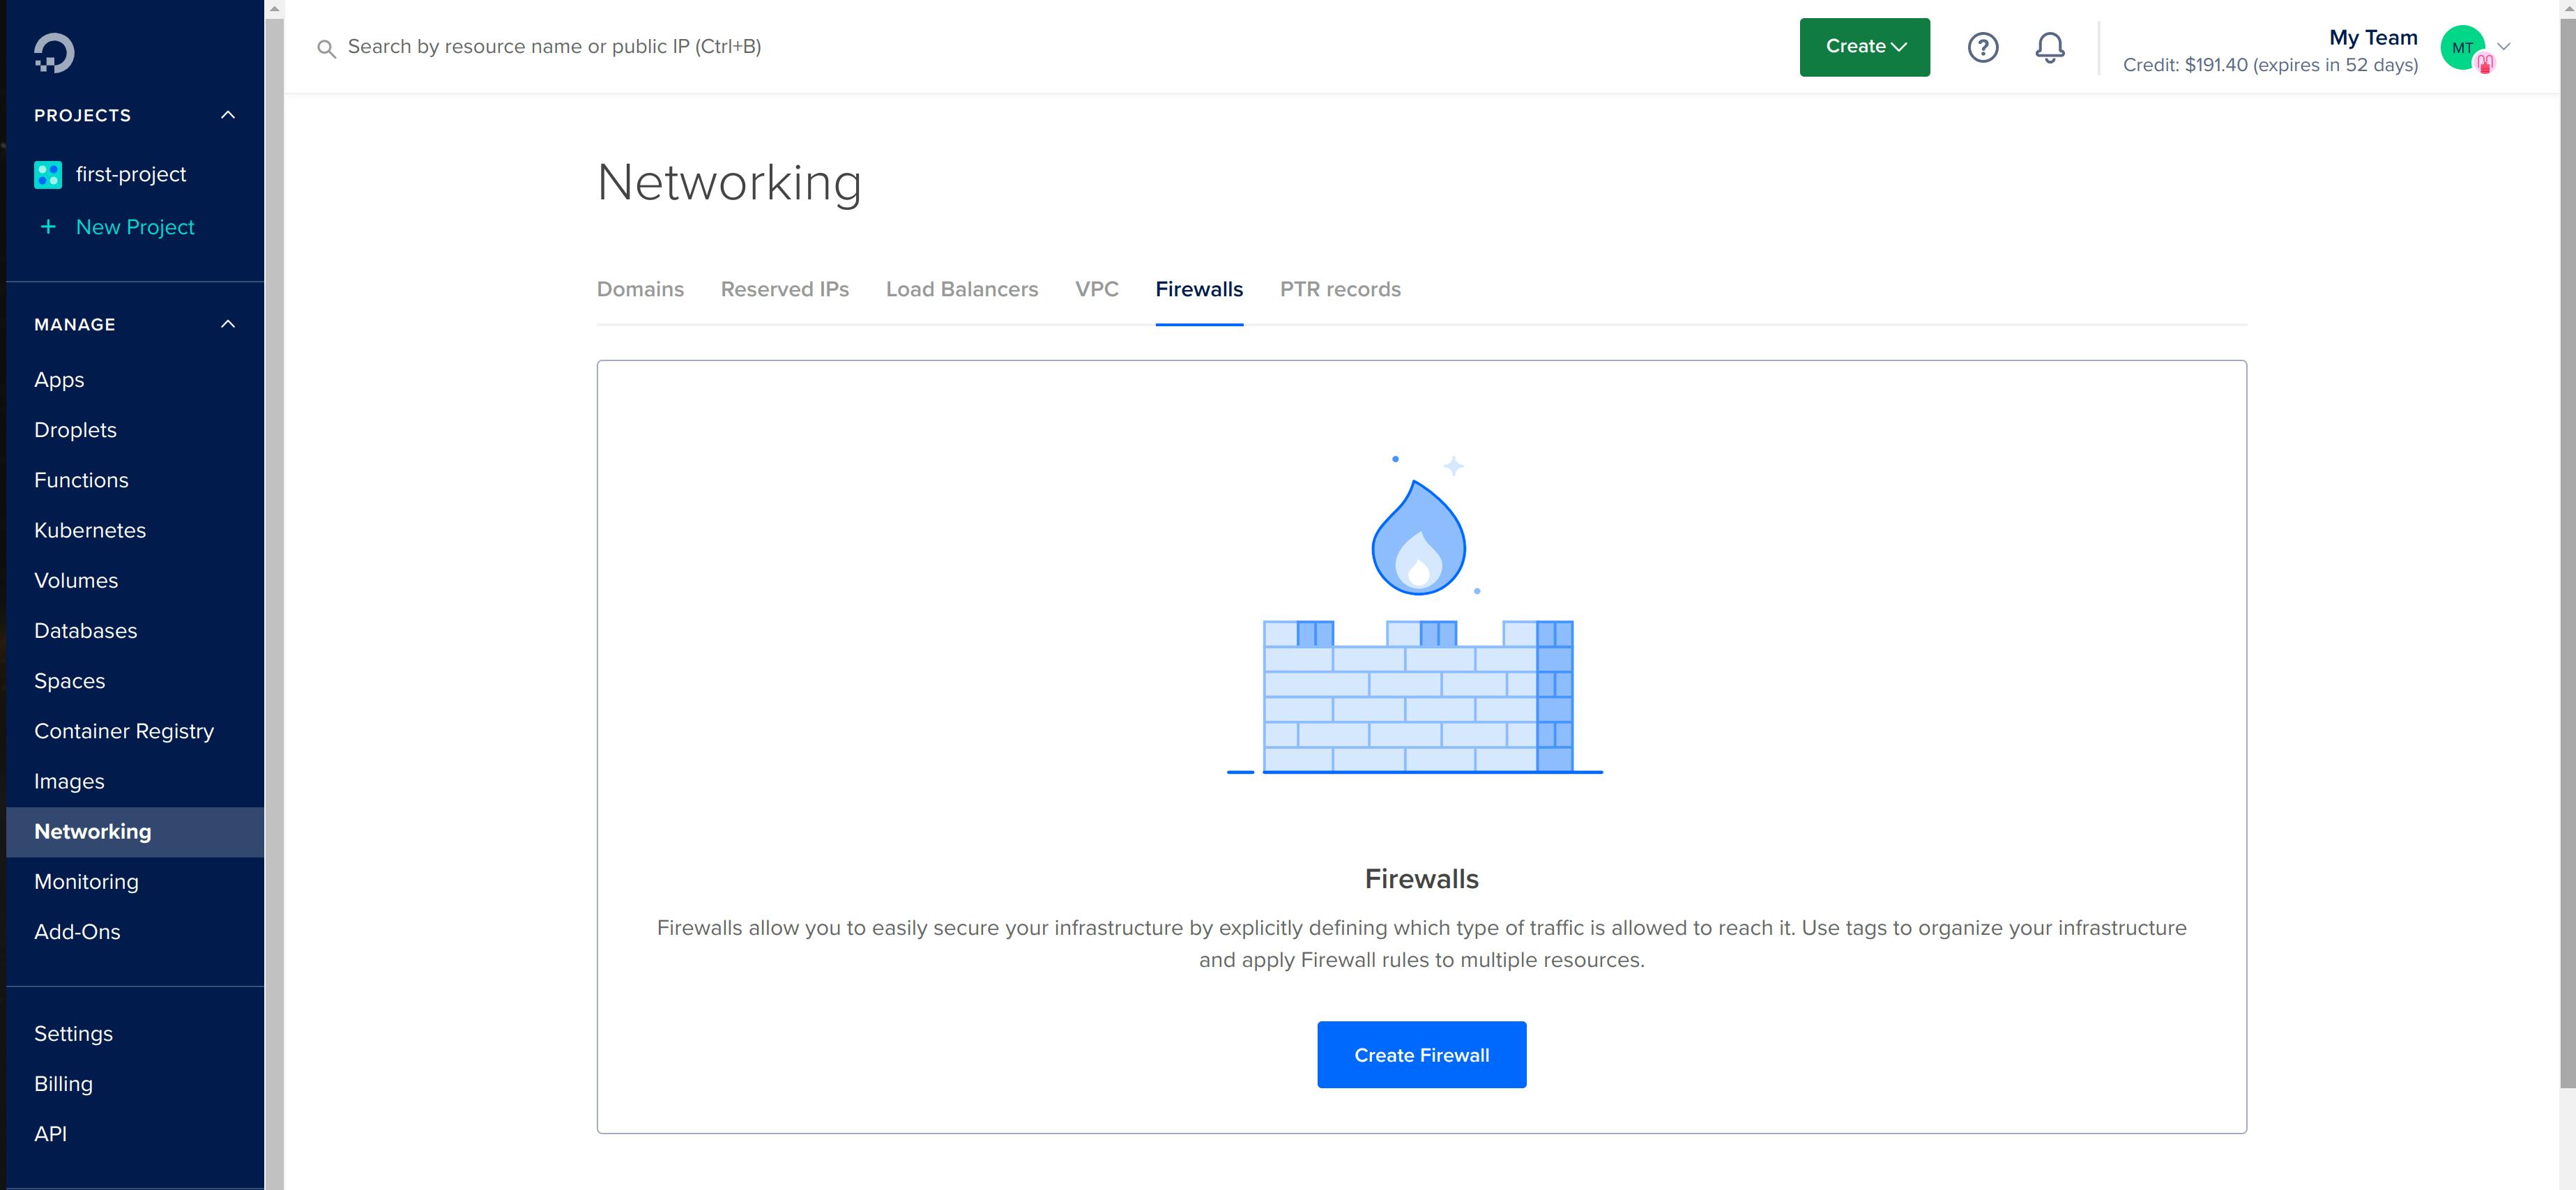
Setting up Jenkins
Now, setup the Jenkins server to build a pipeline. I am using Digital Ocean as a cloud service provider. You can create a free account here and also get a credit of $200.
Steps:
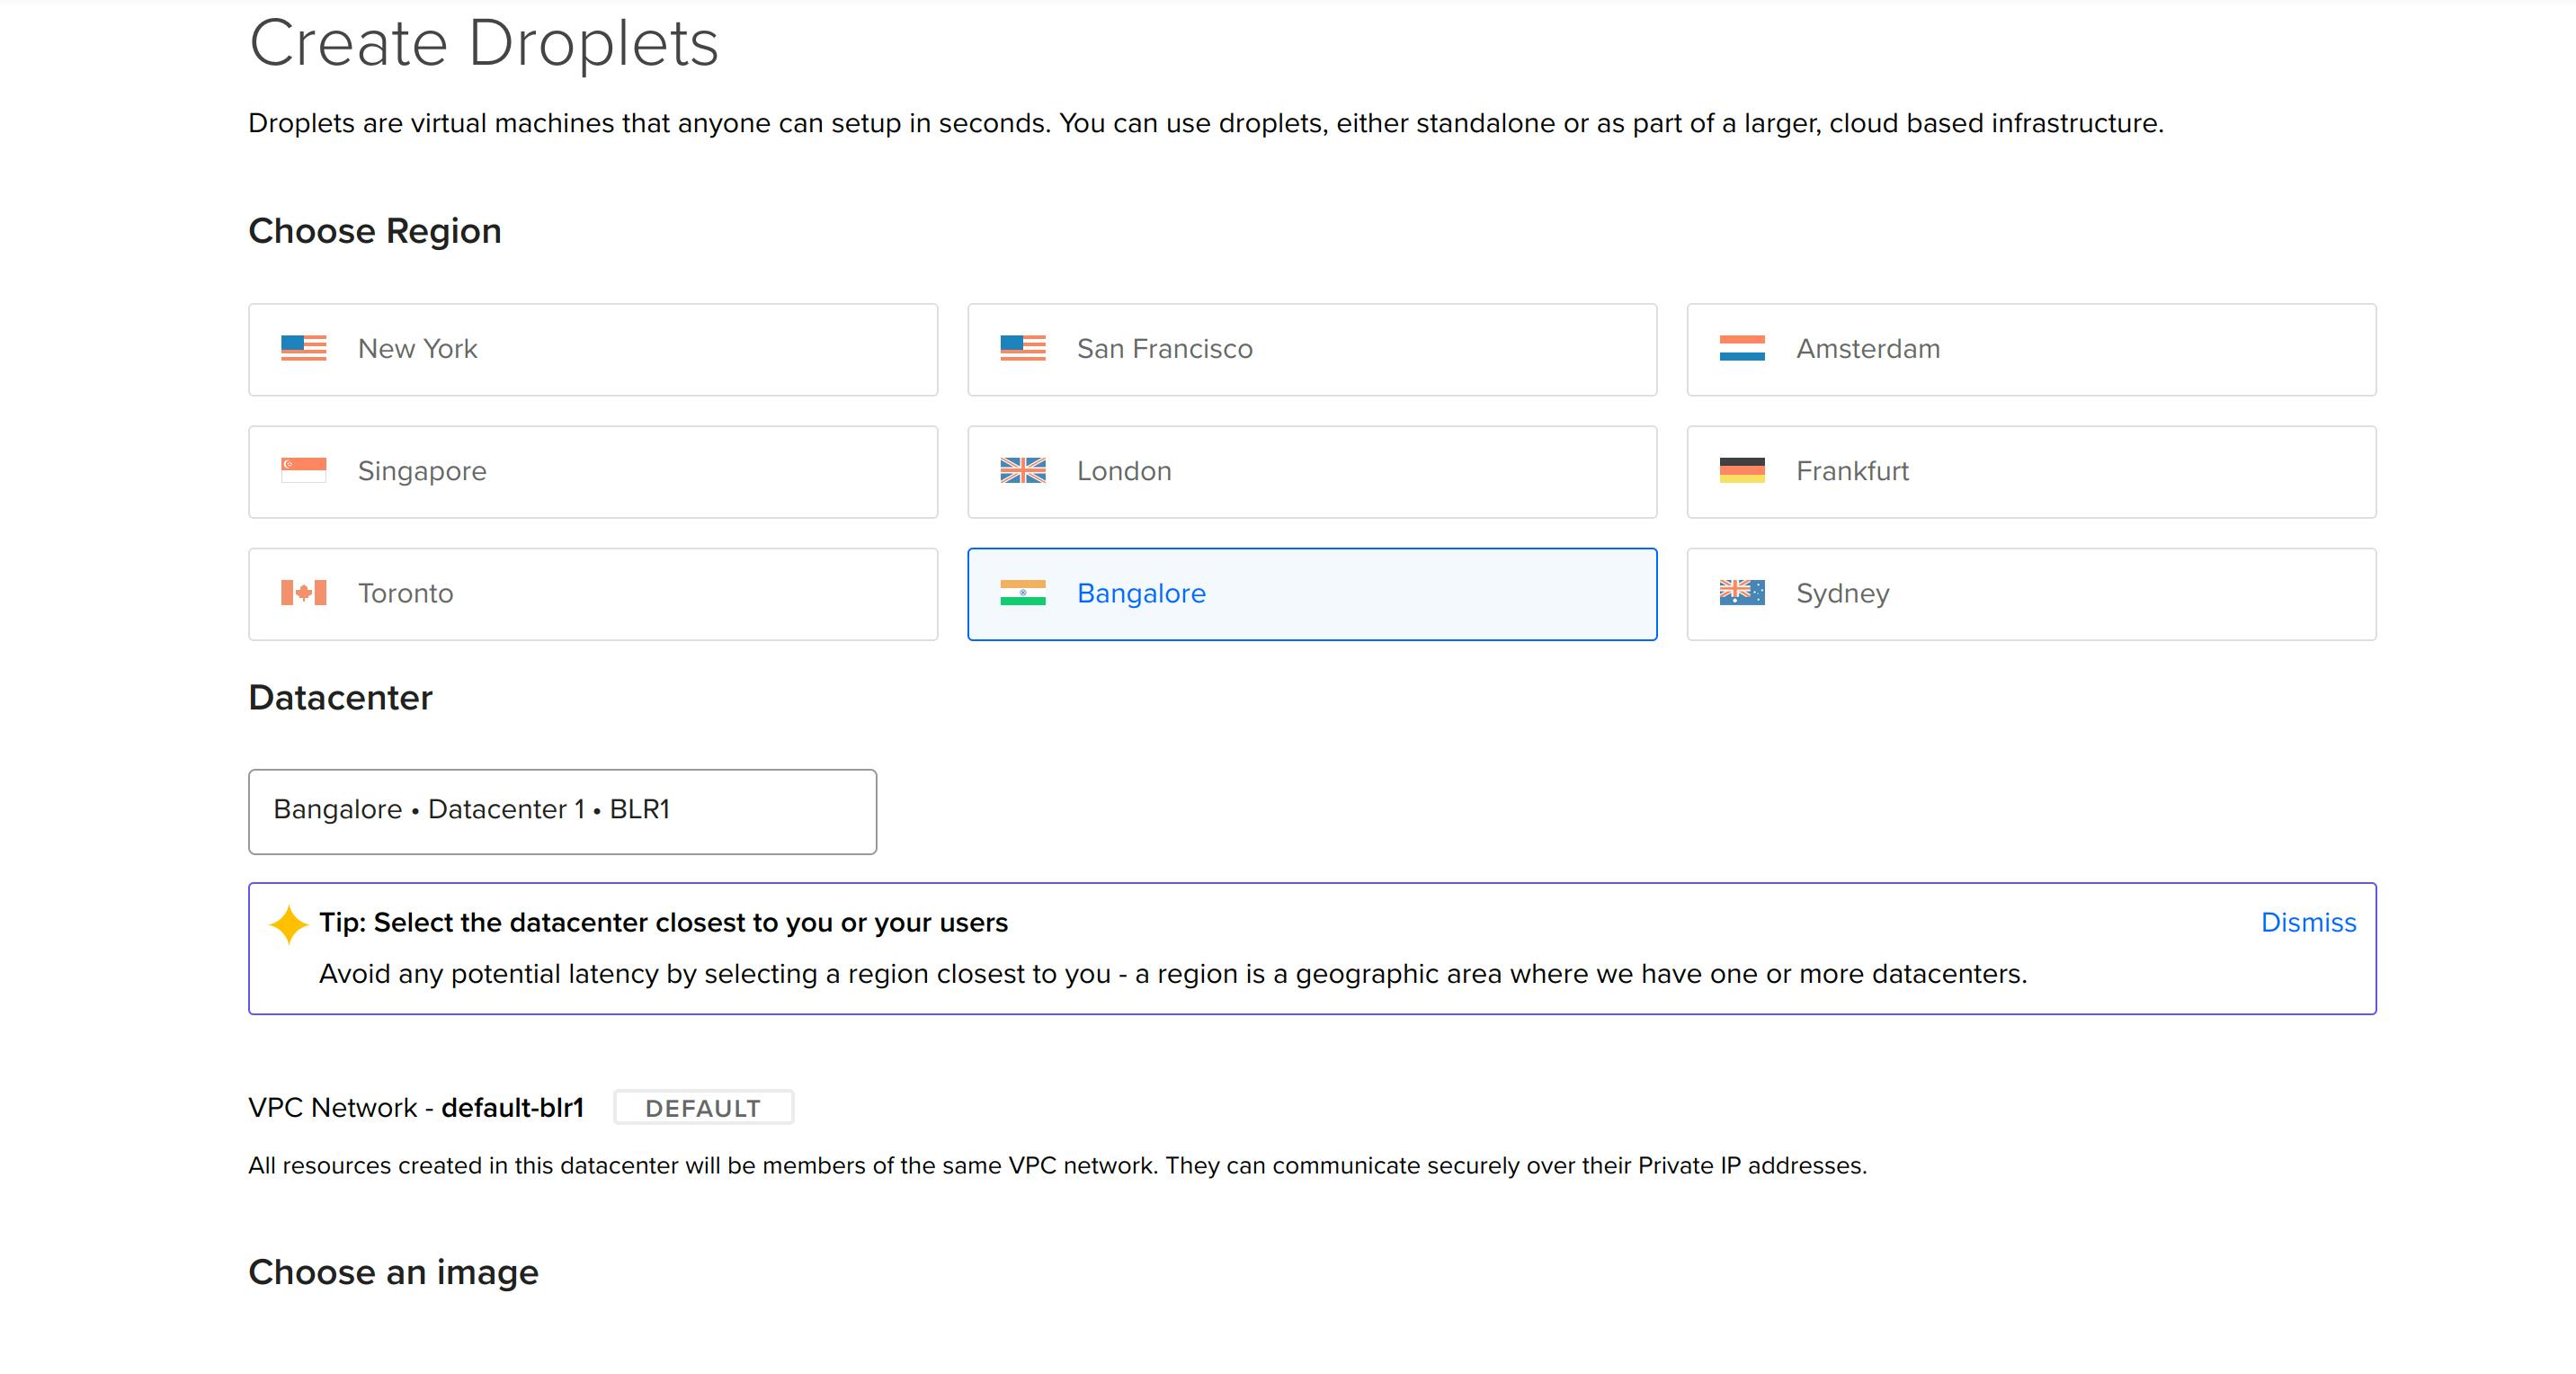
Create a droplet
- Choose Region
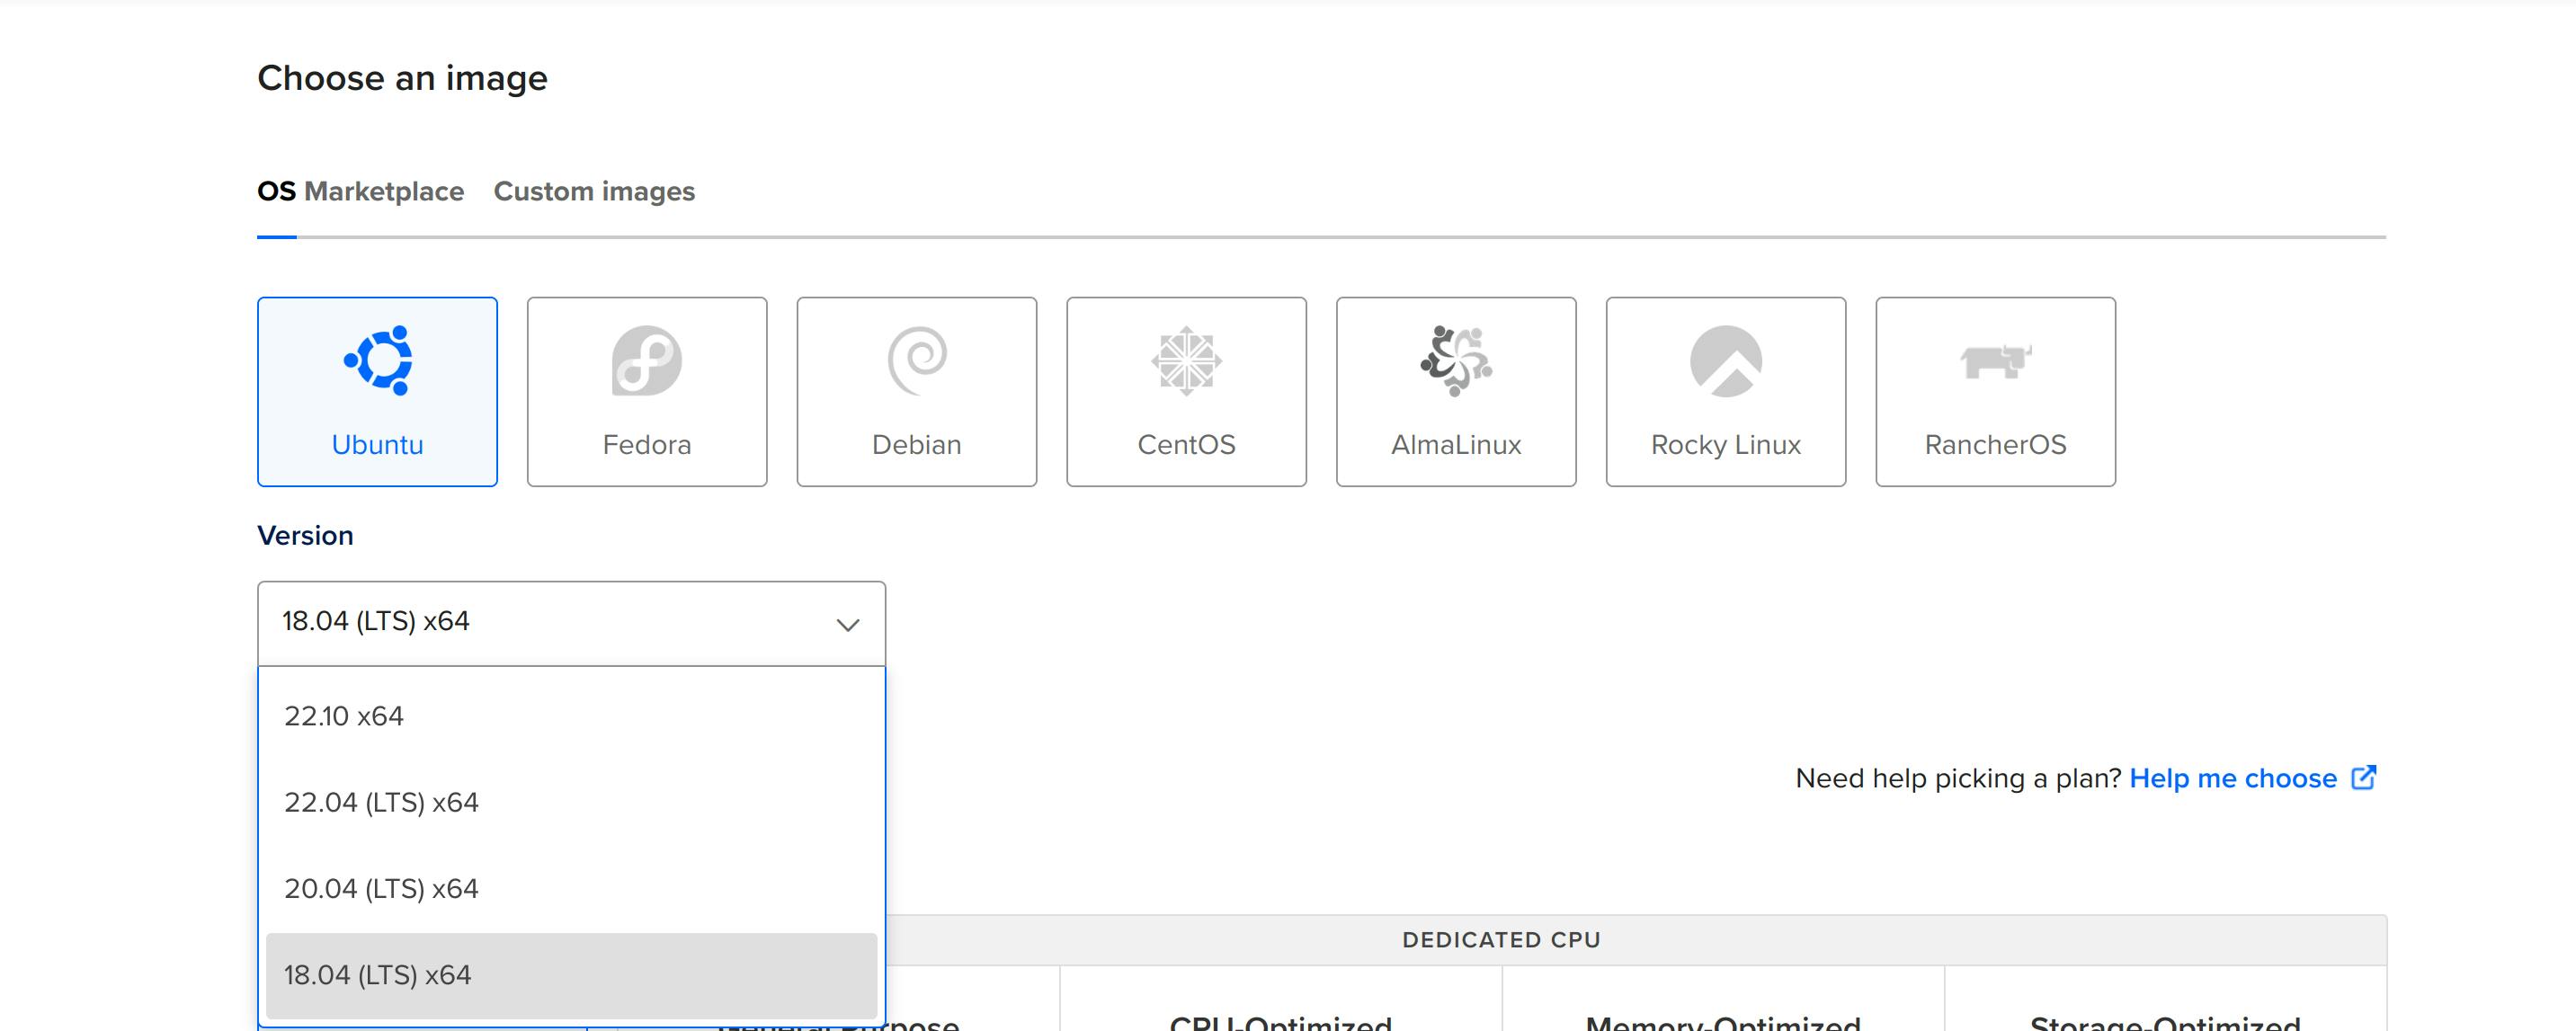
- Choose 18.04 lts as the Ubuntu version. I'll tell you the reason in the later section.
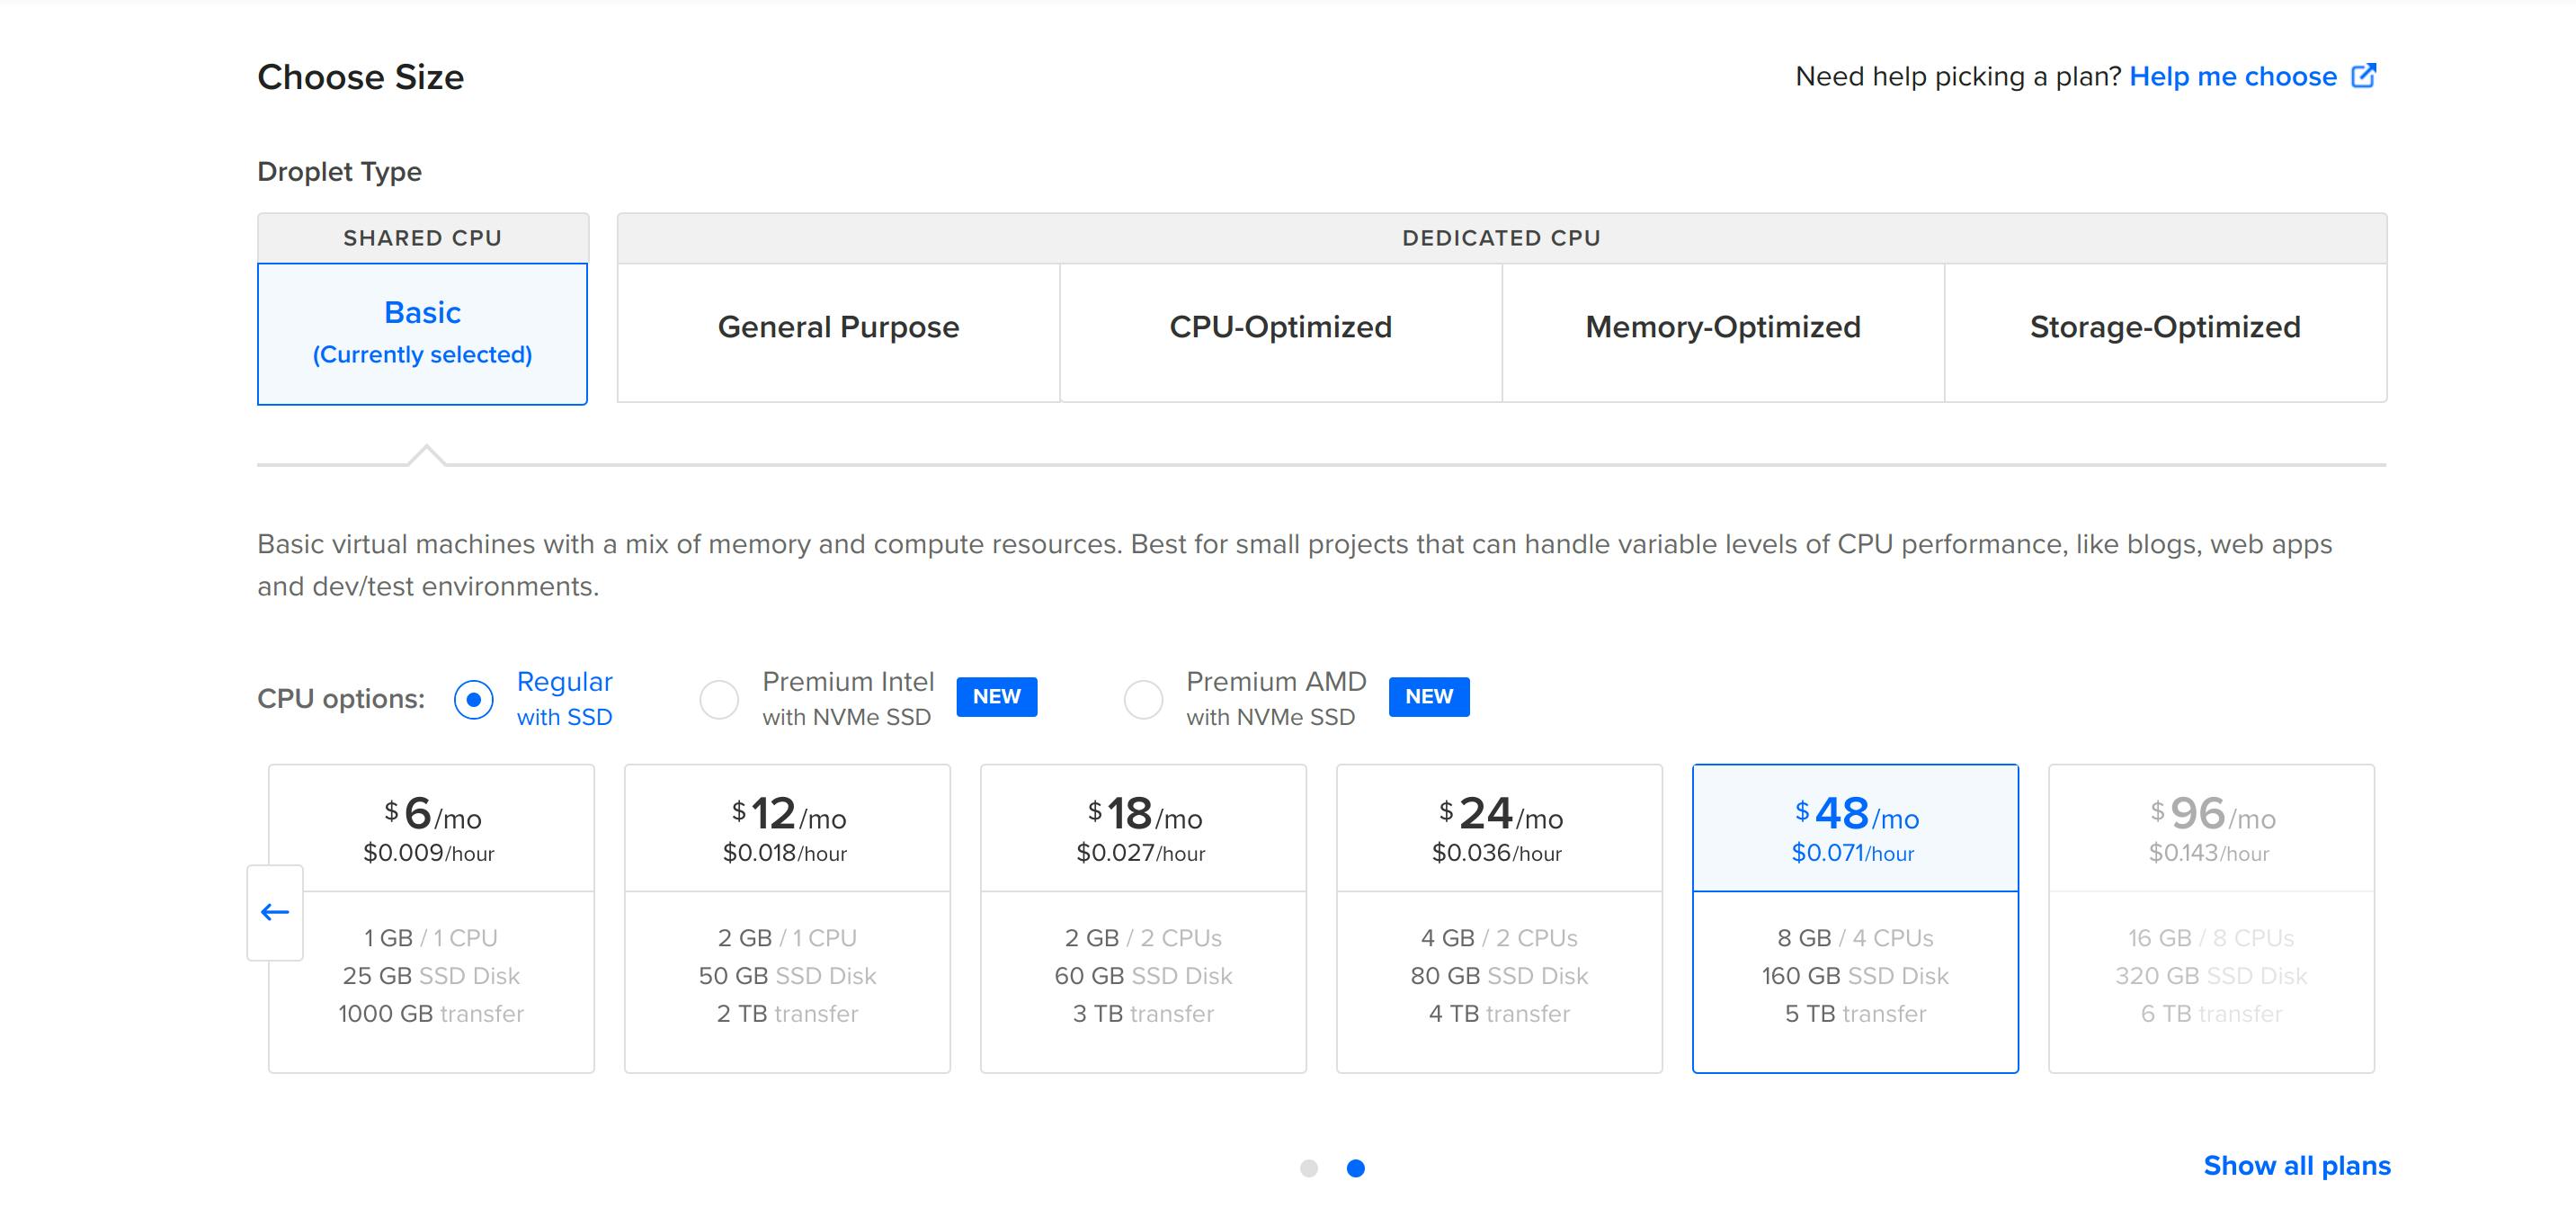
- Choose CPU options
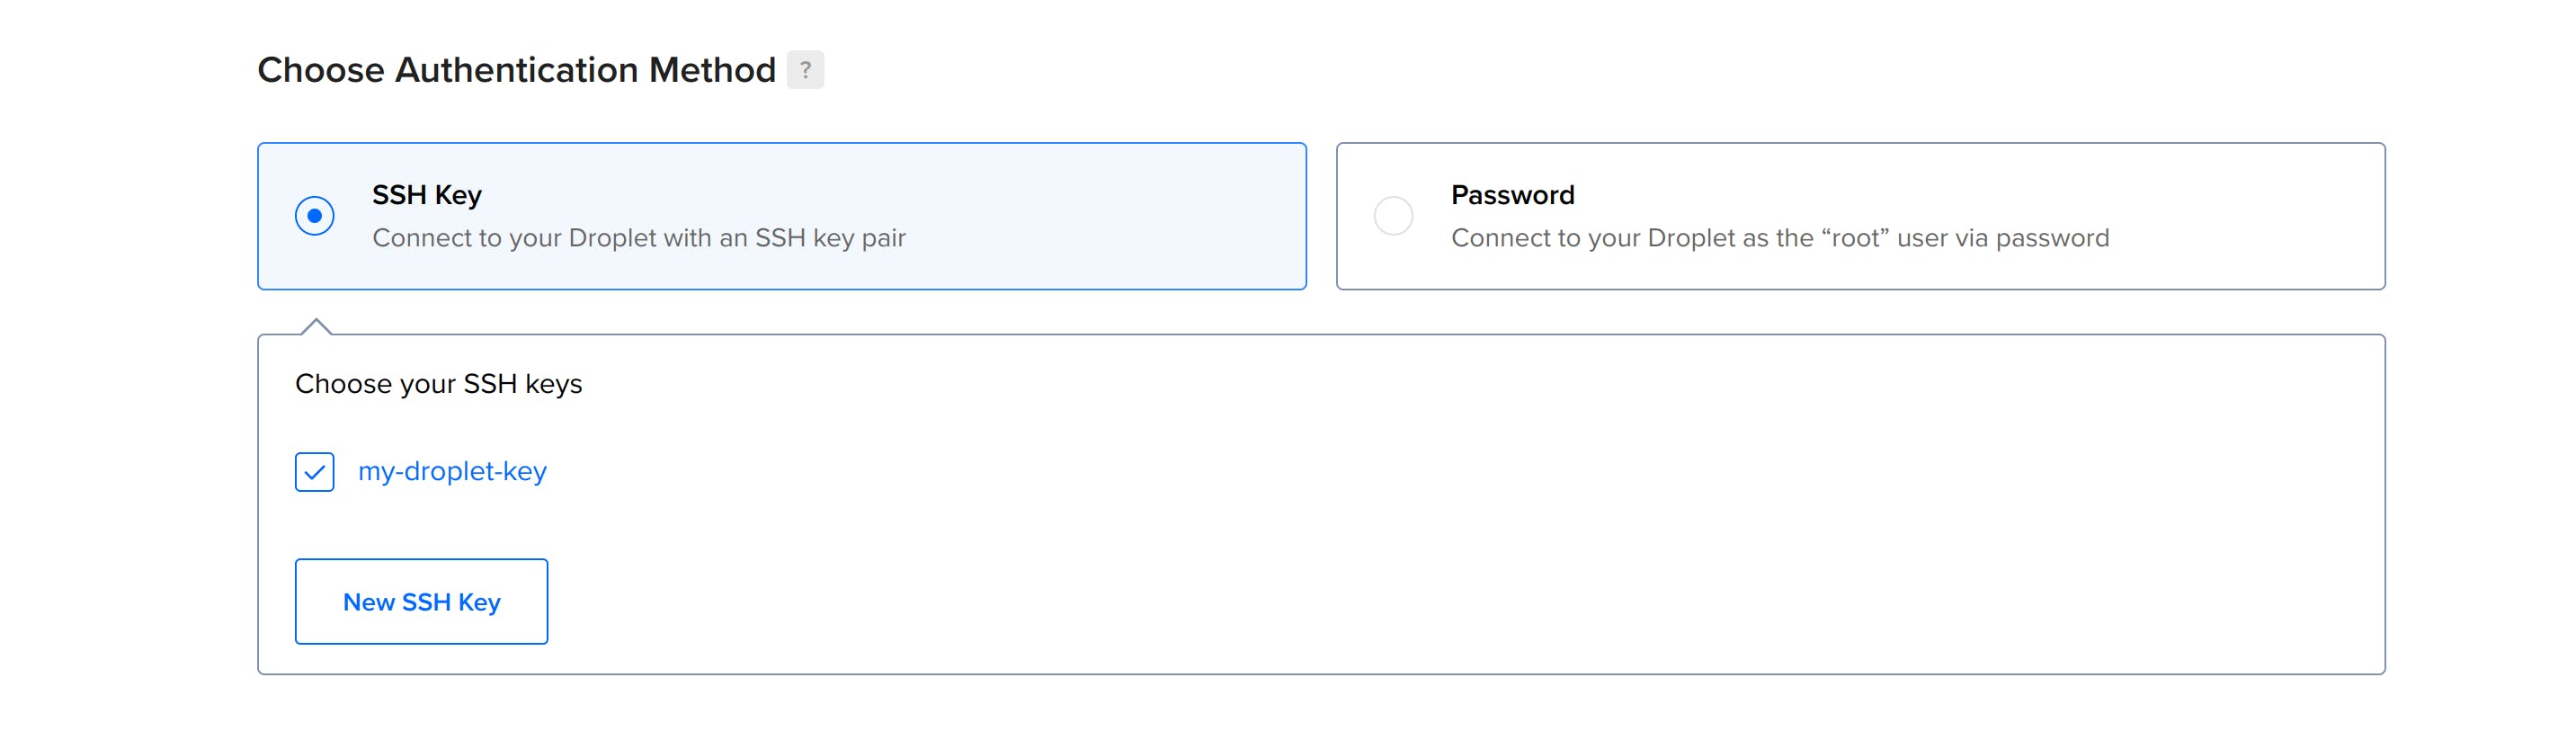
- Add authentication method. If you don't have one then create it.
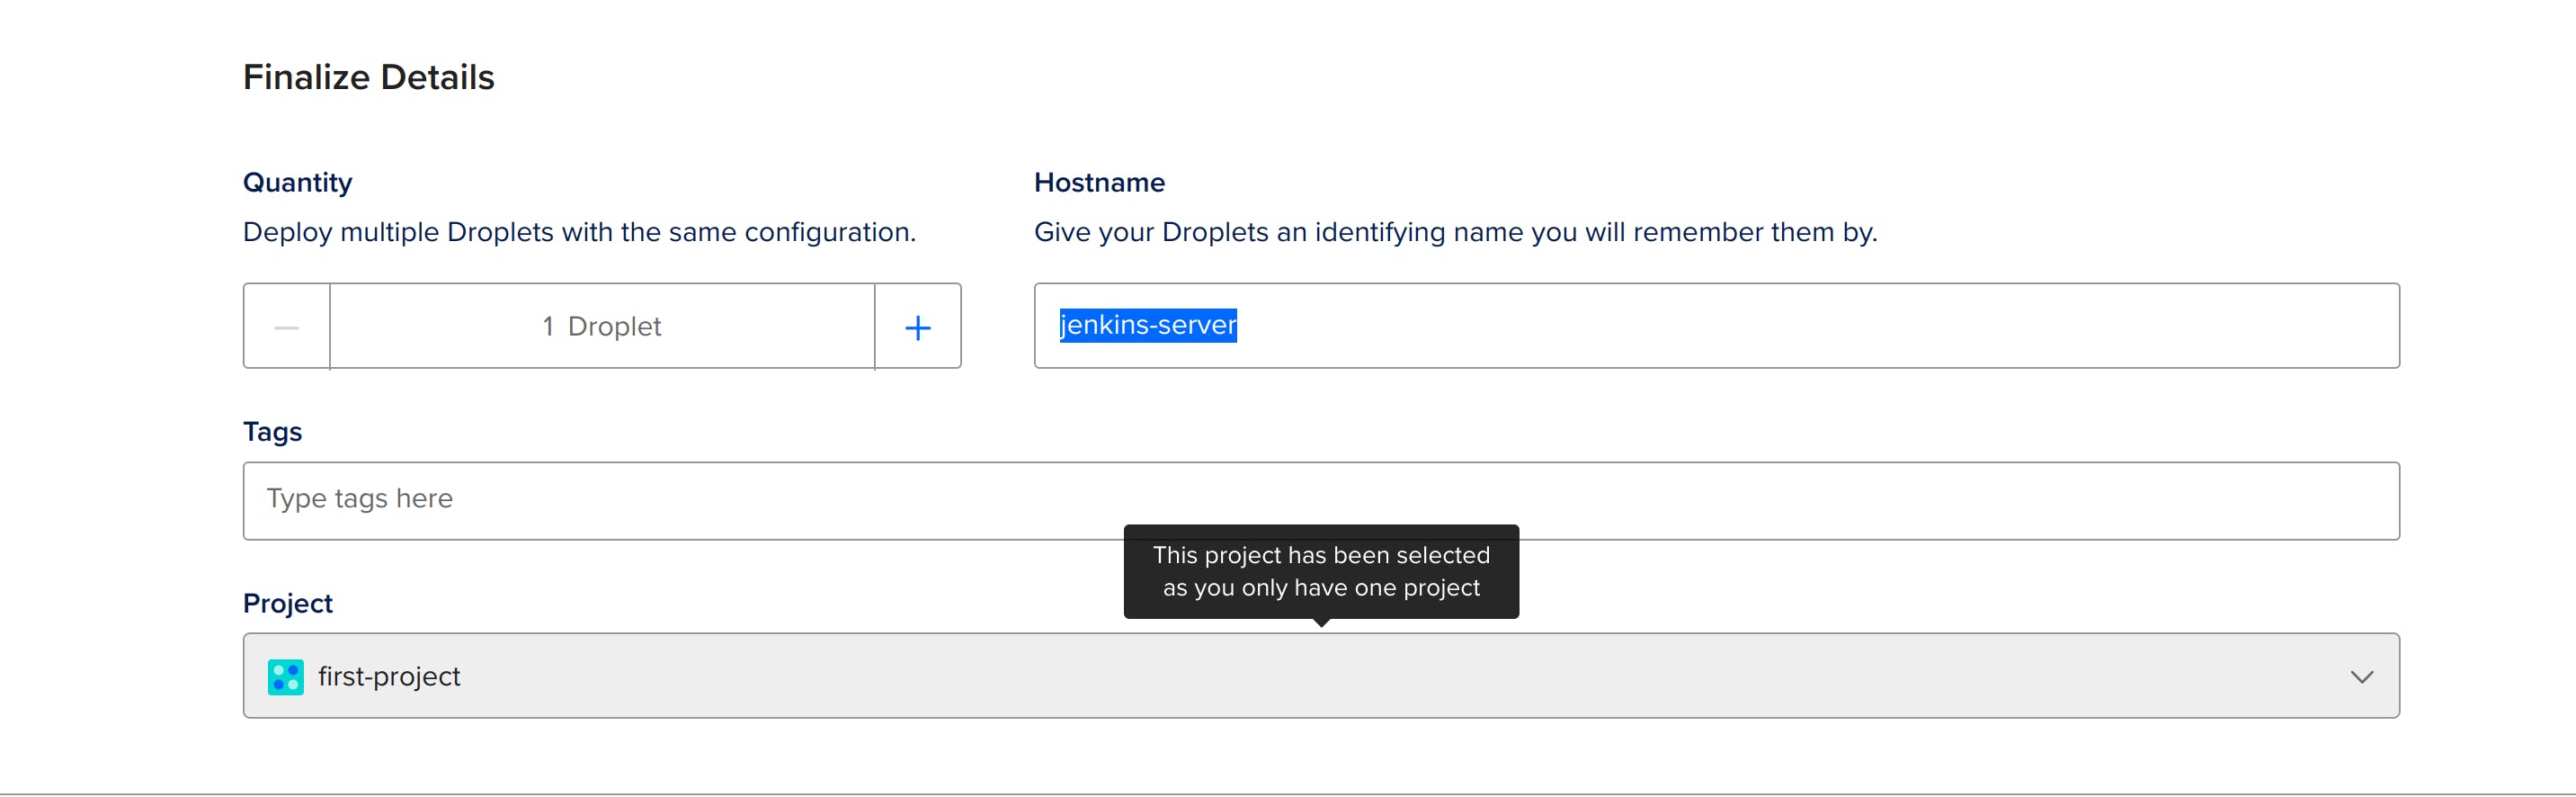
- Rename the server hostname
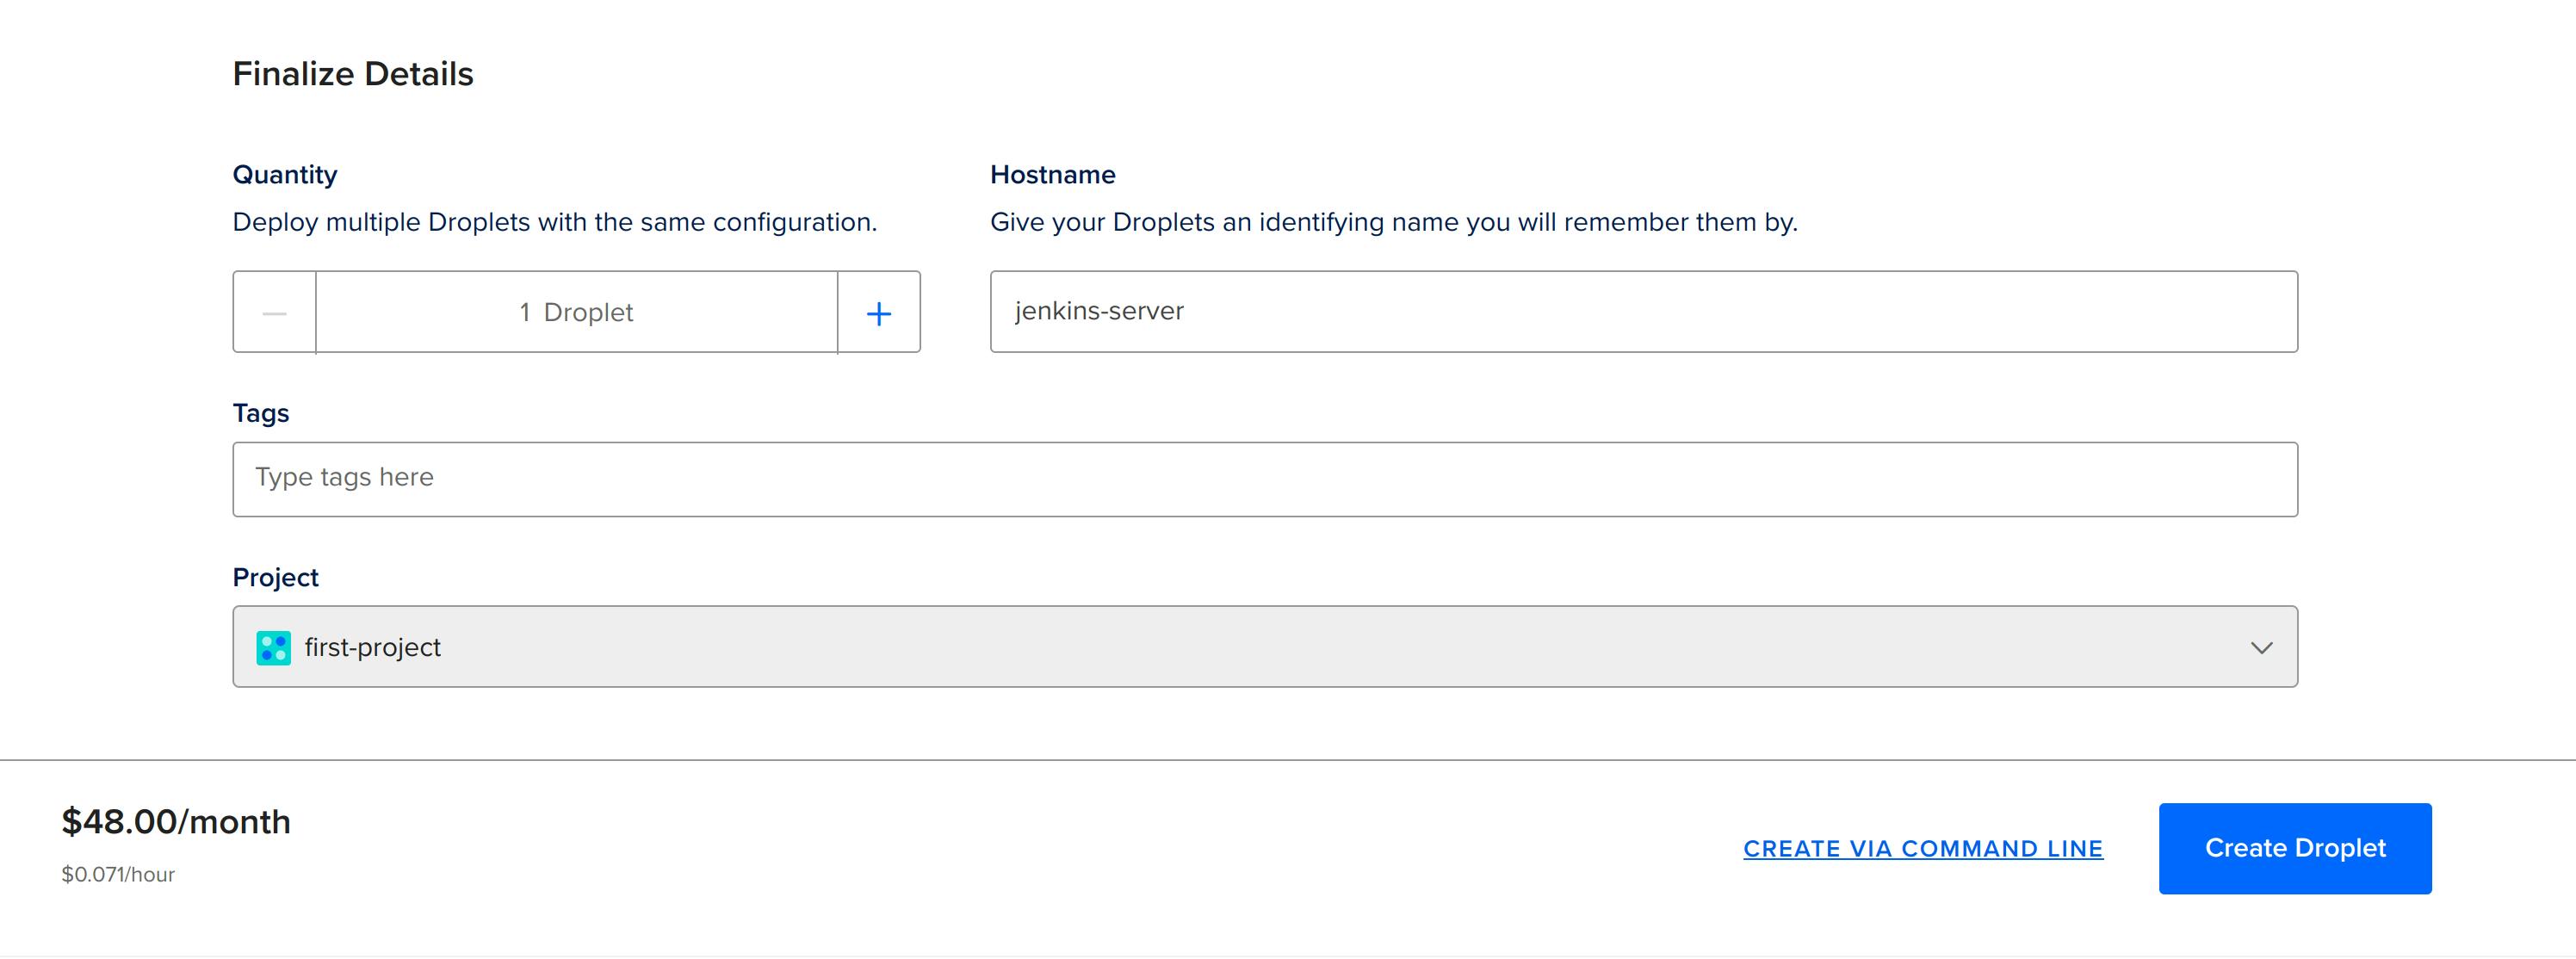
- Click on Create Droplet
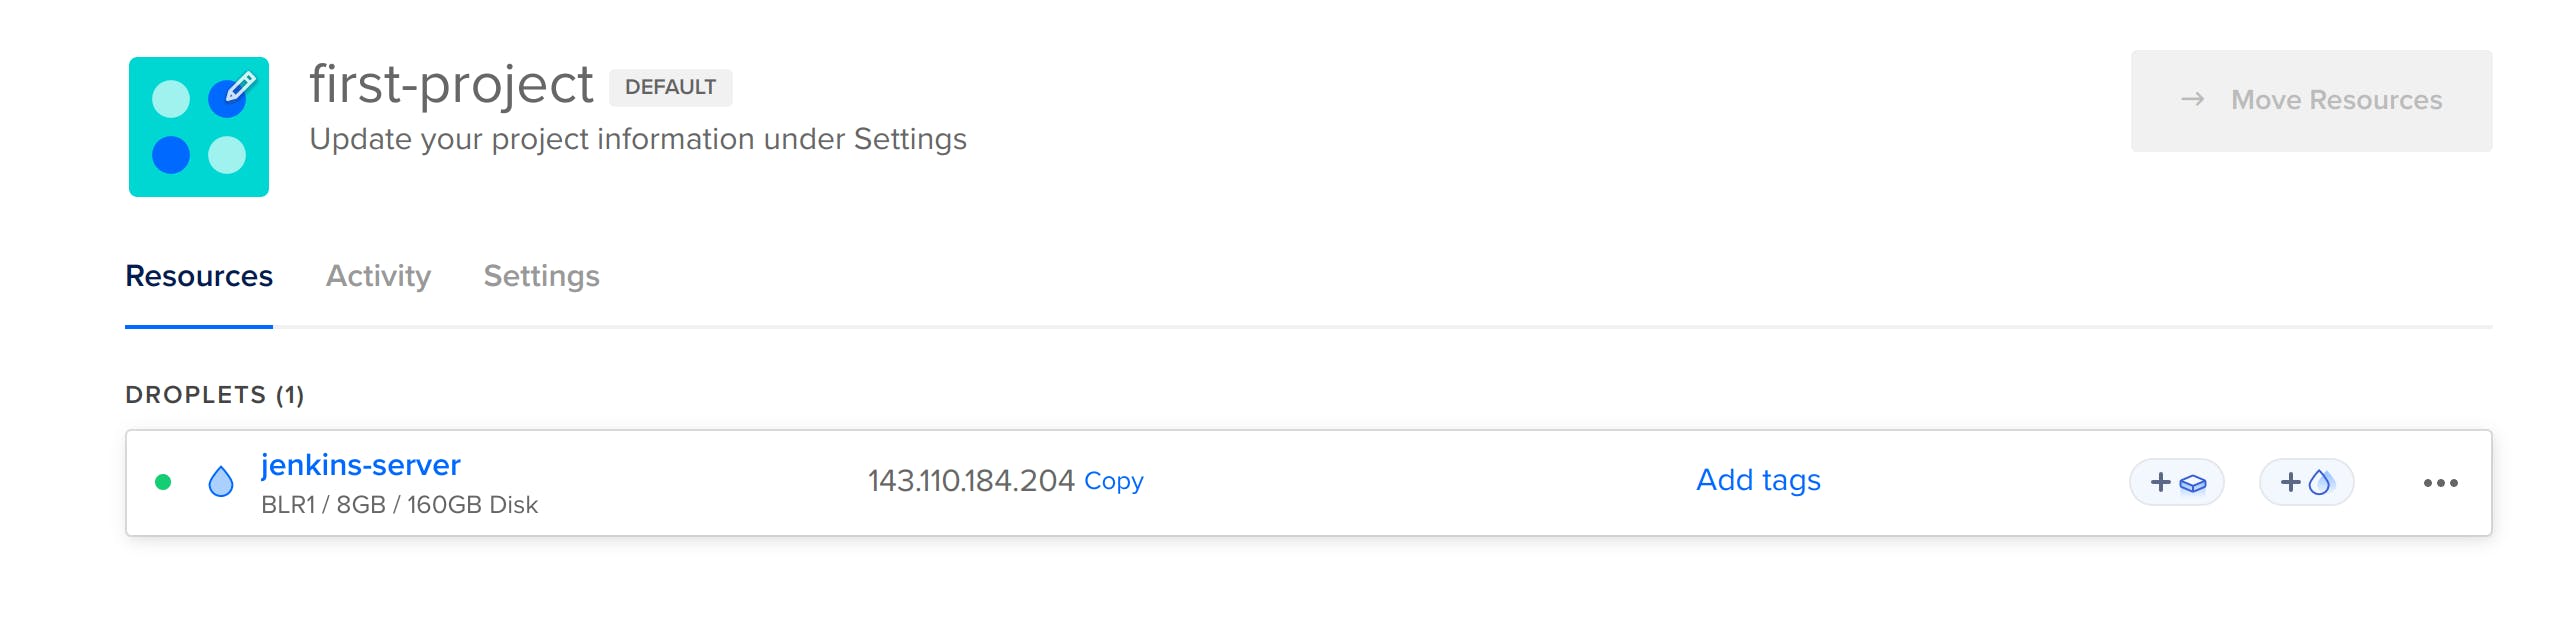
- Your jenkins-server droplet is ready to be used.
- Choose Region
Create a firewall
A firewall allows us to secure our cloud server. You can control which devices can access a particular port.
- To create a firewall go to the sidebar menu and click on Networking -> Firewalls -> Create Firewall. I am naming this firewall jenkins-firewall.
- For the time being, I just want to access ssh service from my laptop. So, I will add my device's IP address to it.
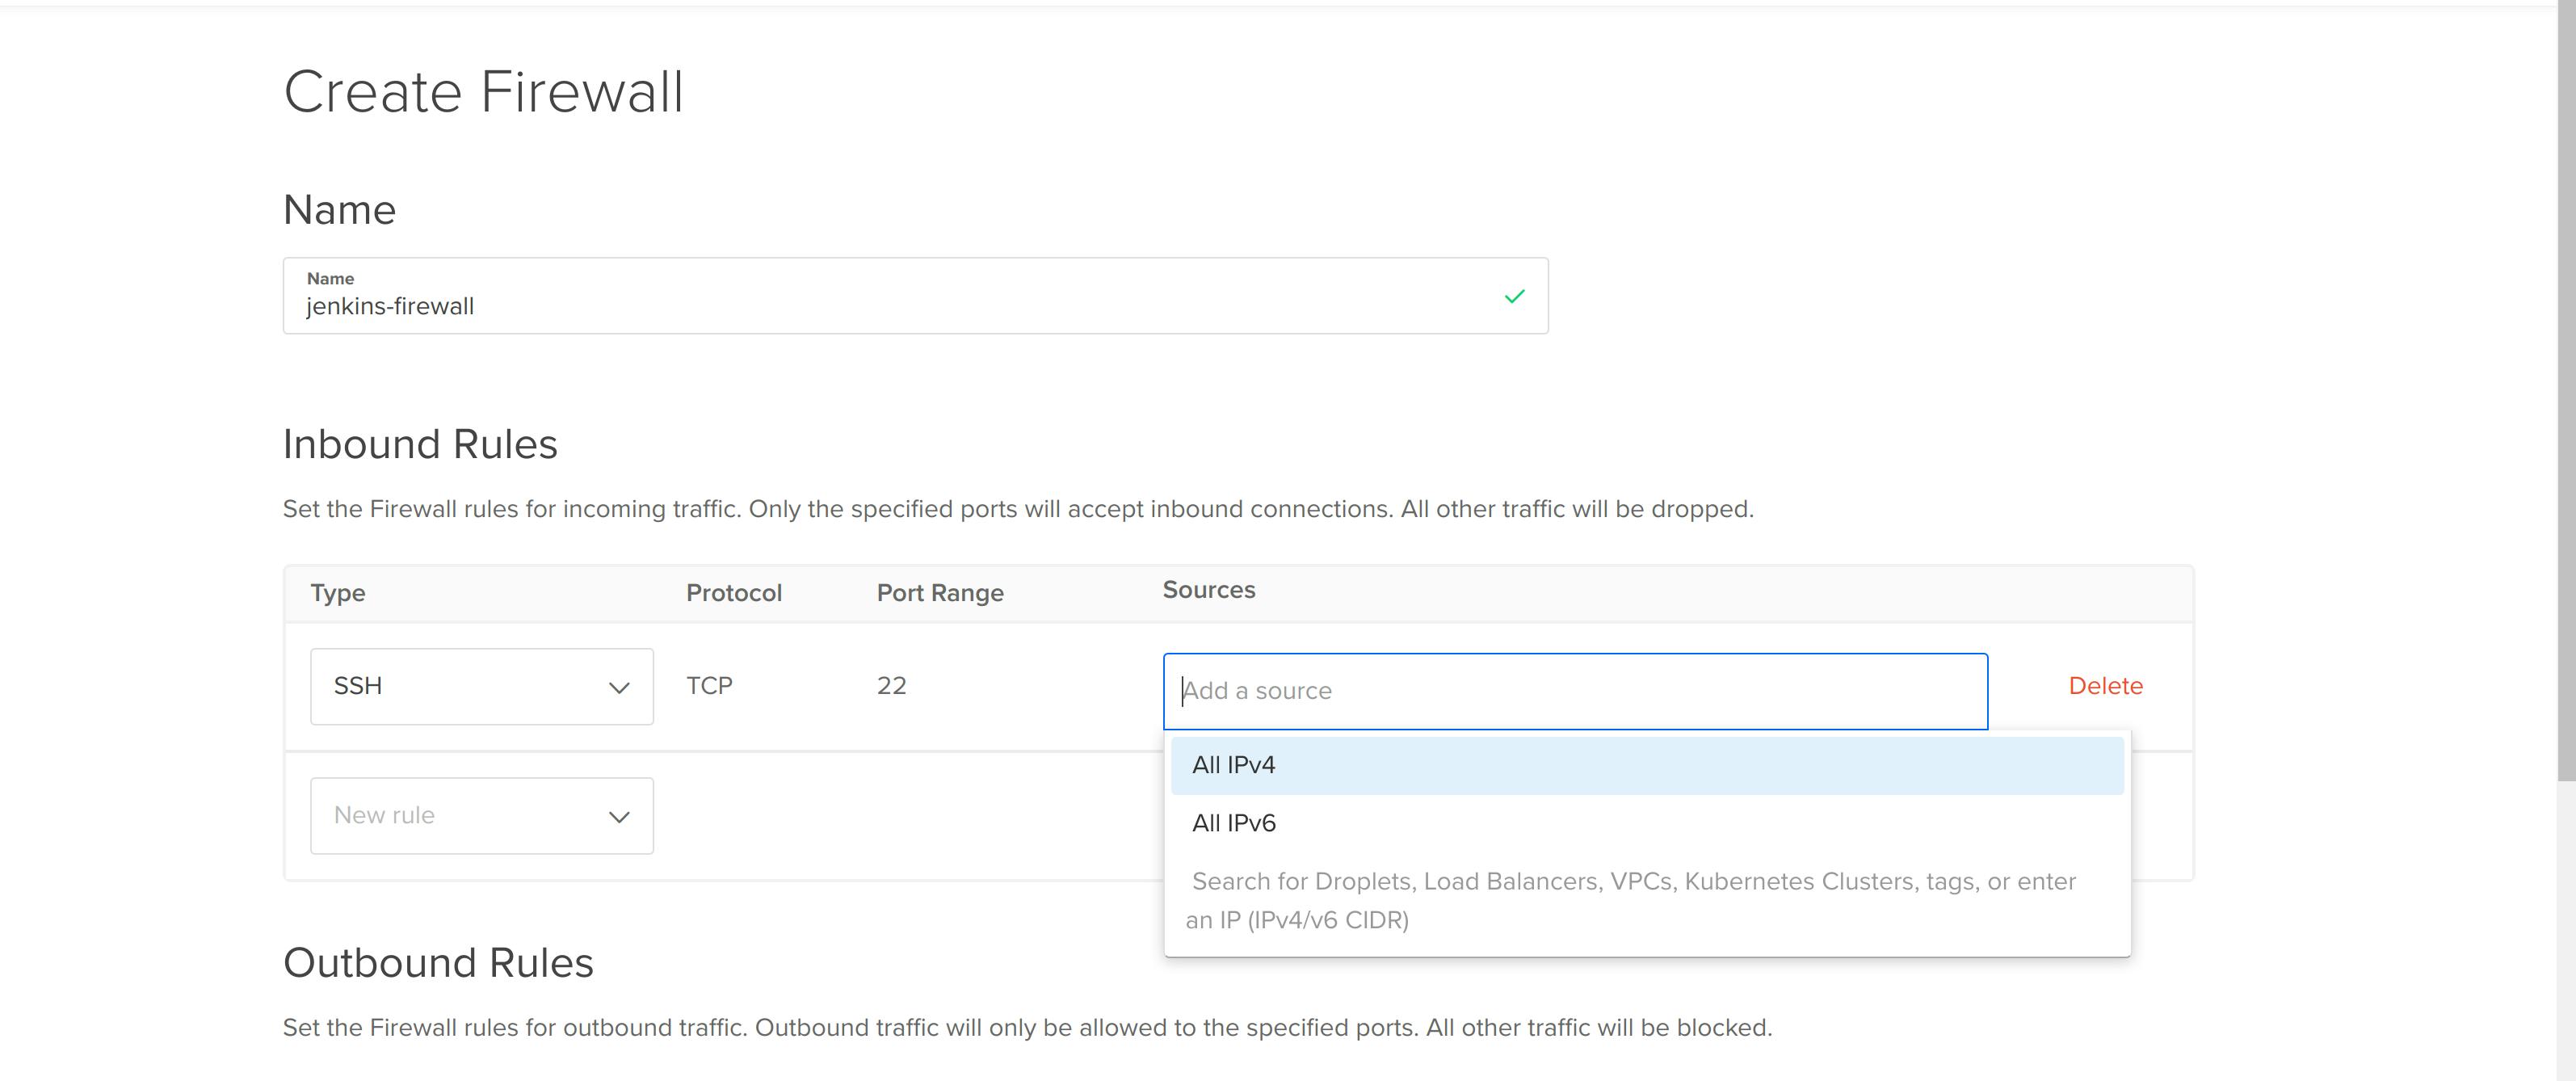
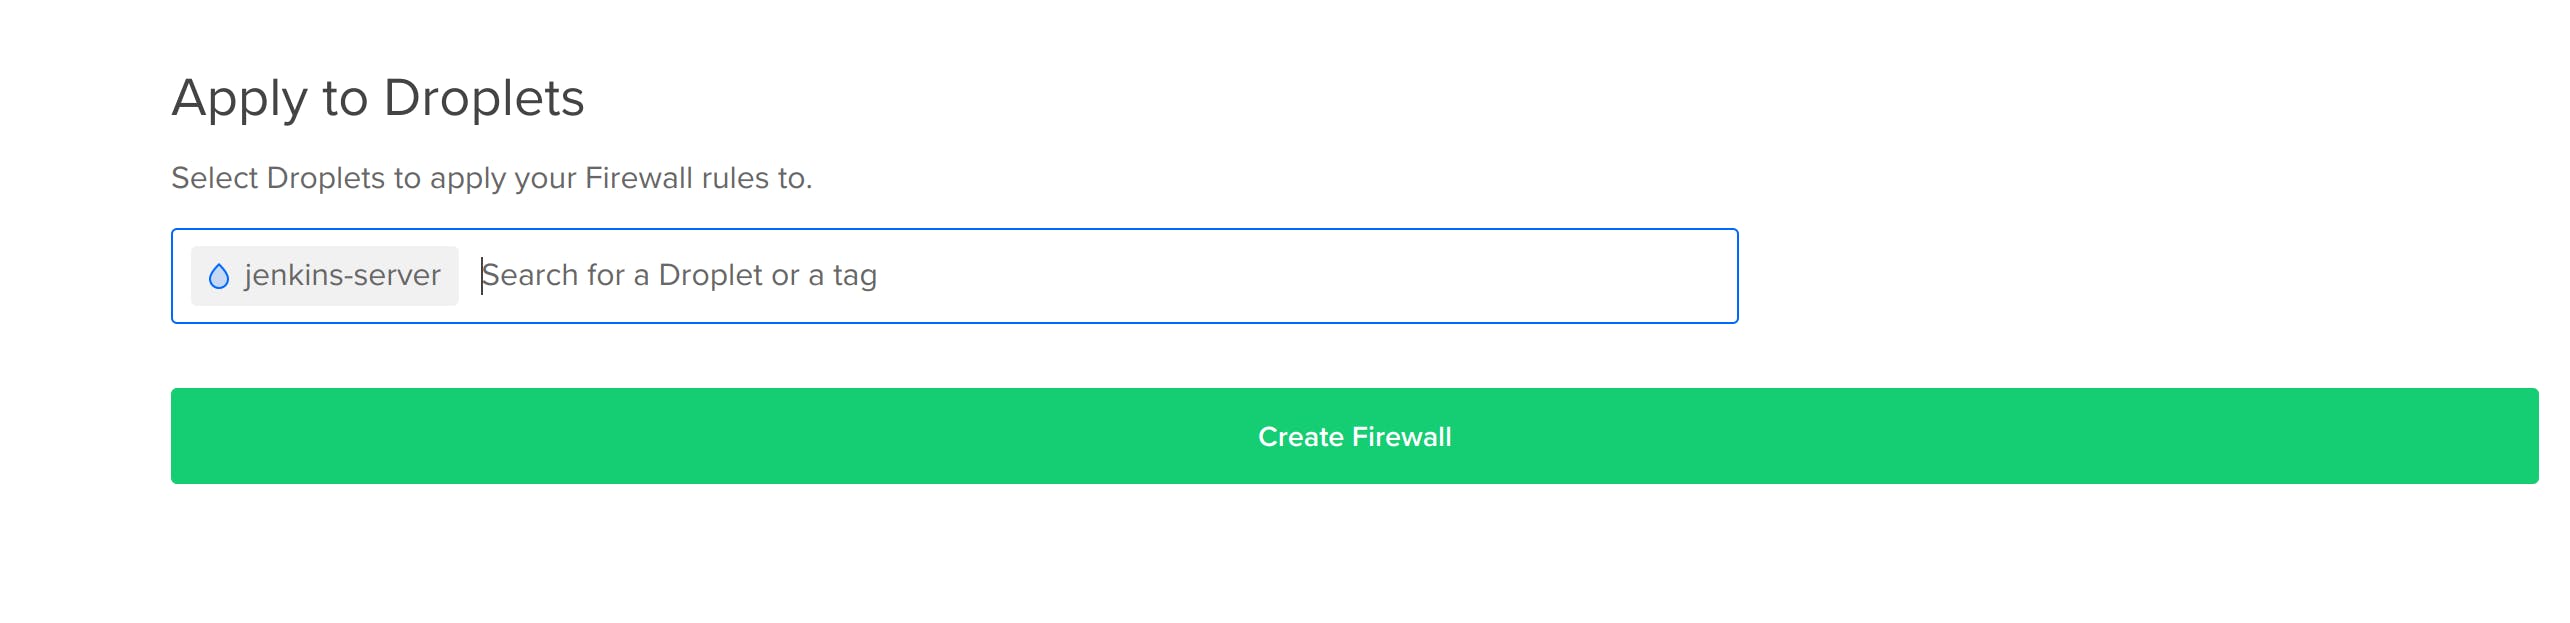
- Add jenkins-server to apply this firewall rules to it.
- To create a firewall go to the sidebar menu and click on Networking -> Firewalls -> Create Firewall. I am naming this firewall jenkins-firewall.
SSH into the server
You can execute commands in the server from your local terminal using a secure socket shell(ssh). We gave our device's IP address the permission to ssh into the jenkins-server using the jenkins-firewall. Therefore, other devices won't be able to access ssh into the server.
Copy the IP address of the jenkins-server.

ssh root@143.110.184.204
Now we can execute commands in the jenkins-server. Let's start executing commands in the jenkins-server by first changing the color of the shell prompt. Run the below command to do so.
echo 'PS1="\[\e]0;\u@\h: \w\a\]${debian_chroot:+($debian_chroot)}\[\033[01;32m\]\u@\h\[\033[00m\]:\[\033[01;34m\]\w\[\033[00m\]\$ "' >> .bashrc && source .bashrc
Install Docker
We are going to run Jenkins in a docker container. For that, first, update the apt package manager and then install docker.
apt update -y && apt install docker.io -yCheck whether the docker got installed or not by displaying the version of the docker.
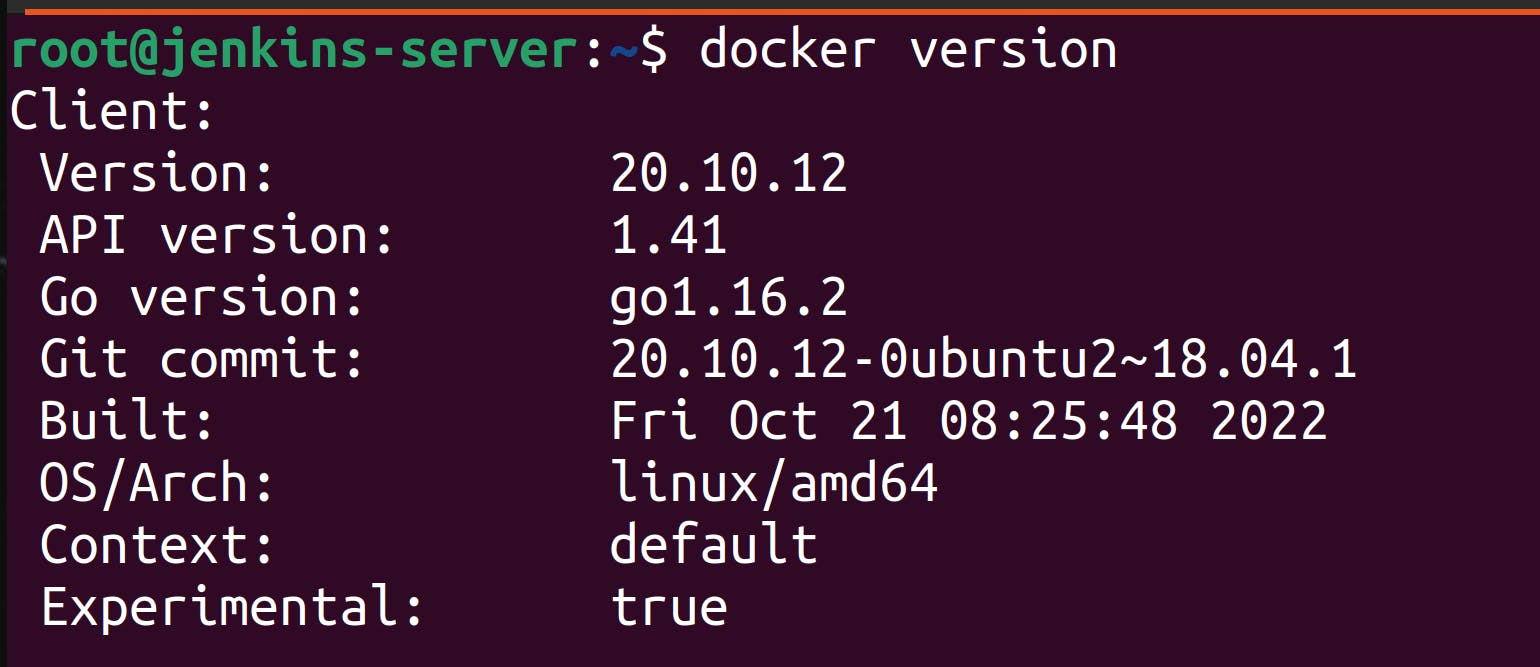 Docker is installed successfully.
 Run Jenkins
To run the jenkins container, we have to specify the port where we can access it. We would like to access jenkins on port 8080 of the jenkins-server. Don't get confused. jenkins-server is the cloud server on which we are running our jenkins container.
In case jenkins container fails, we want the container data to persist. Therefore, we are attaching jenkins_home volume to it.
Port 5000 is for communication between the Jenkins master and the worker nodes. Don't worry about it. We aren't building that complicated structure.
Execute the following command to run jenkins container.
docker run -d -p 8080:8080 -p 5000:5000 -v jenkins_home:/var/jenkins_home --name jenkins jenkins/jenkins:lts-jdk11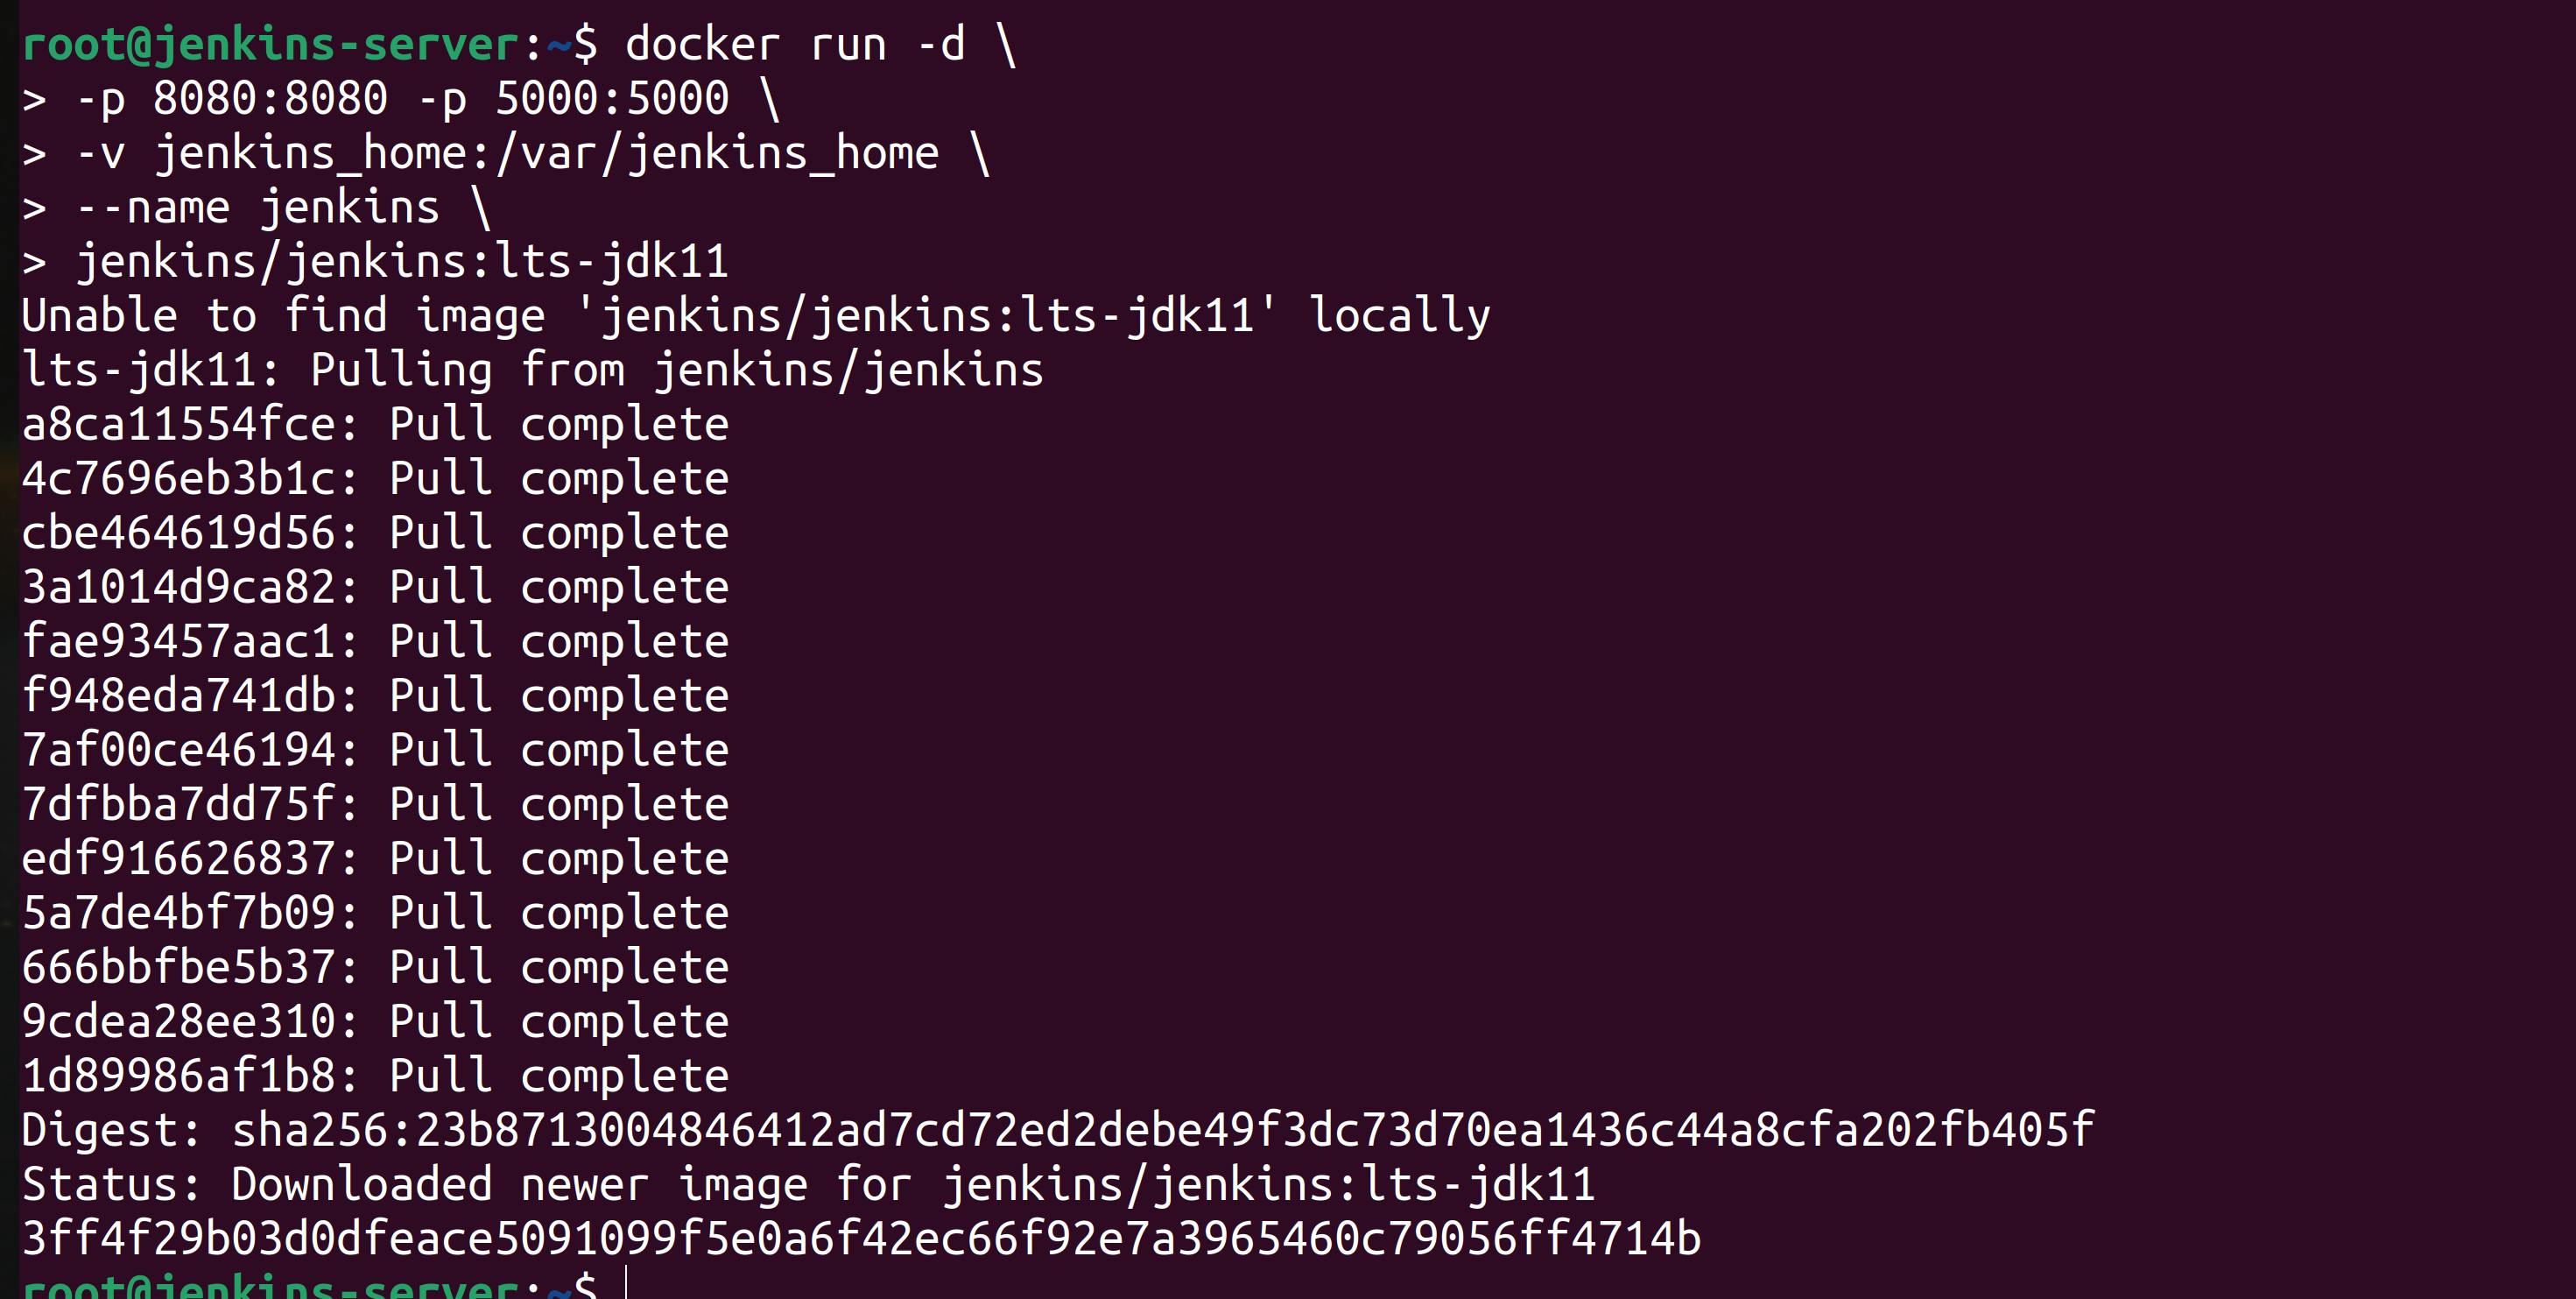 As you can see by executing the below command that our jenkins container is running.
docker ps # it will list the running containers You can enter into the jenkins container by running below command:
docker exec -it jenkins bash
Use exit command to come out of the container.

Access Jenkins
You can access the jenkins container on port 8080 of your host, that is, jenkins-server. To do so, go to any browser and enter ipAdressOfJenkinsServer:8080.

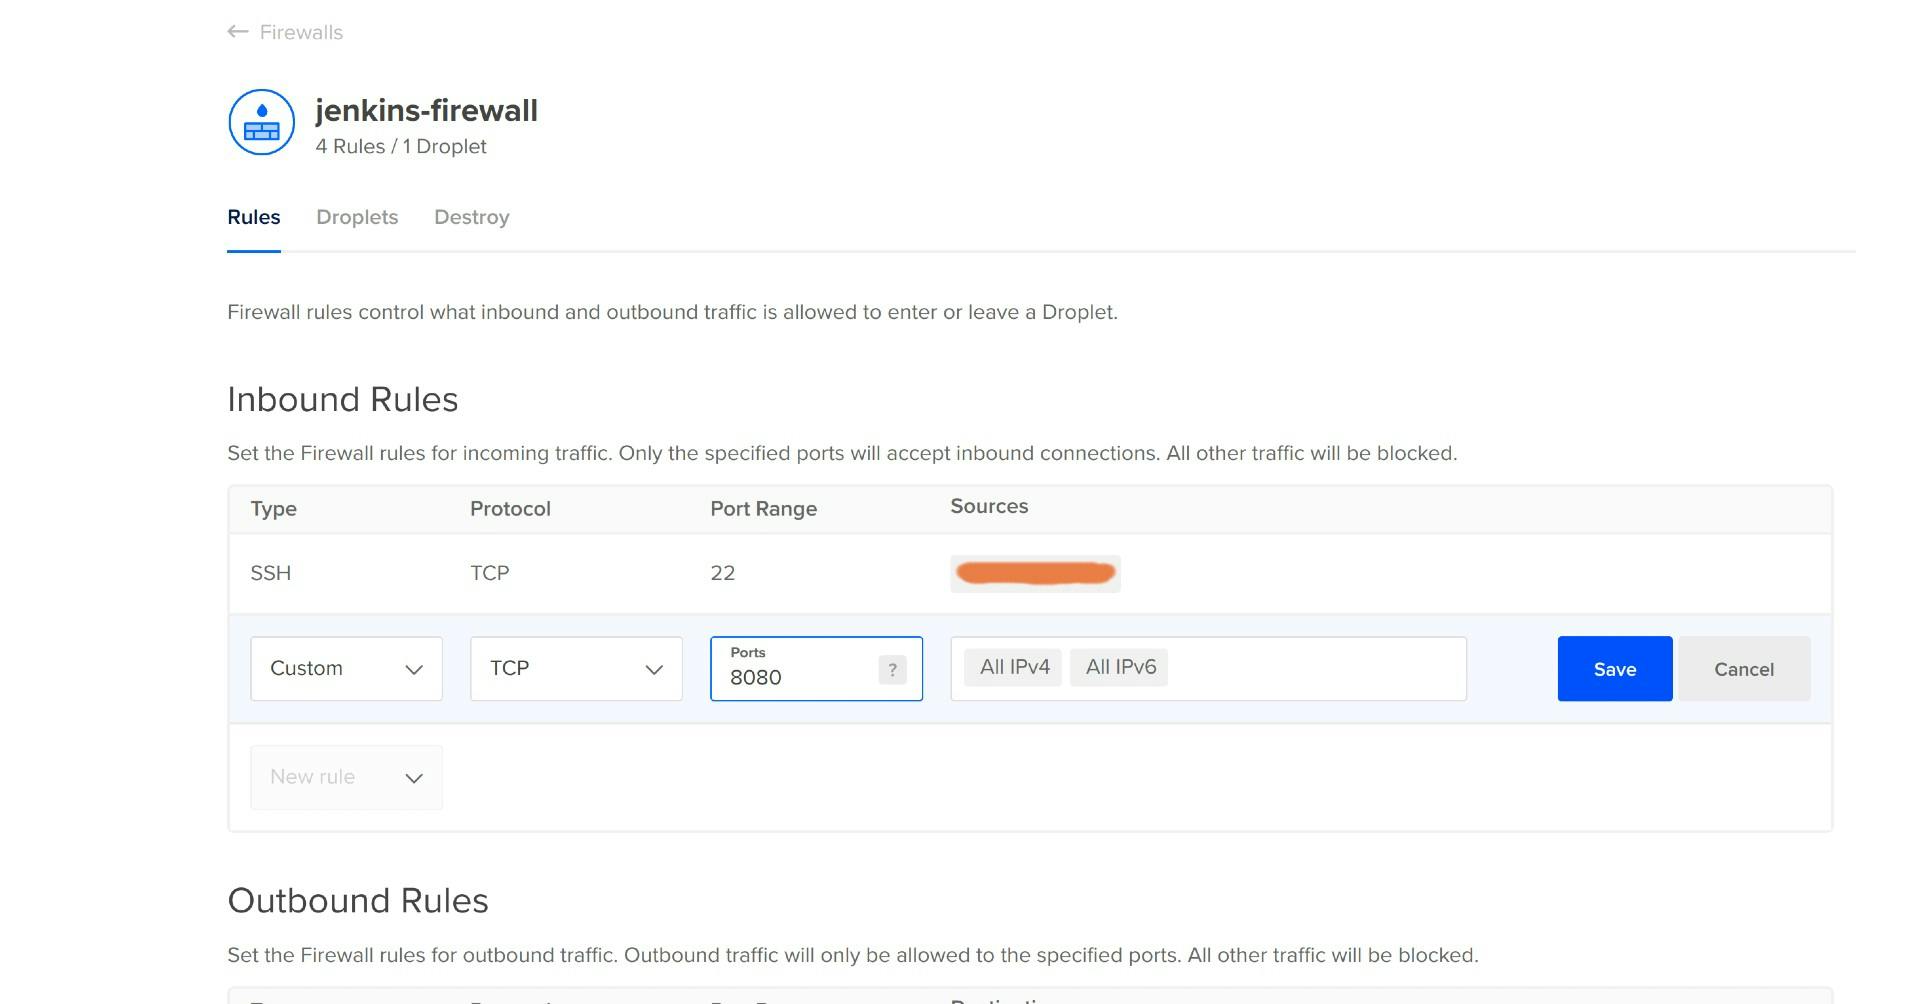
But nothing's happening! Where is the Jenkins application? Well, the jenkins-firewall firewall associated with the jenkins-server droplet denied the access. So, we have to edit the firewall settings, to give access to everyone(or specific IPs) at port 8080!
To edit firewall setting, go to navigation bar and select Networking -> Firewalls -> jenkins-firewall -> Add new rule in Inbound rules -> Save
Now refresh your browser. Voila! The Jenkins application is running on port 8080 of the jenkins-server machine.
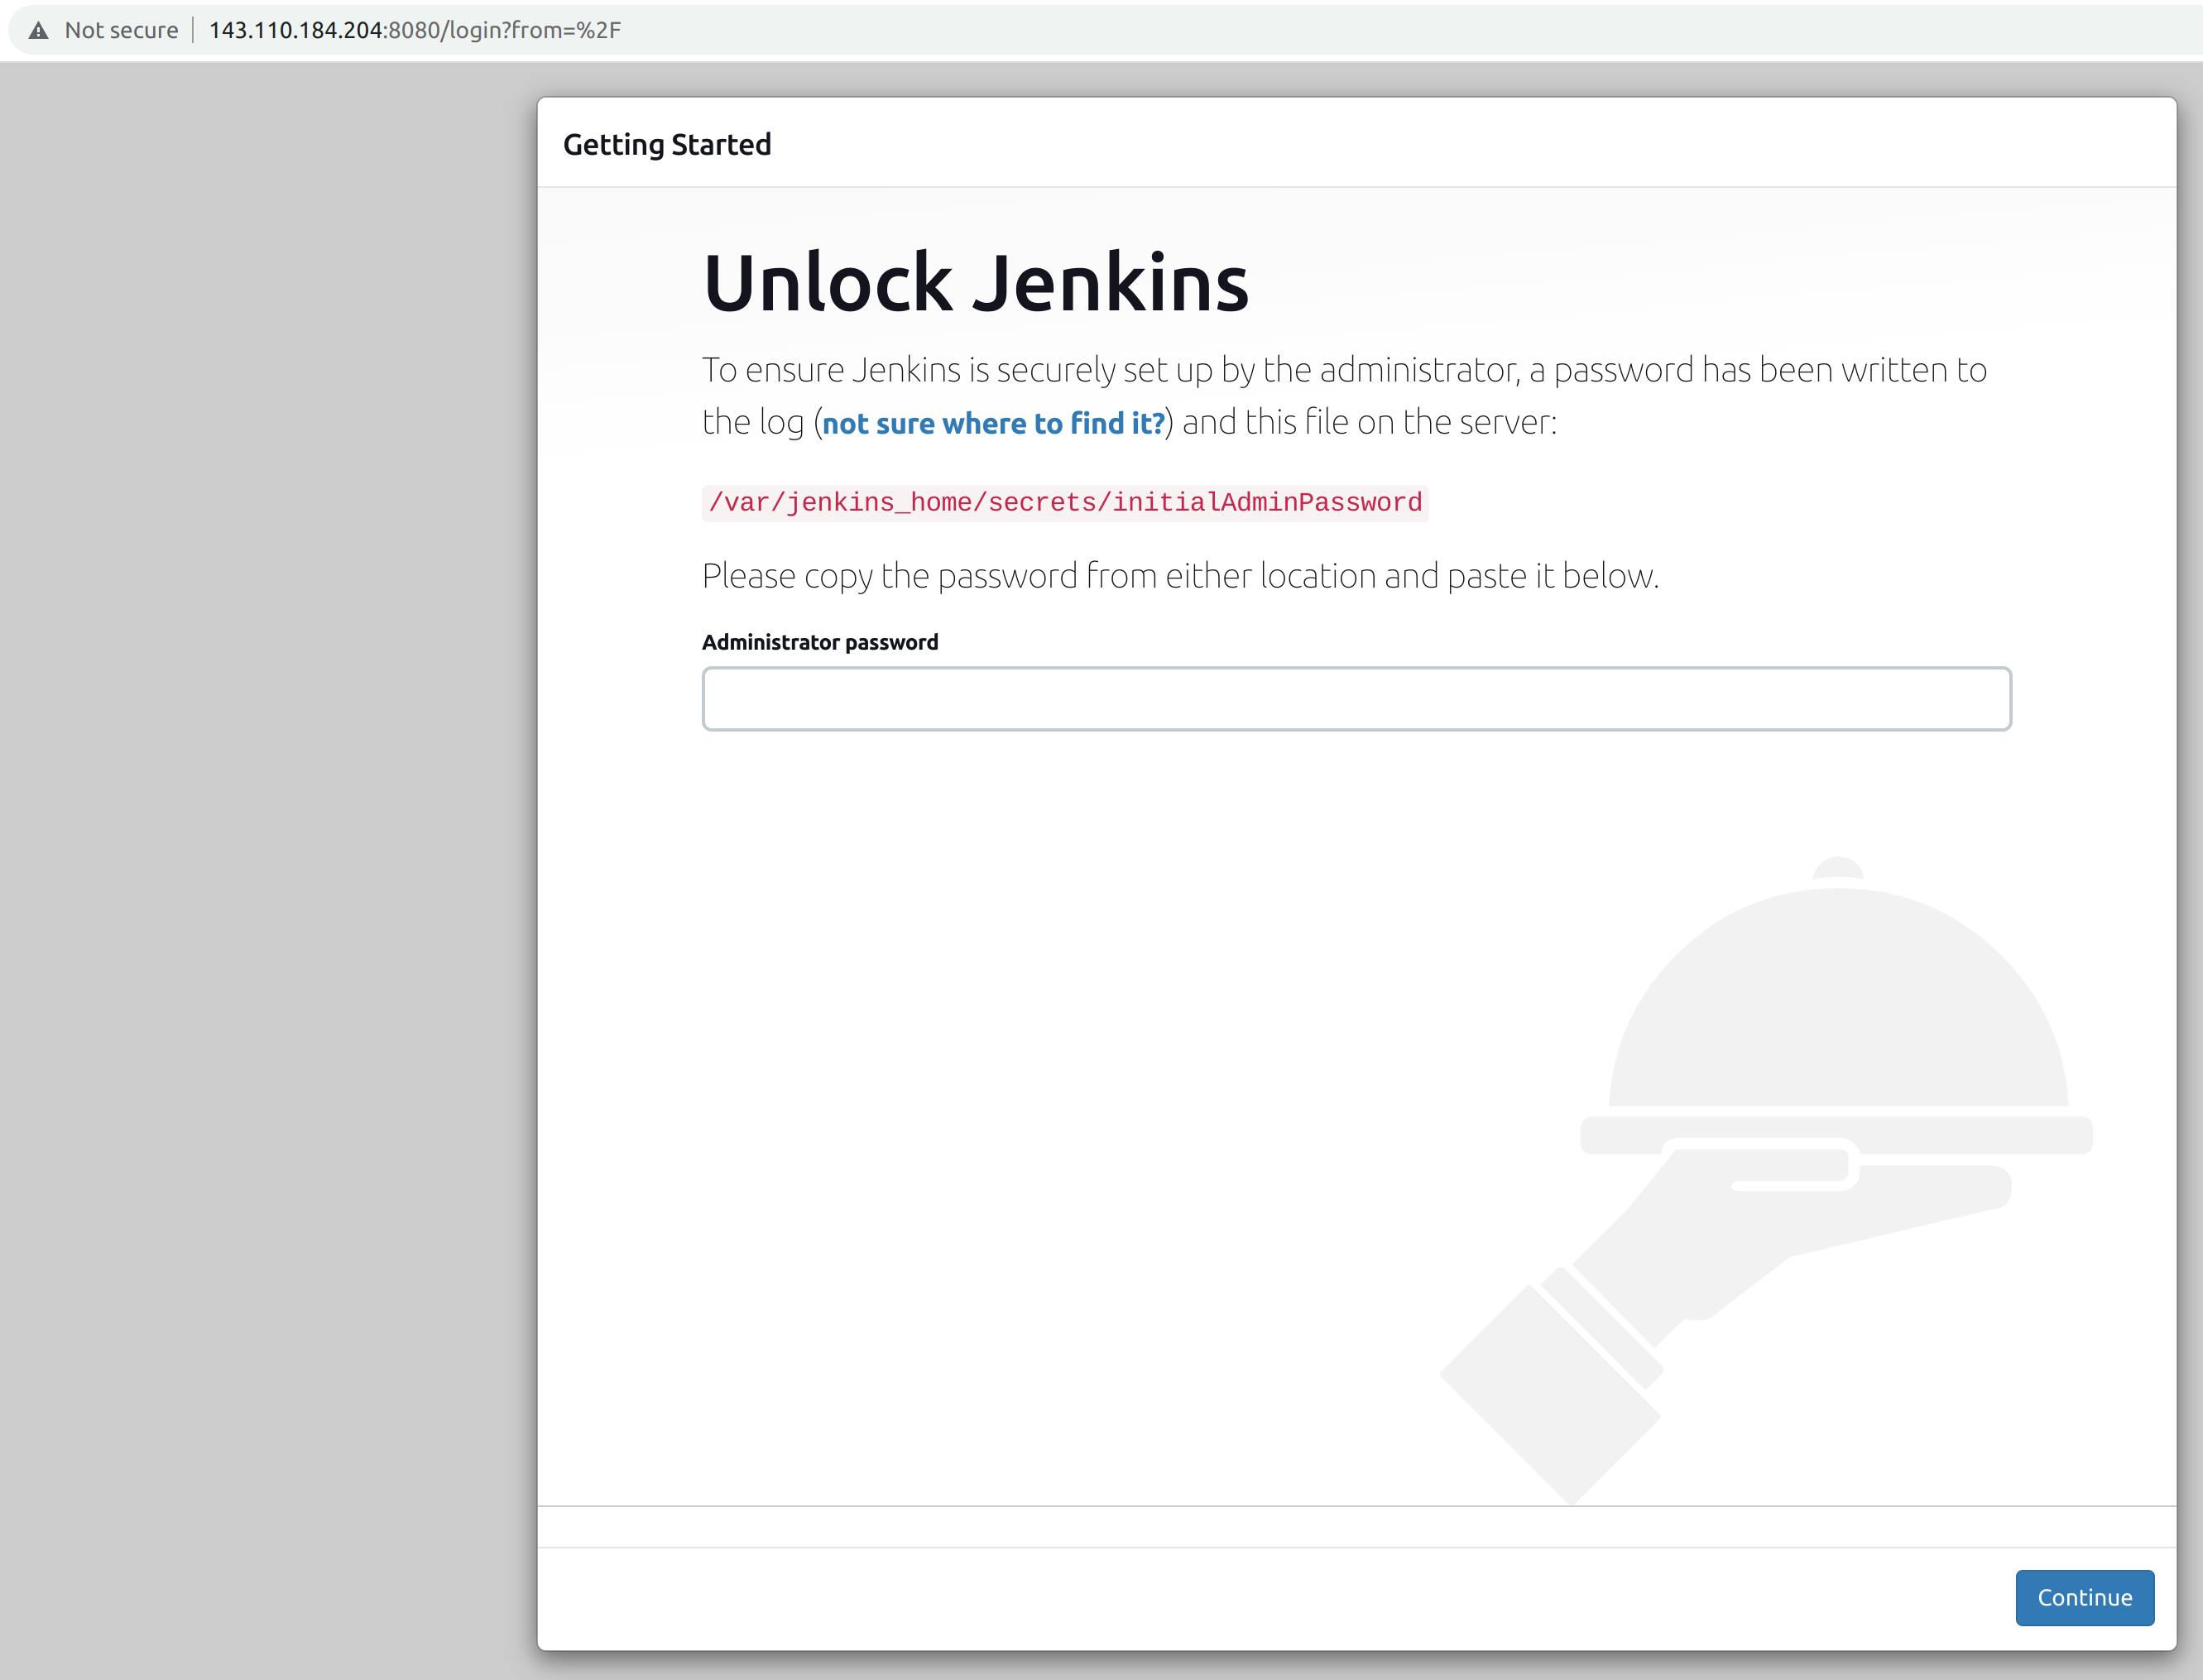
Enter into the jenkins container and copy the password from the /var/jenkins_home/secrets/initialAdminPassword file.
docker exec -it jenkins bash
cat var/jenkins_home/secrets/initialAdminPassword
Copy-paste the password and click on continue button.

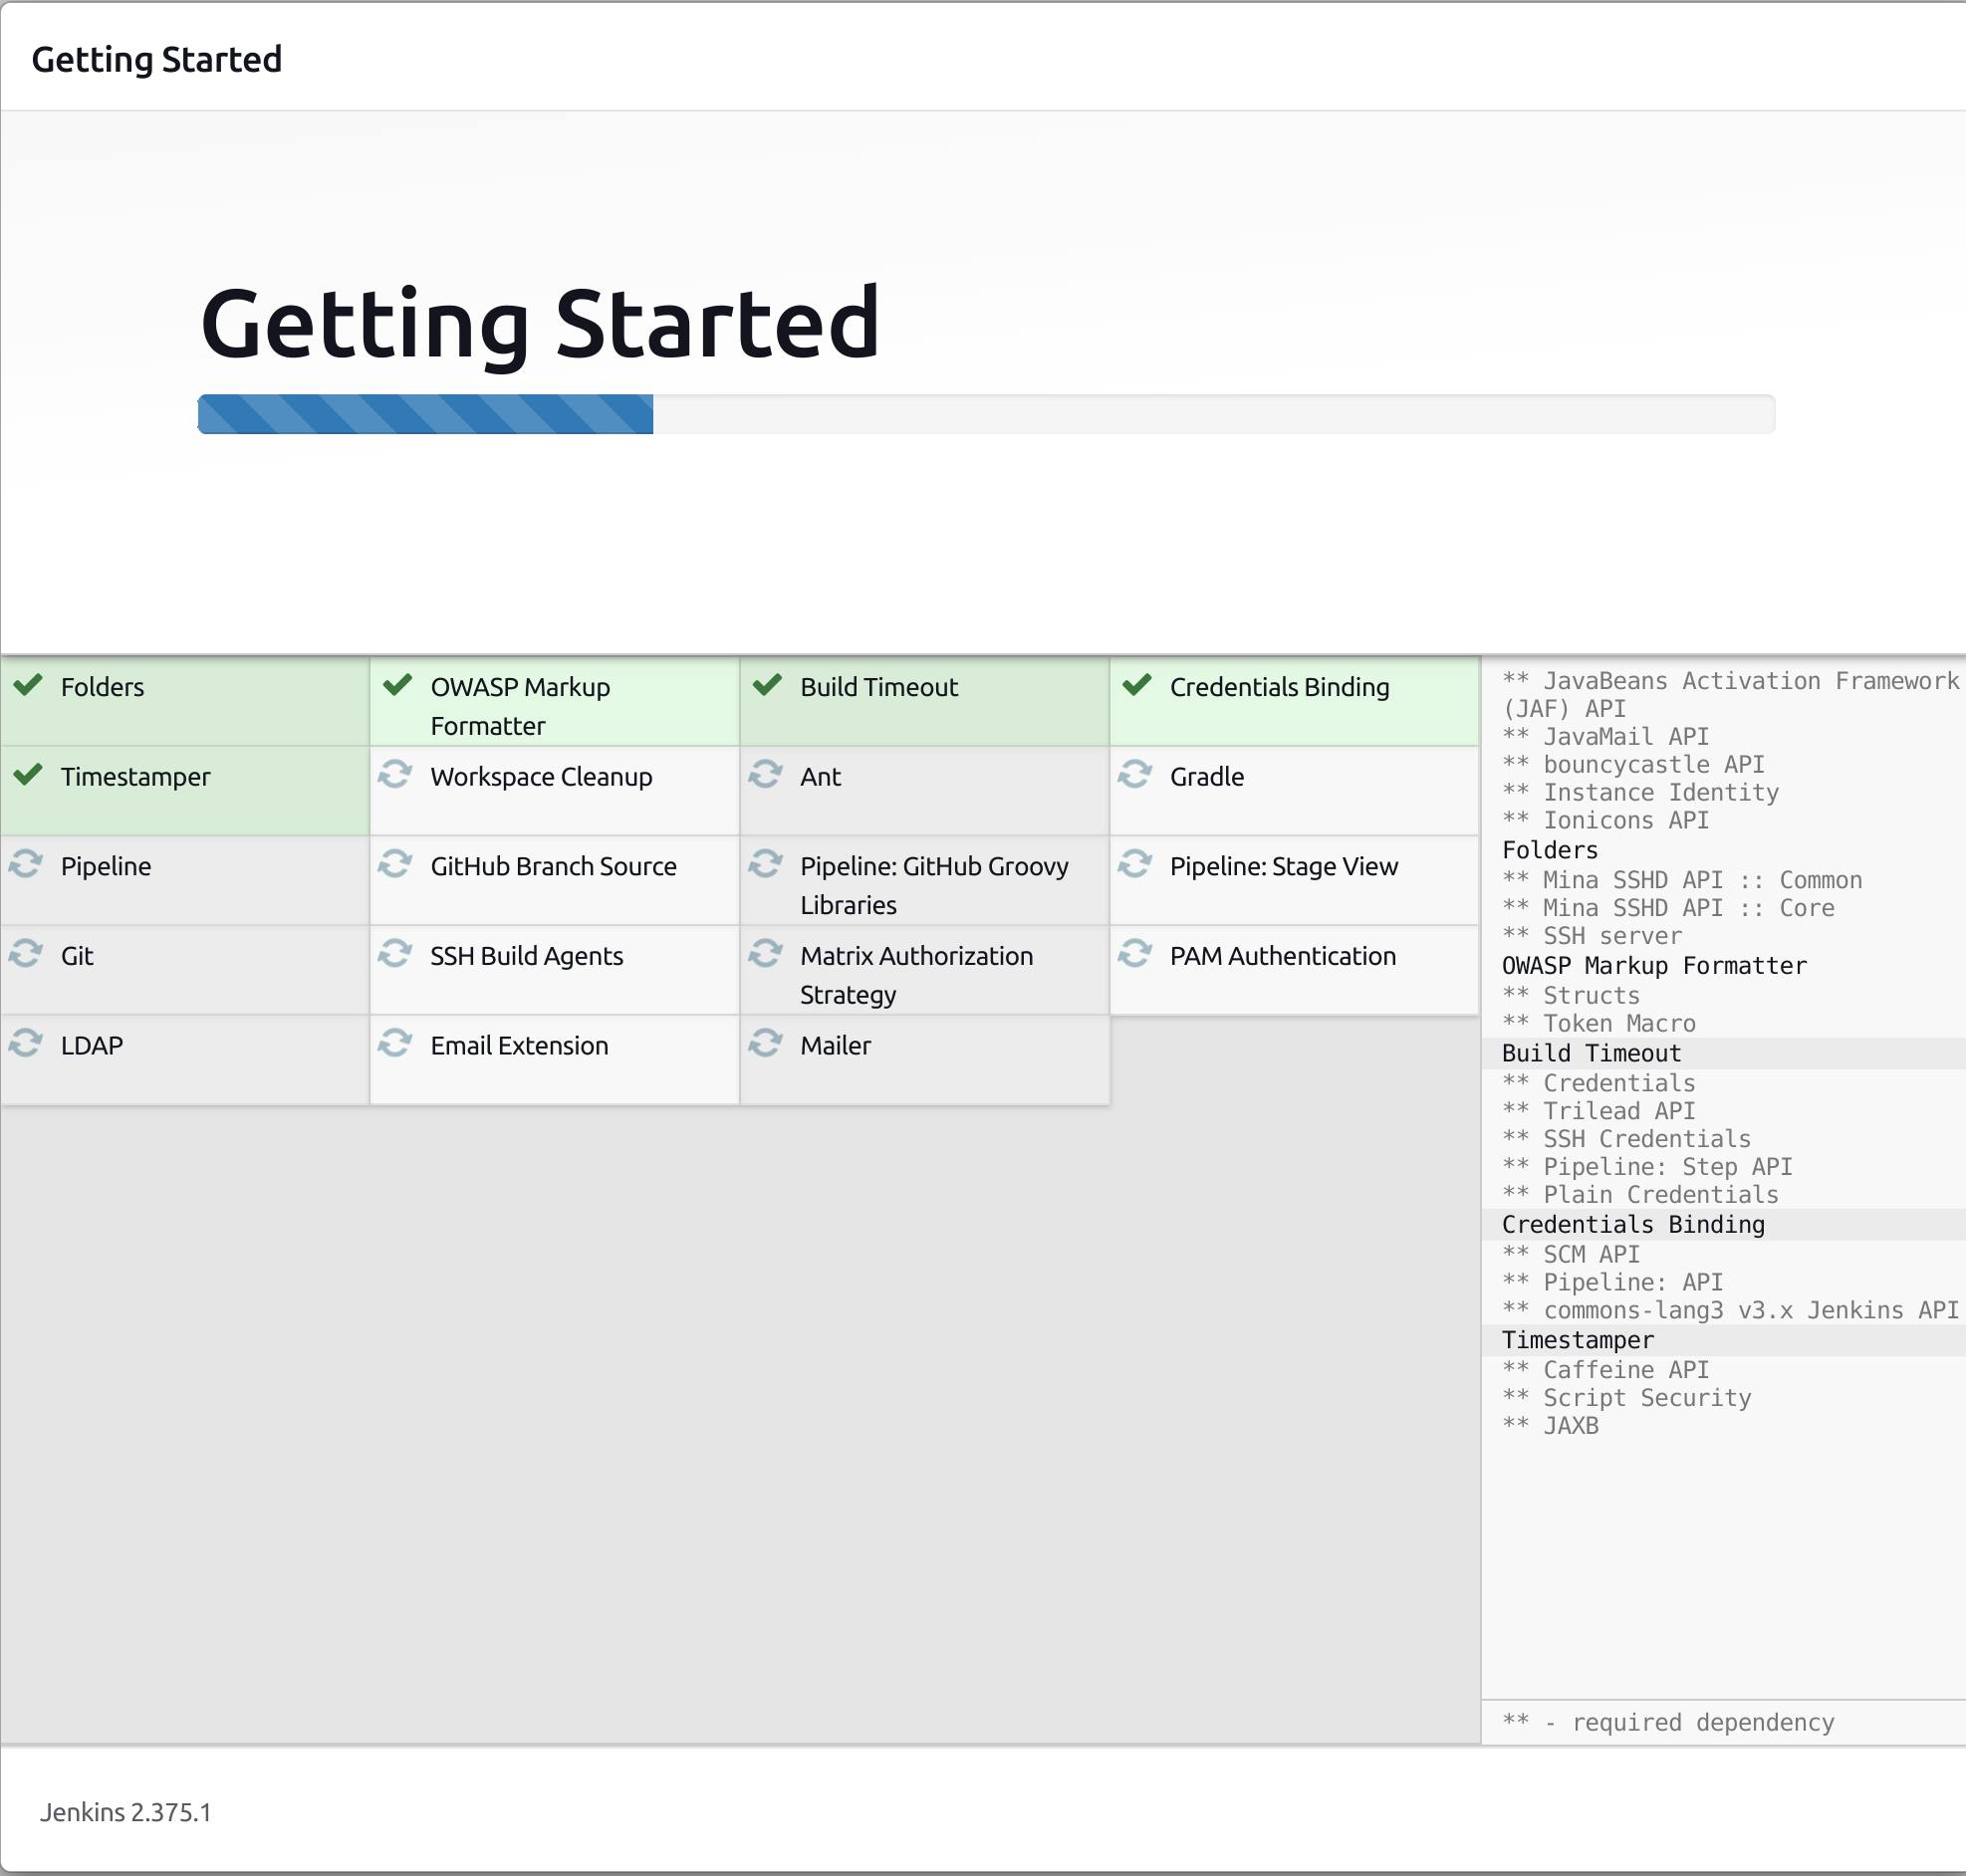
Click on Install suggested plugins.
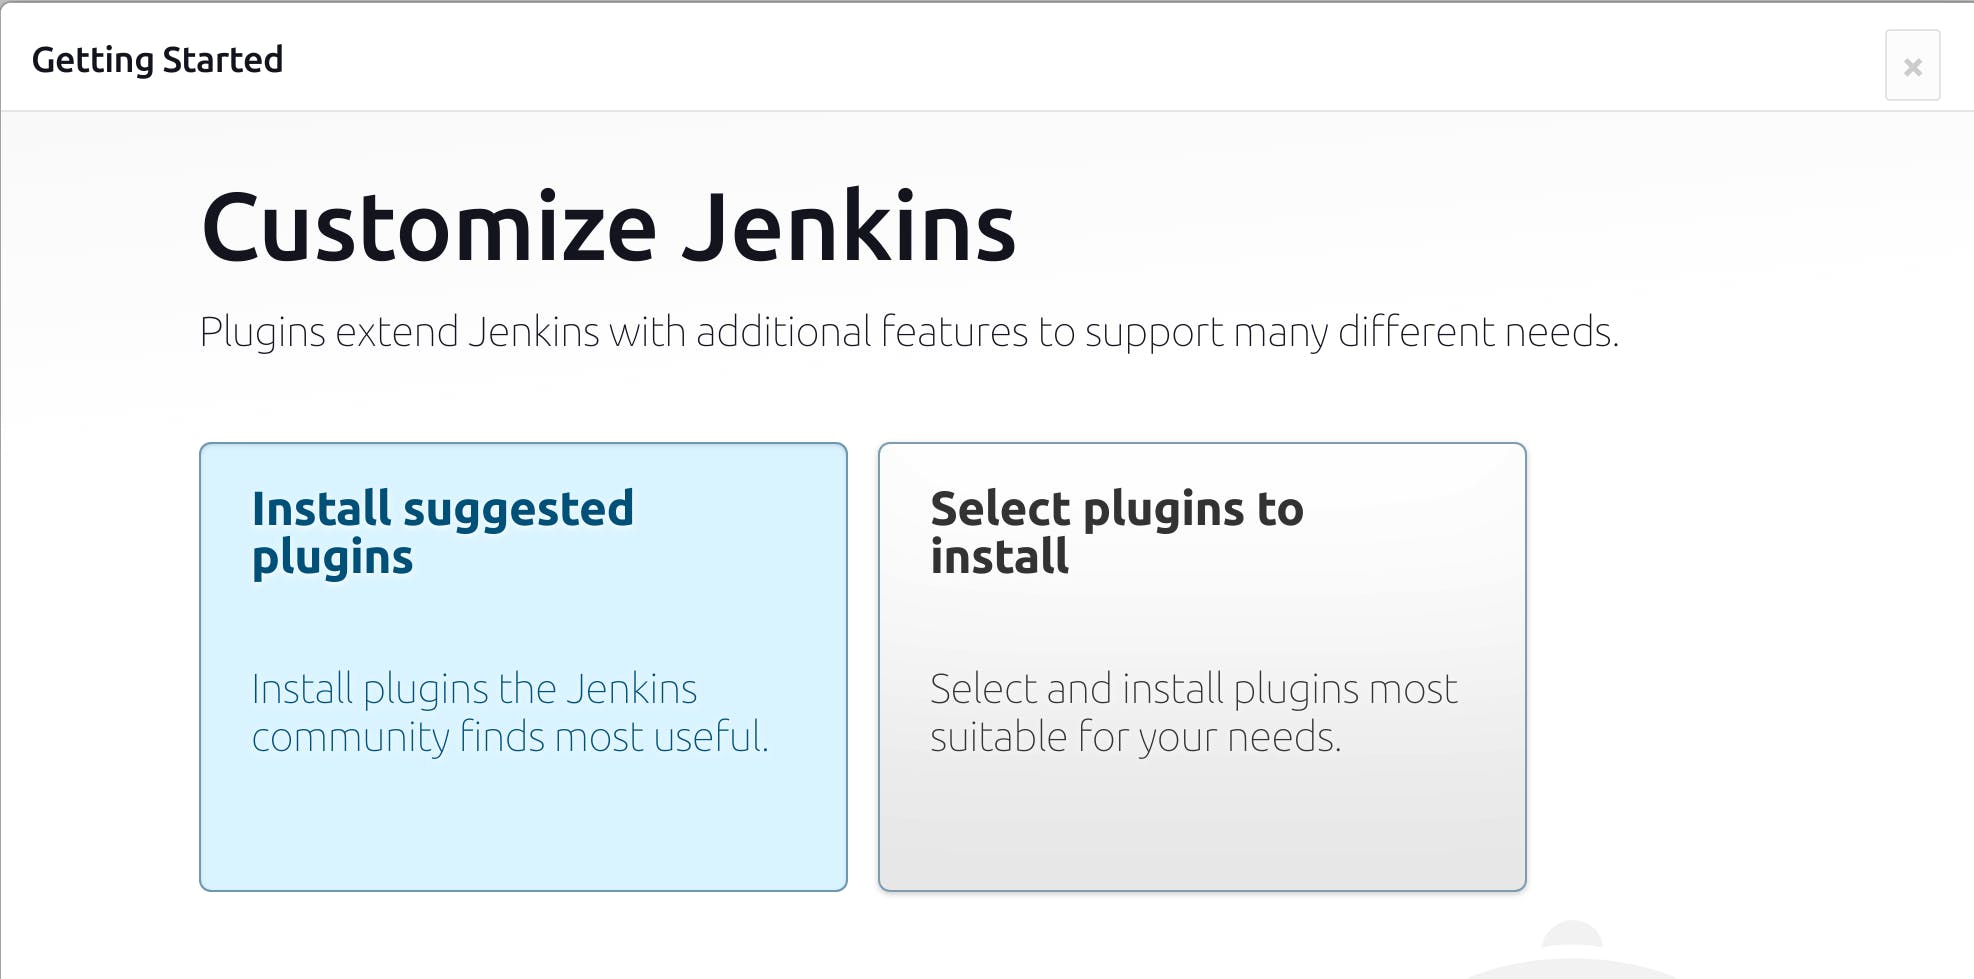 It will take some time to install the plugins.
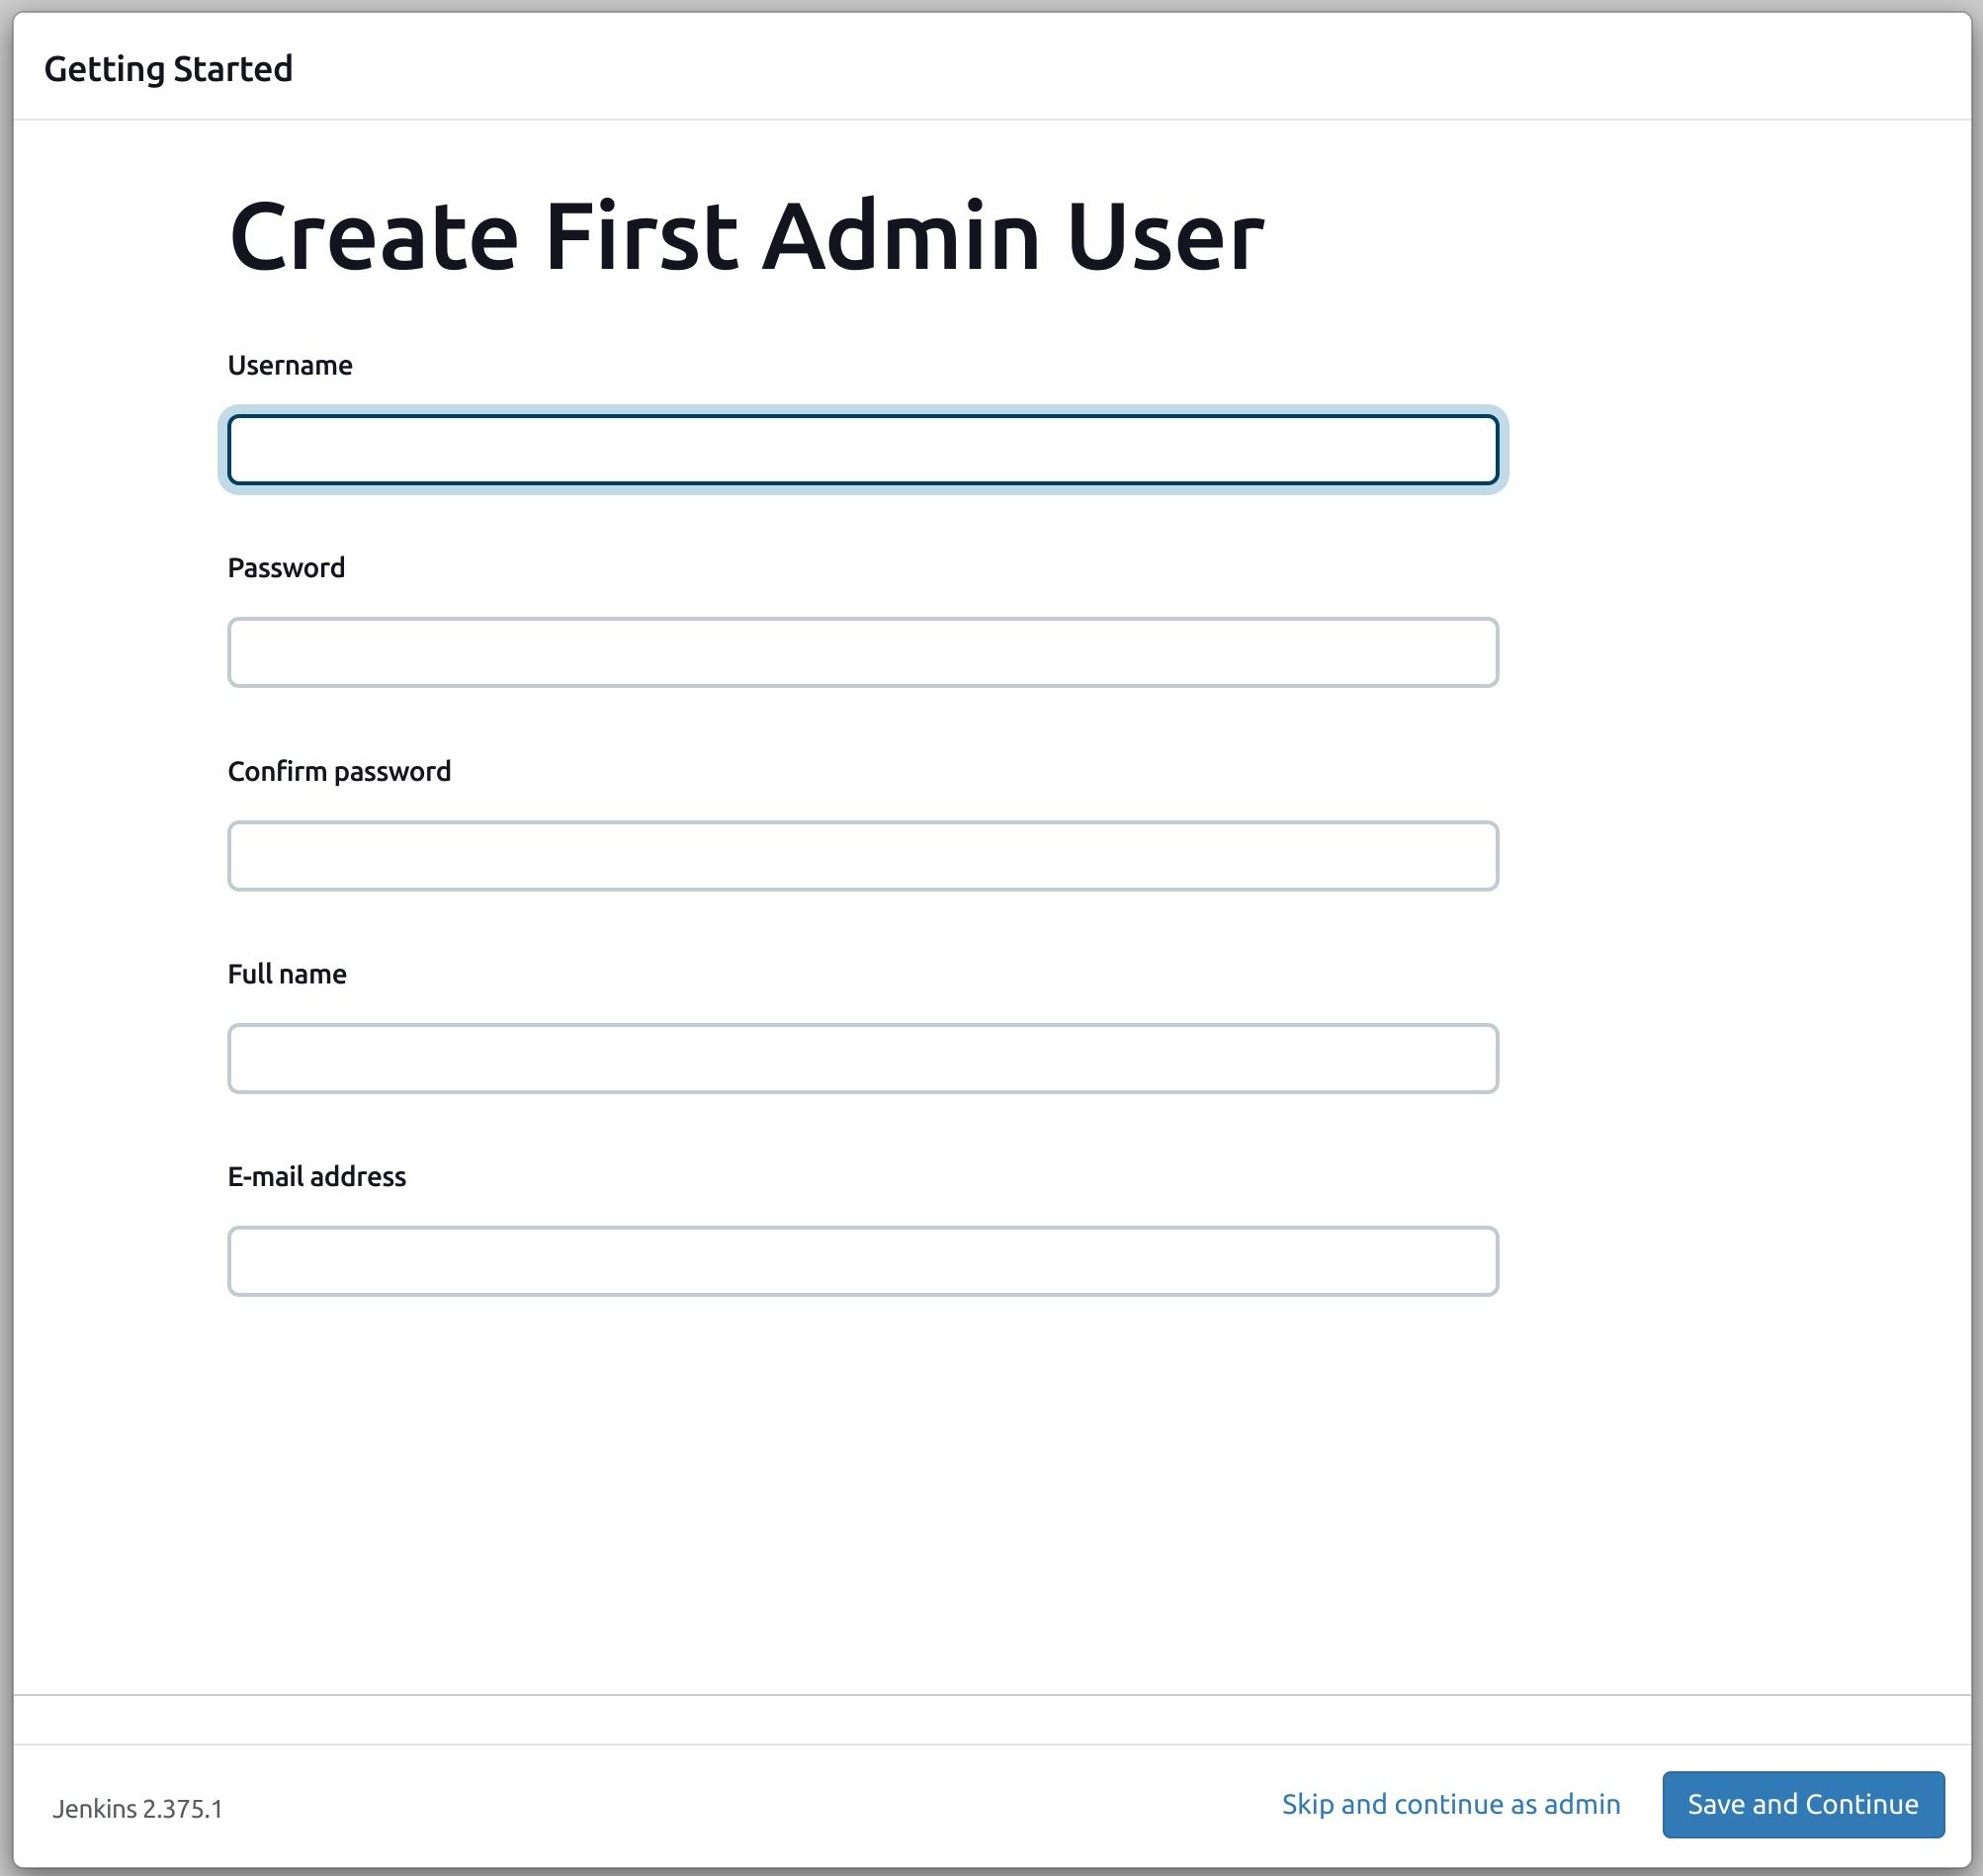
Now, create a user. I created a user named sanskriti.

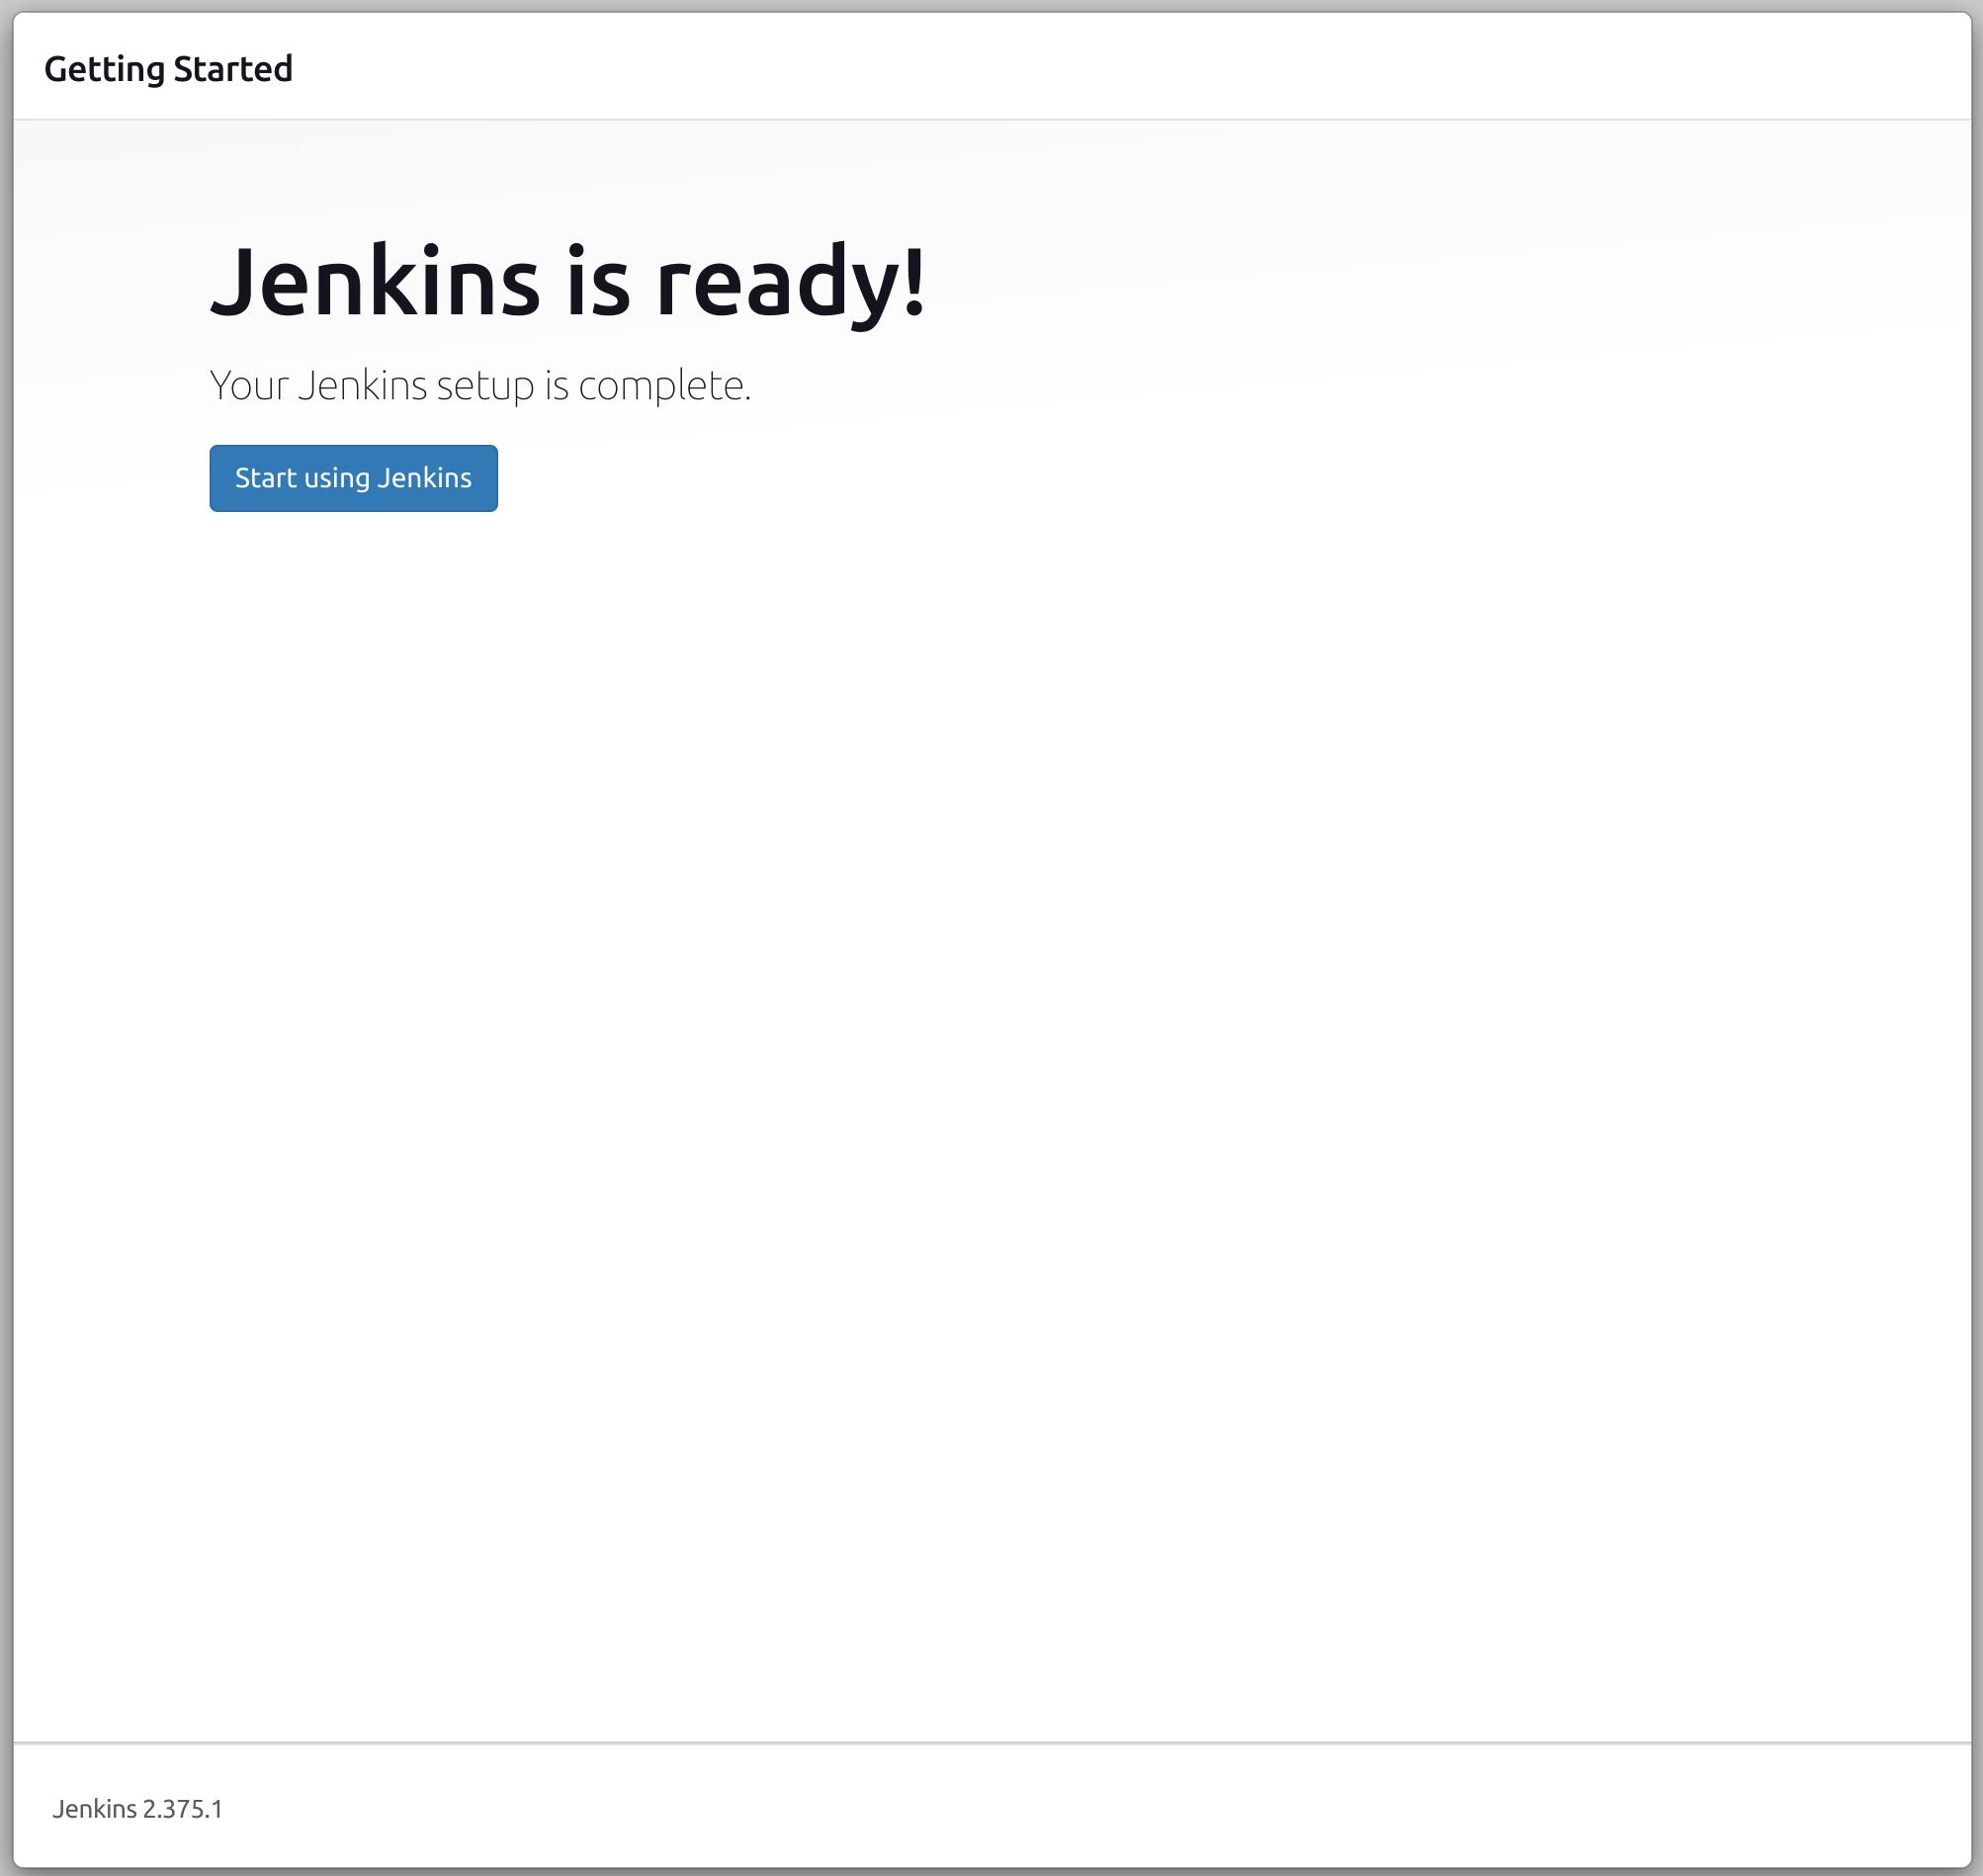
Congrats! You have completed the Jenkins installation and setup.
Create a pipeline
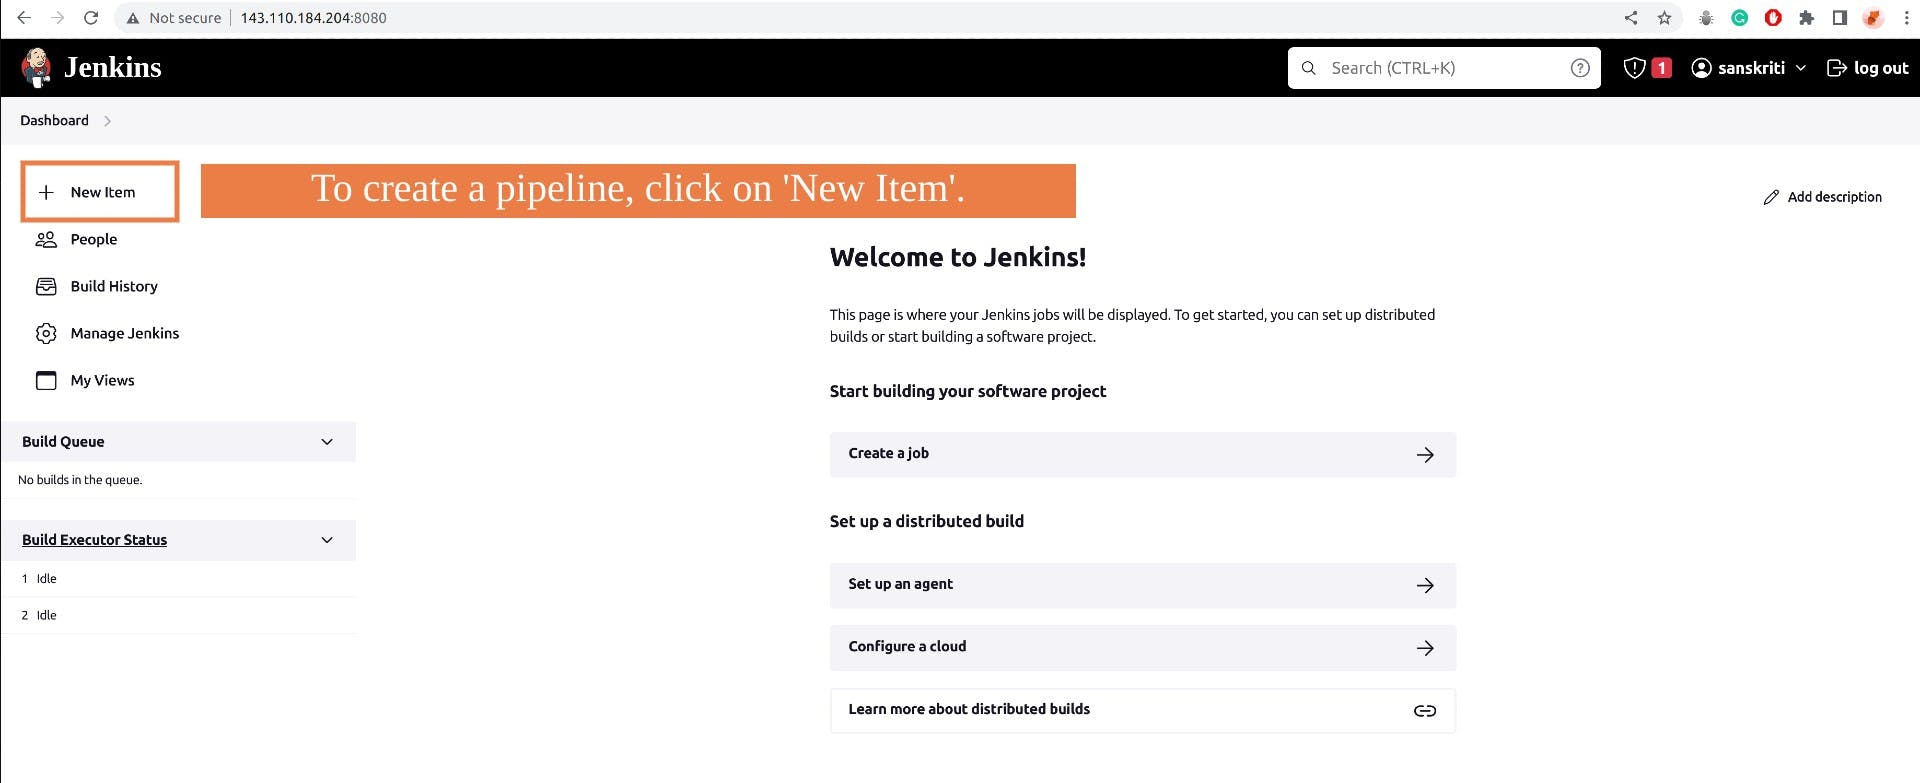
- Now, it's time to build the CI pipeline for our web application! Go to the side menu bar and click on + new item button.
- Give your project a name and choose the pipeline option to create a pipeline item. Click on OK

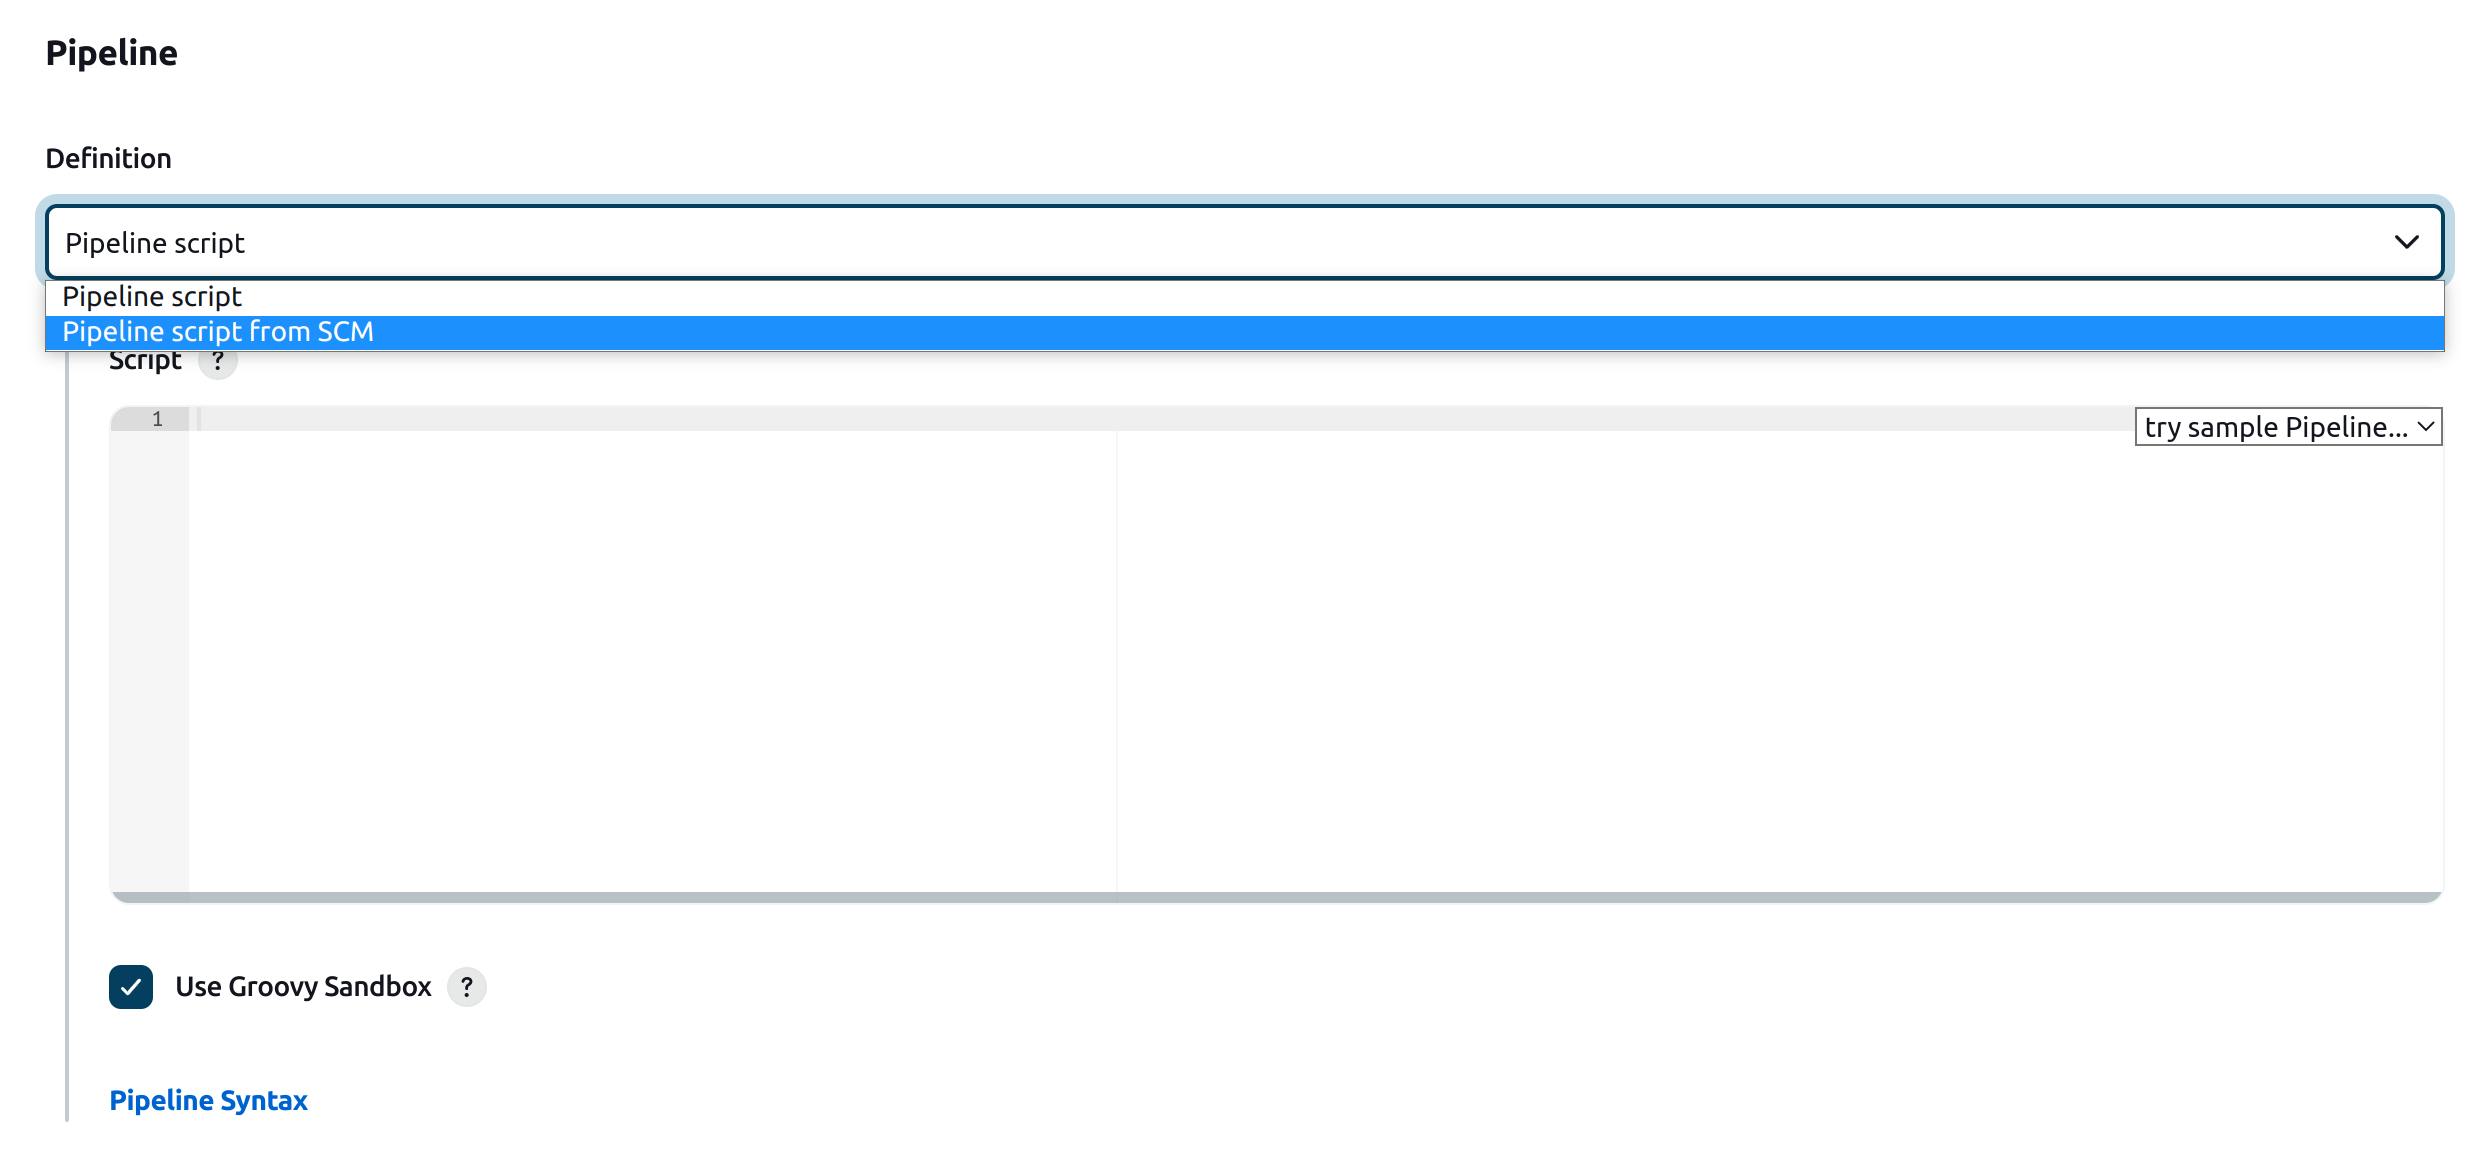
- Select the Pipeline script from SCM option. This option will let you choose a GitHub repository where your Jenkinsfile is stored. Otherwise, you have to write the pipeline script here only. Anyways, this Jenkinsfile contains all the steps that will build a pipeline!
- Choose Git as your SCM(source code management).
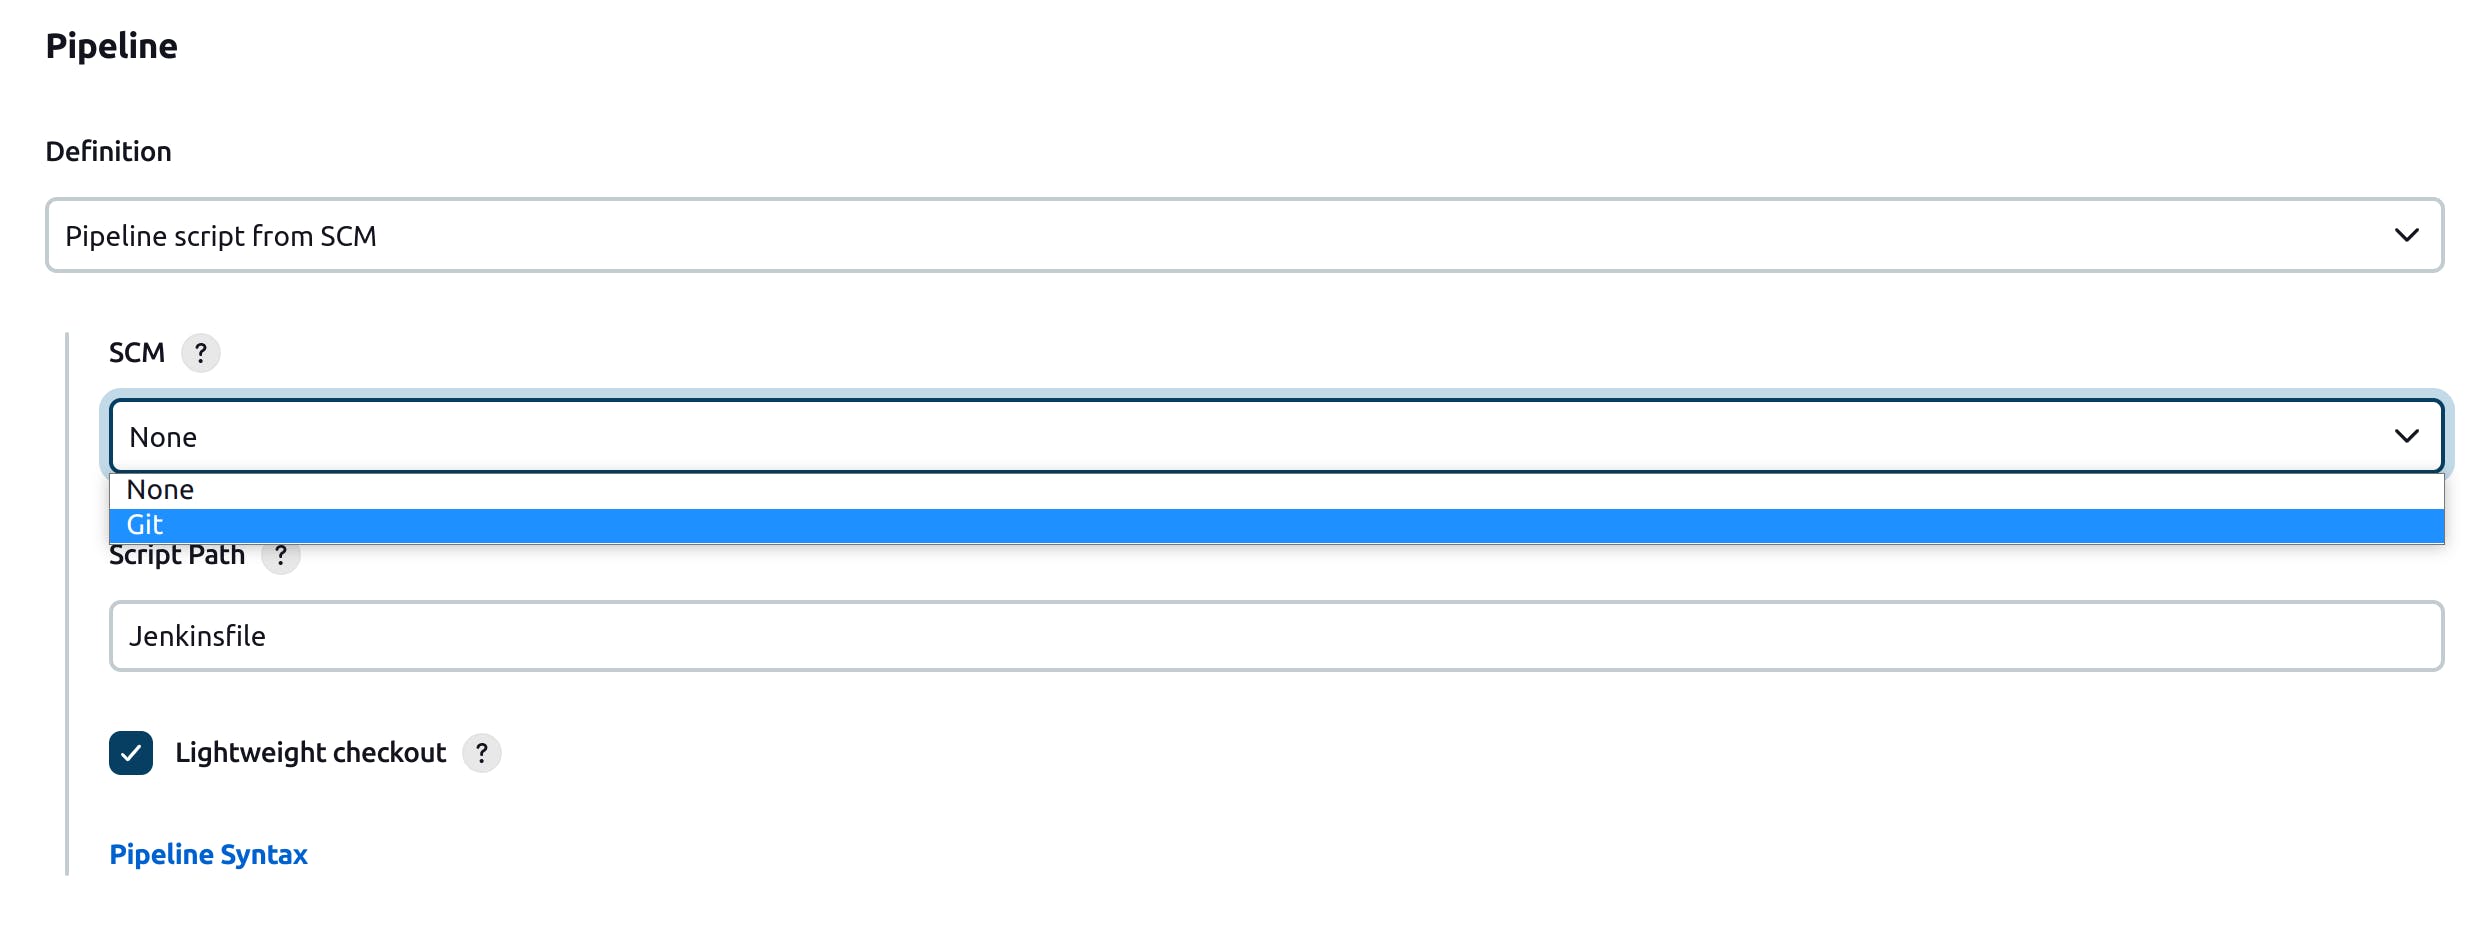
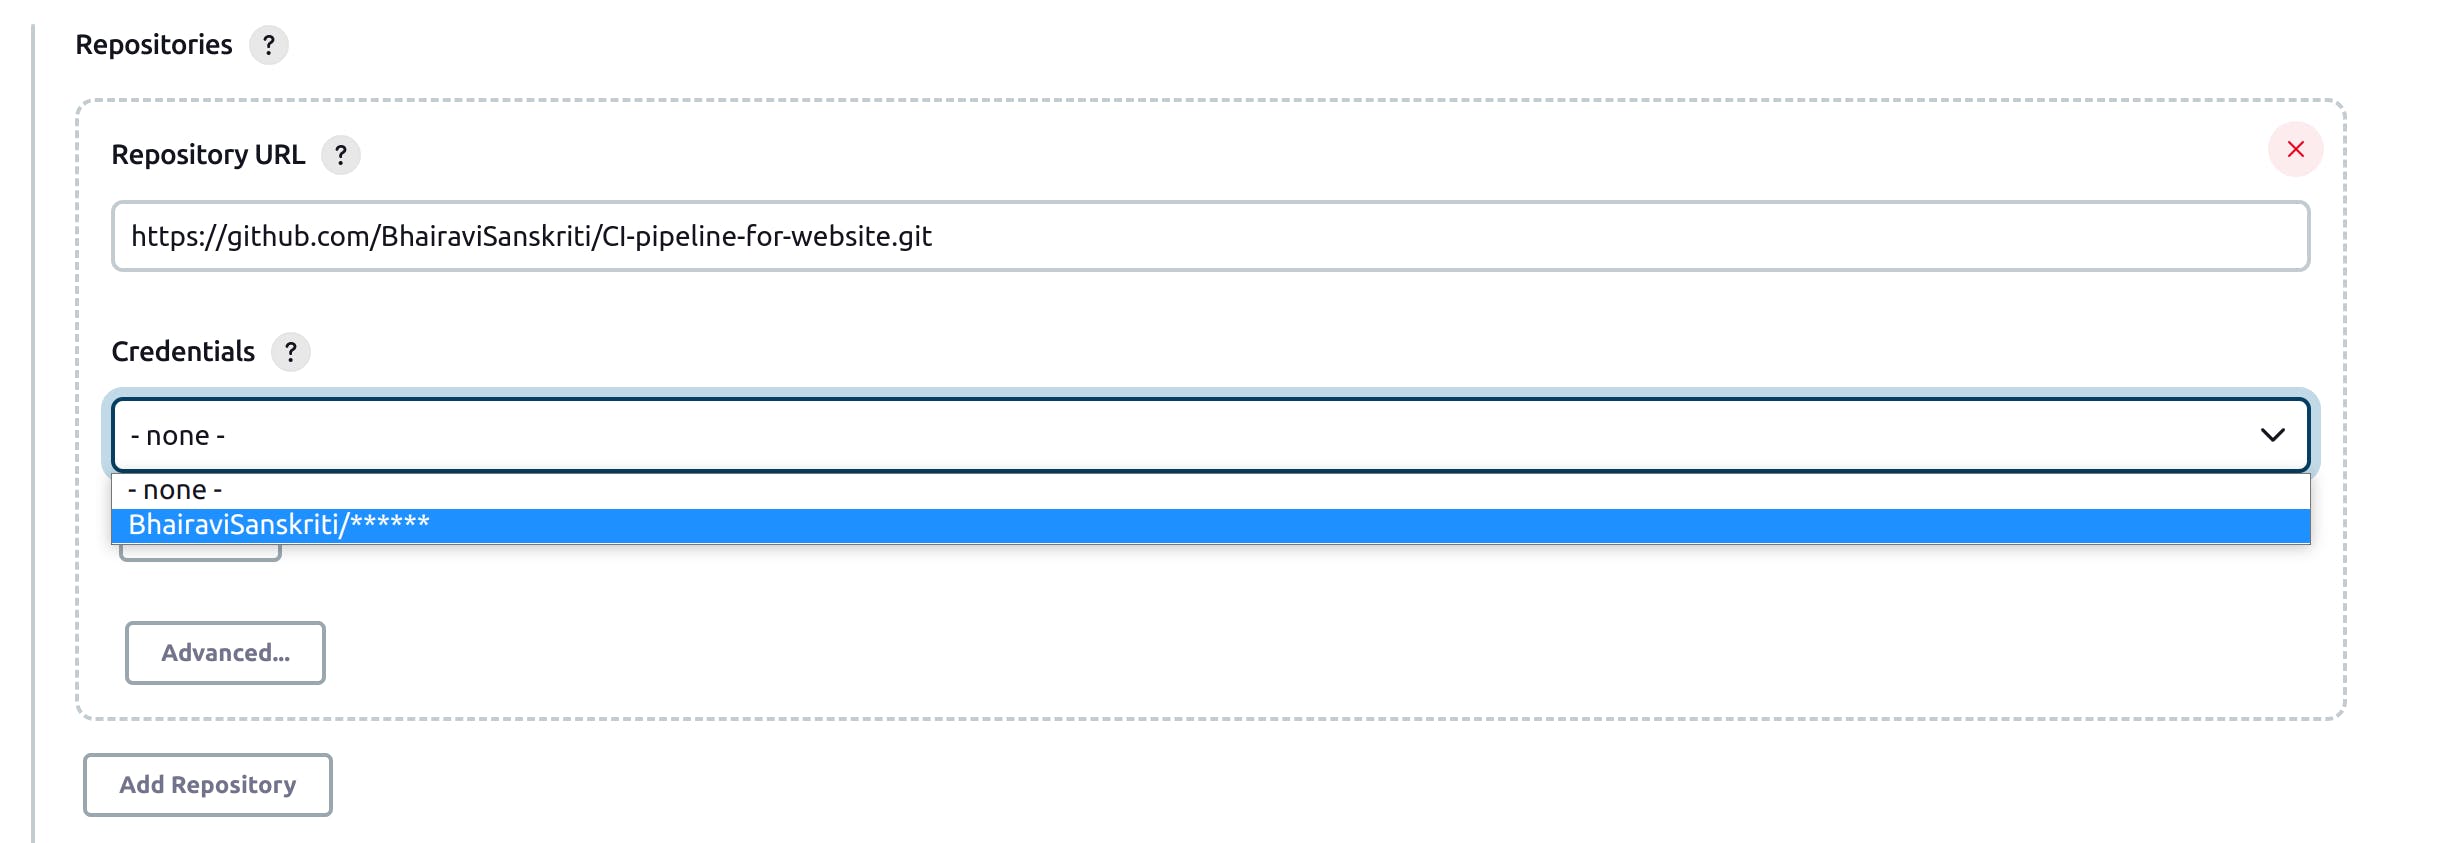
- You have to provide the GitHub repo URL where your Jenkinsfile is stored.


- Click on Credentials. Credentials allow us to access services, in this case GitHub service.

- Click on the Jenkins Credentials Provider.


- Add your GitHub credentials. You have to use personal access token as your password. Learn how to generate one from this article. Remember the credentials ID. This is the ID that you'll use in your Jenkinsfile to access GitHub. Click on the Add button.

- Now, select the credentials for GitHub account.
- Change the branch name from master to main.

- Click on the save button.
 Everything is setup.
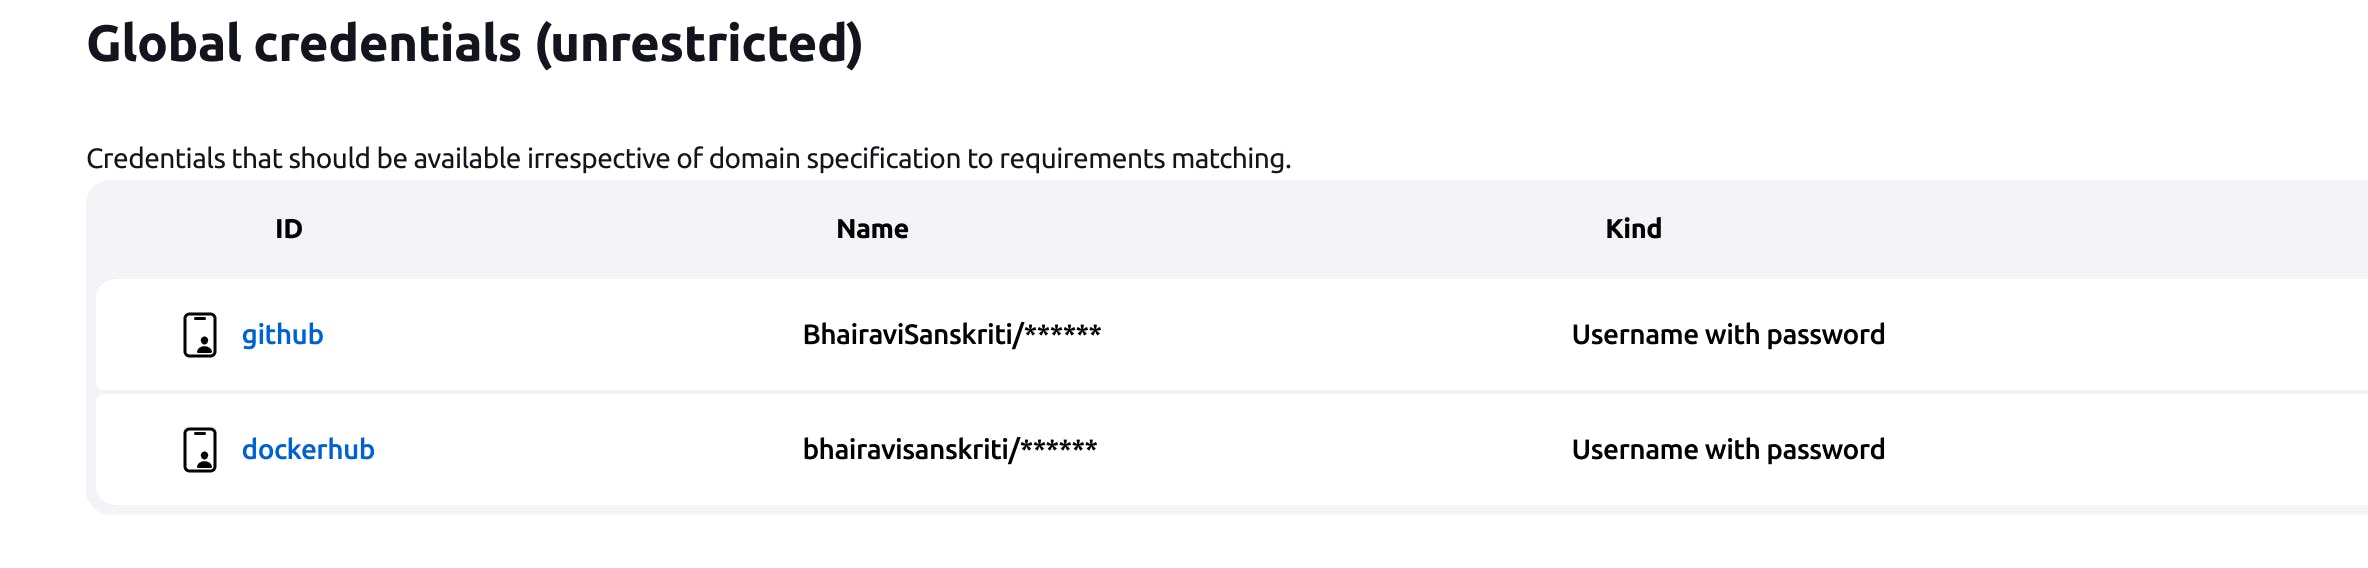
Adding Credentials in Jenkins
Before building the pipeline, we must add credentials for the Docker hub that we used in our Jenkins file otherwise, the docker push command won't work.
Follow the below steps to add your Docker hub credentials.
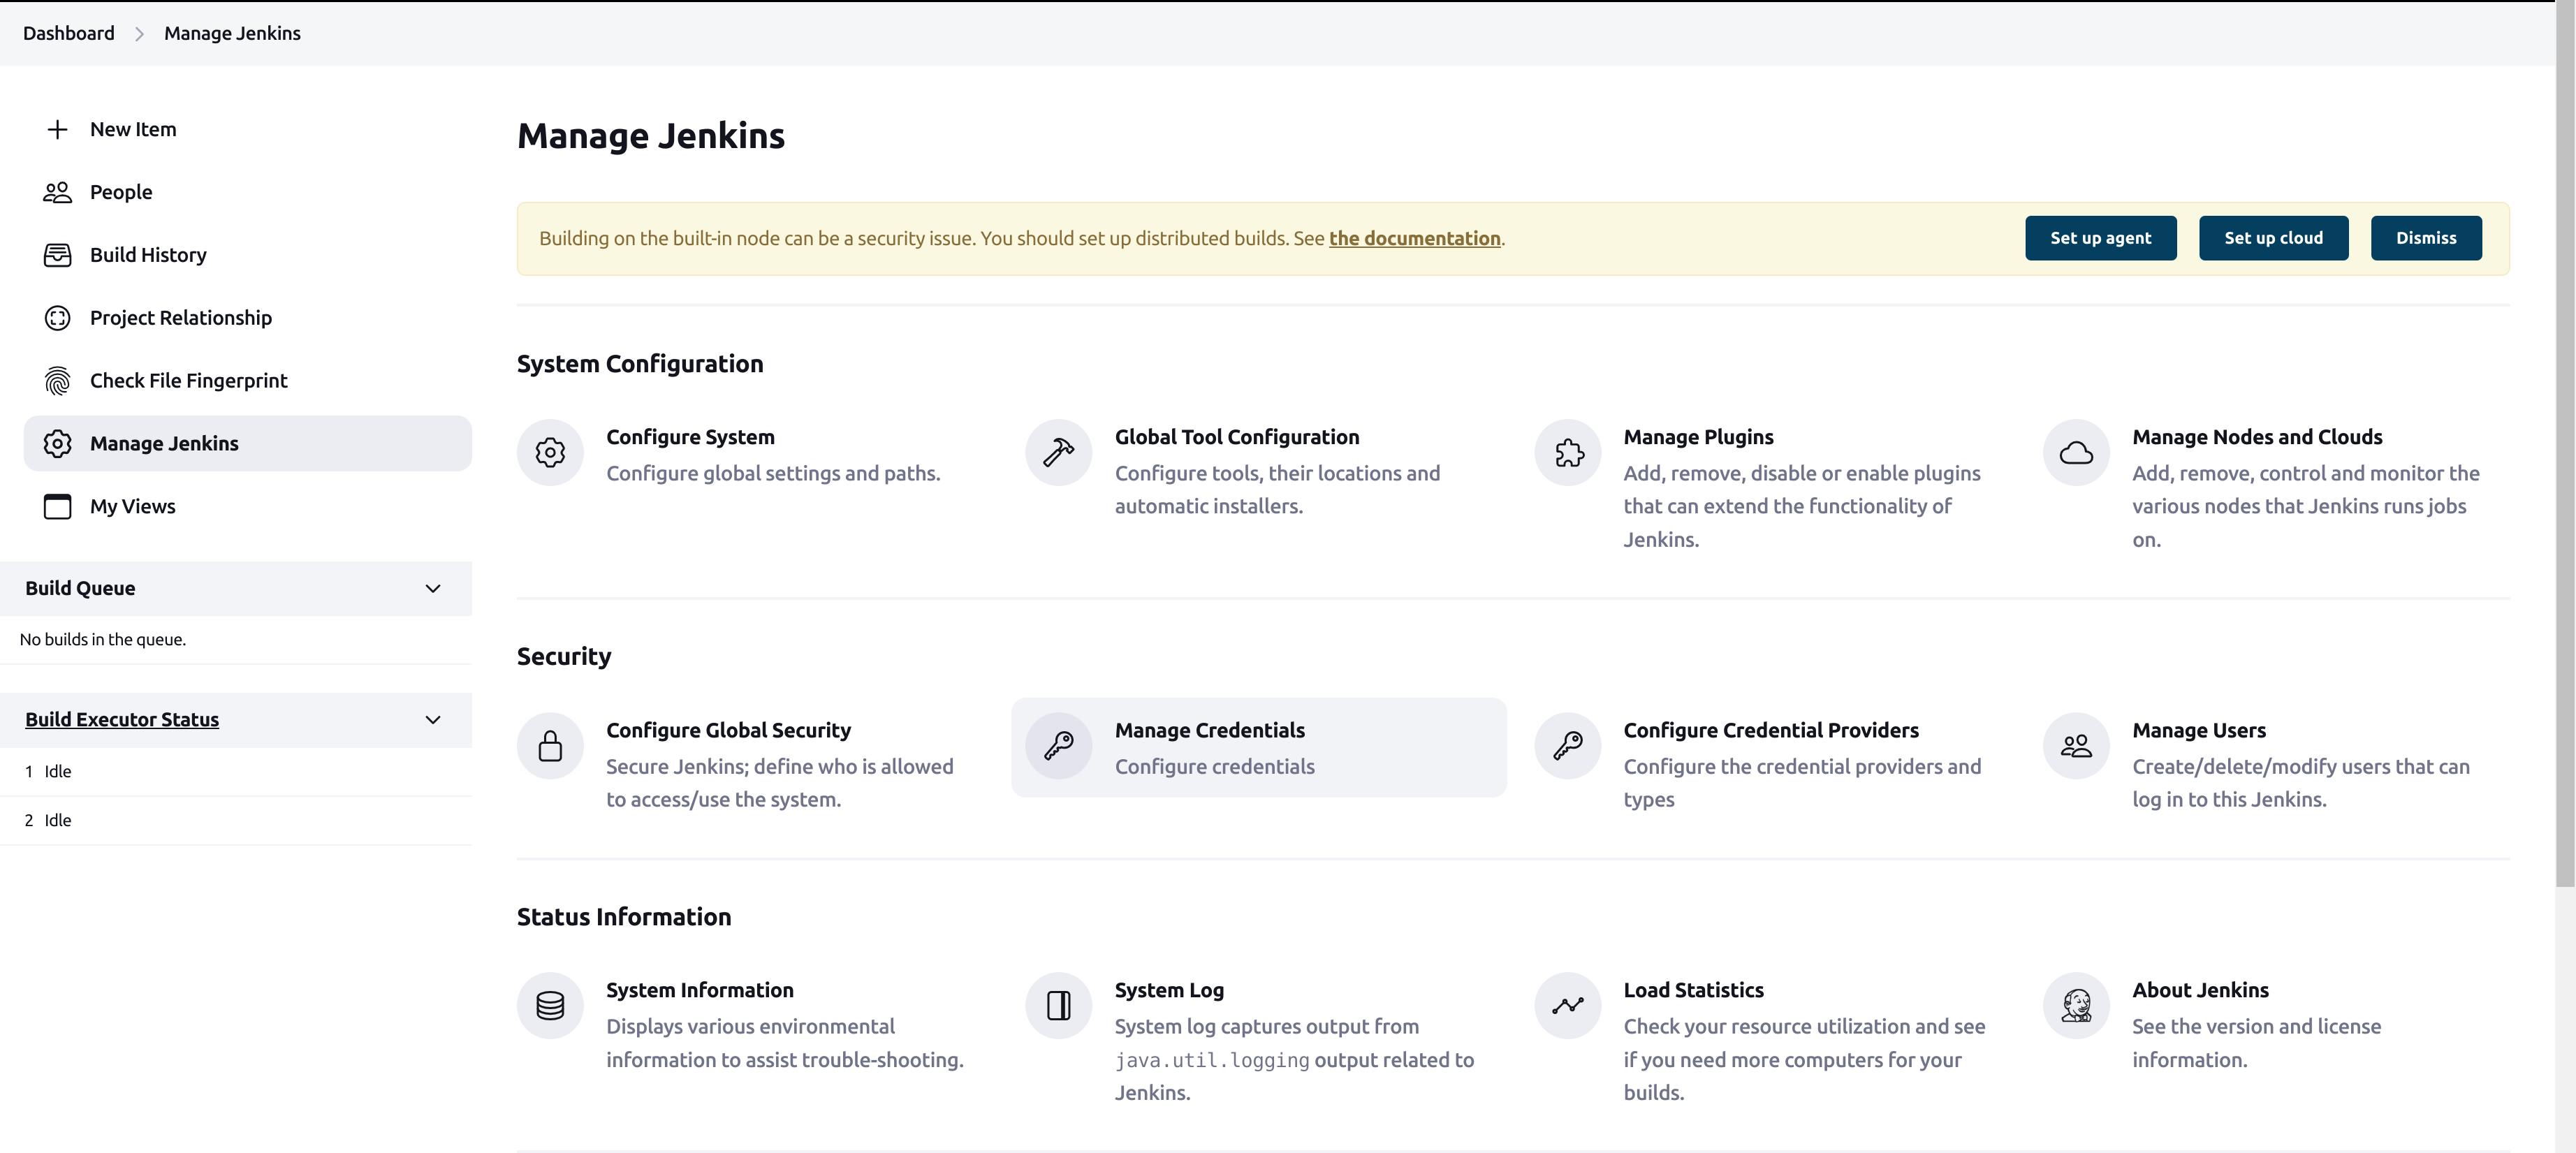
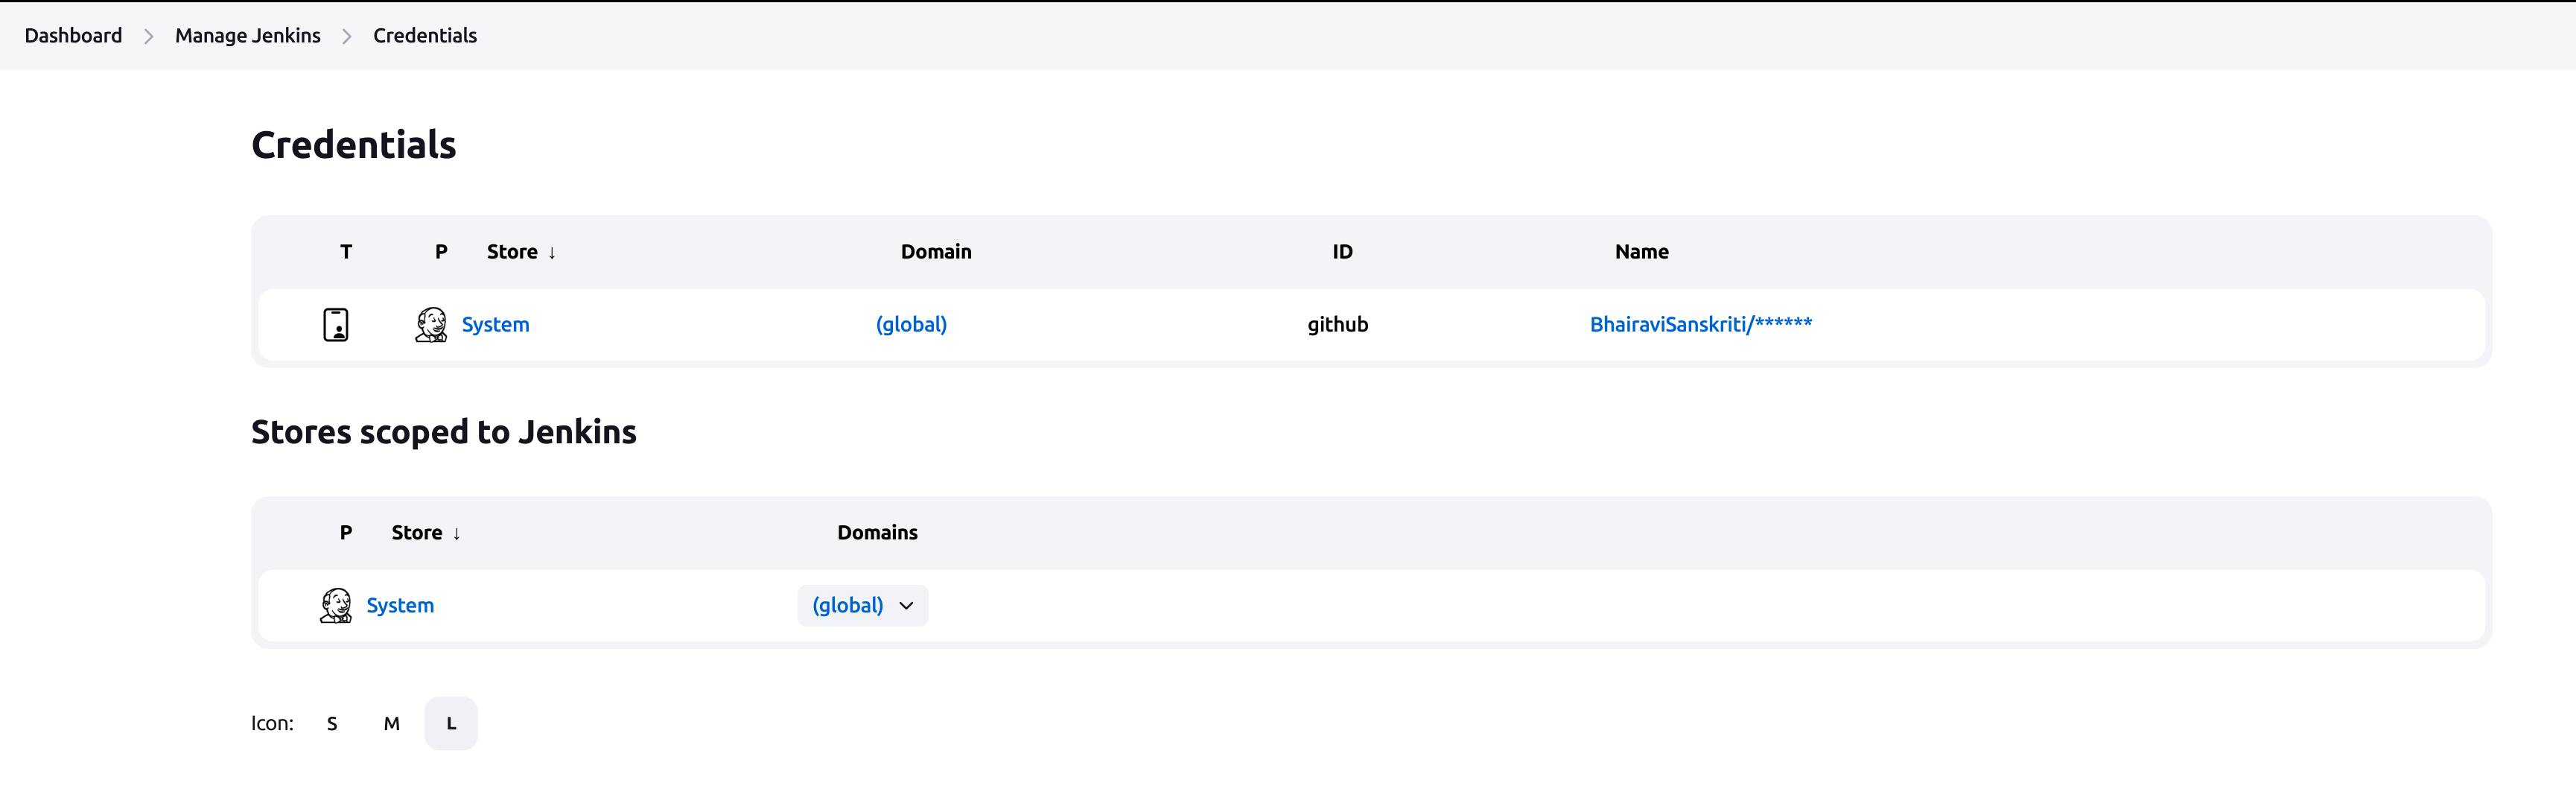
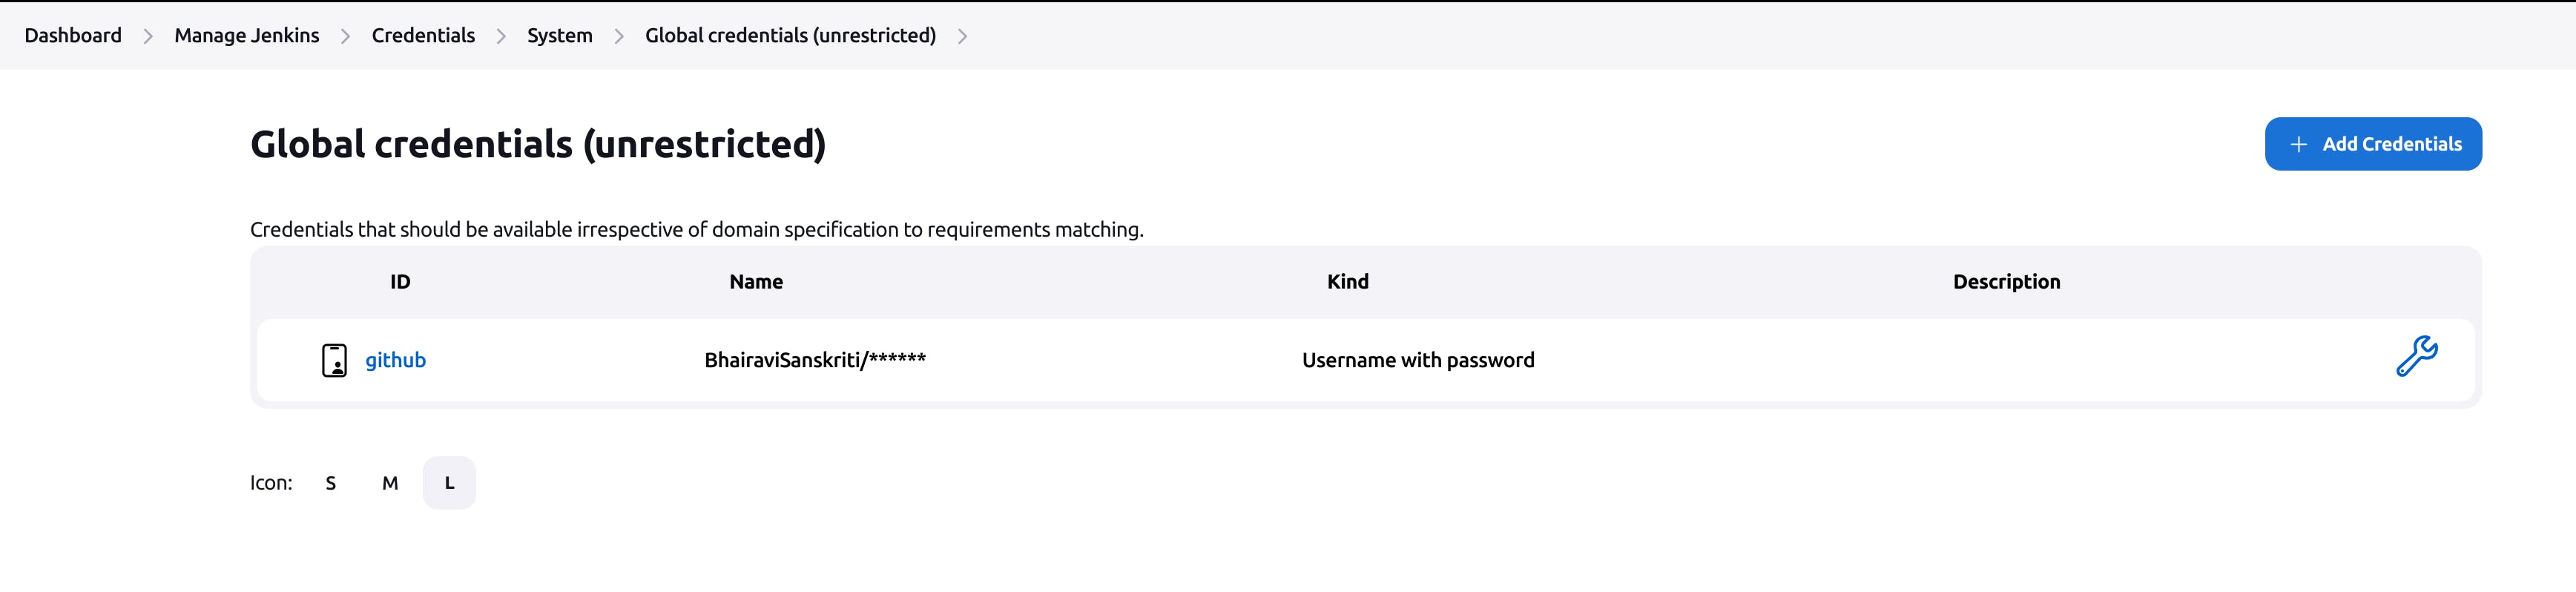
- Go to Dashboard -> Manage Jenkins -> Manage Credentials.
- Click on global under the Stores scoped to Jenkins section.
- Click on + Add Credentials
- Now, add your Docker hub credentials. Jenkinsfile will use the ID, so remember it. Your username and password will be associated with this ID.
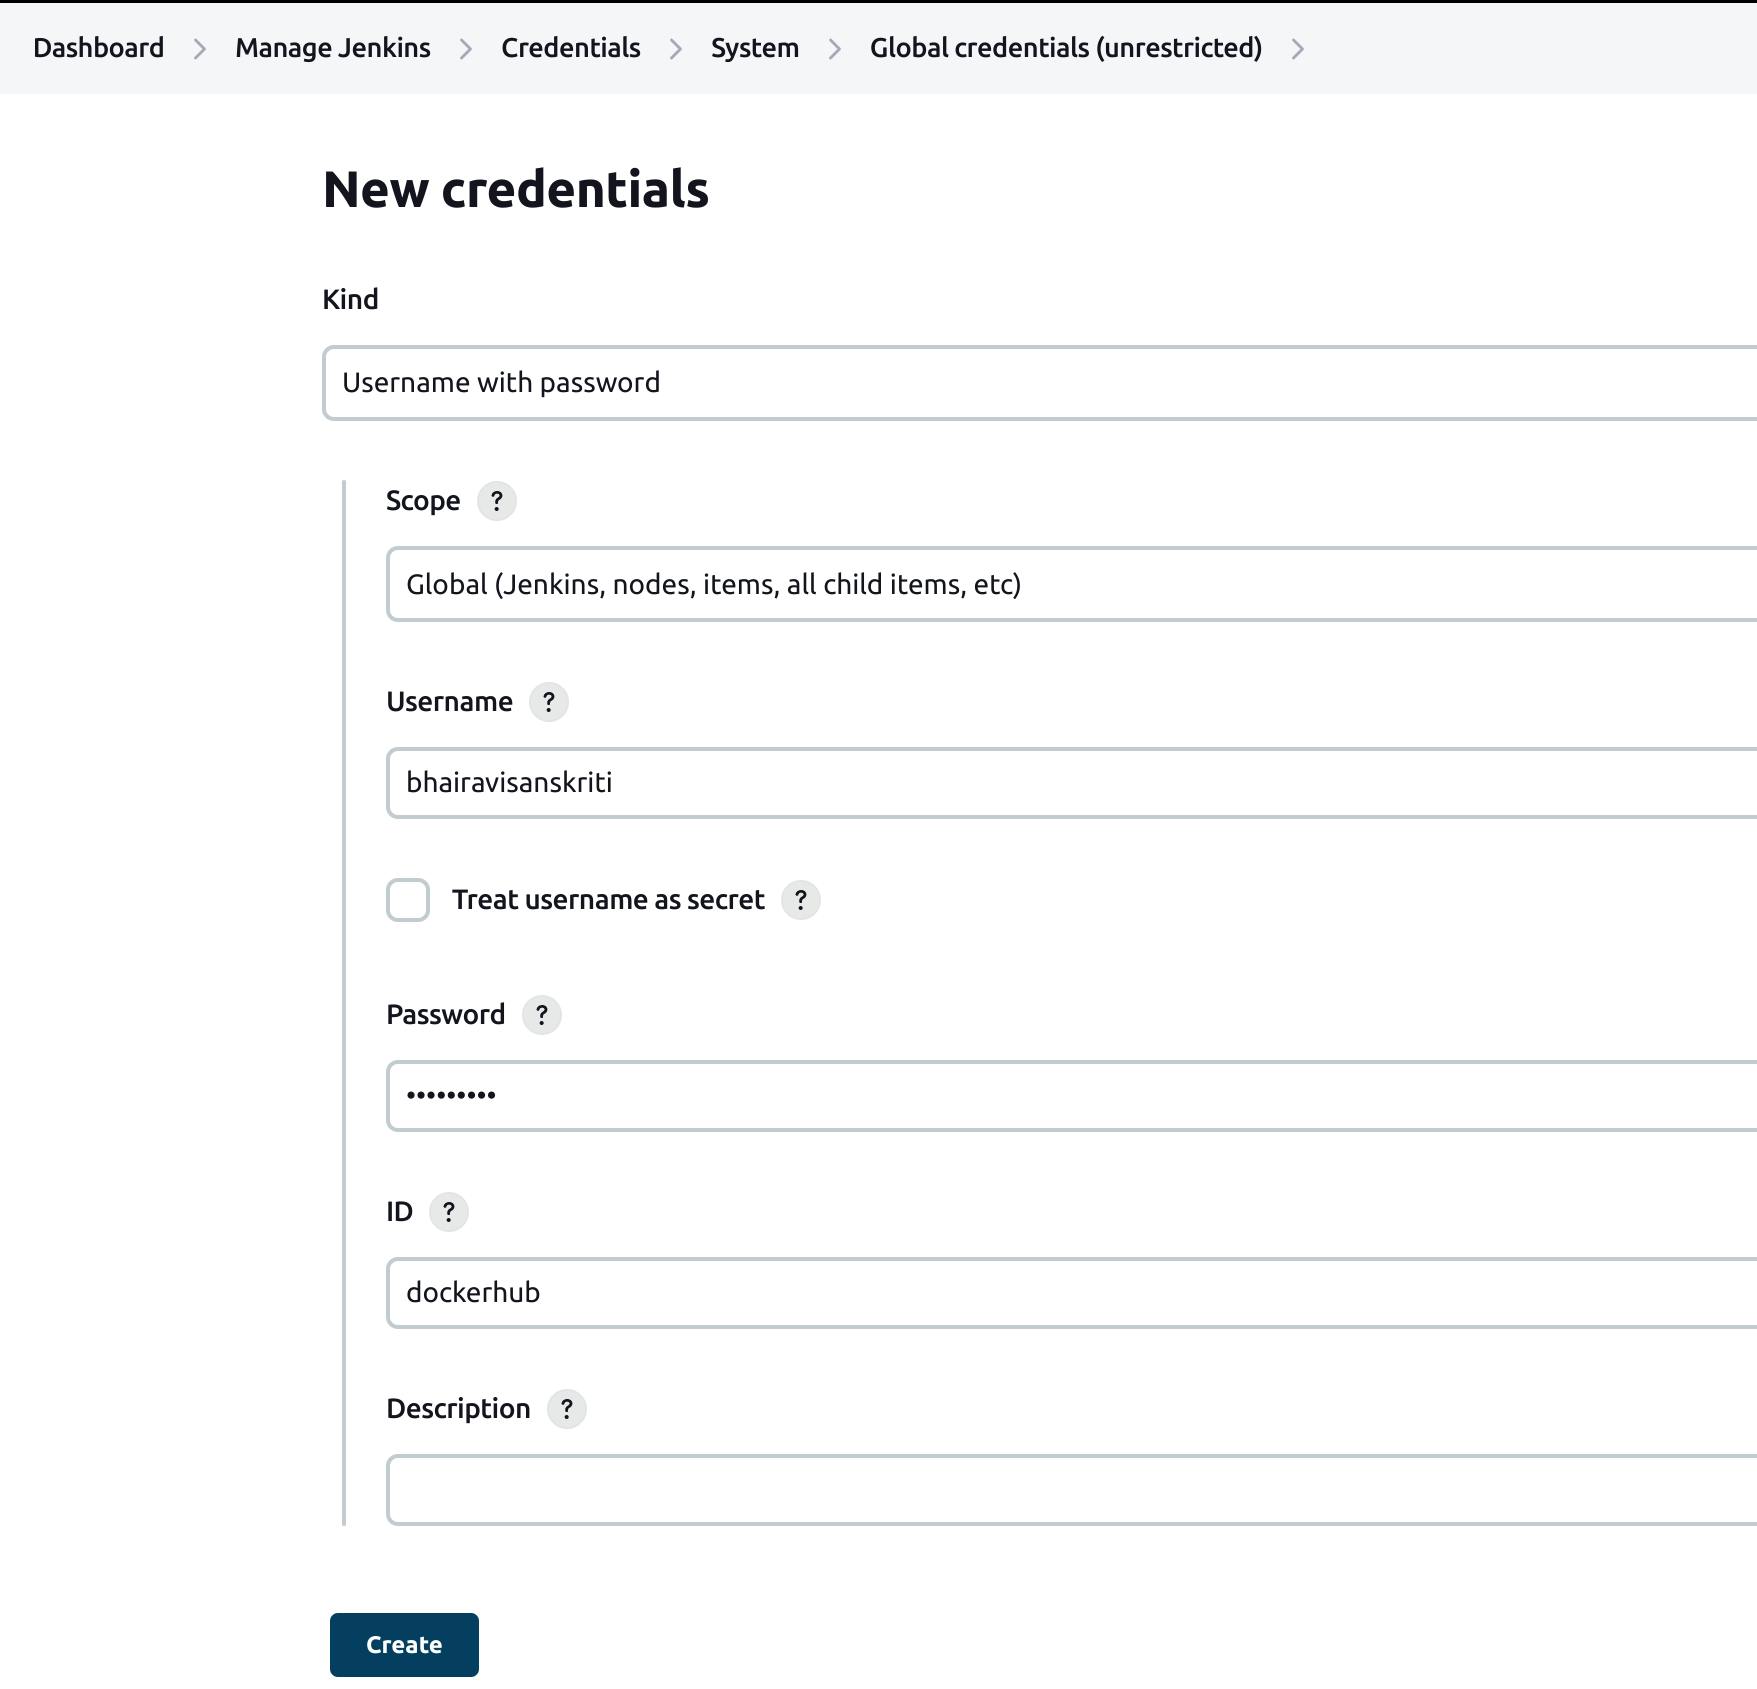
- Click on Create button. As you can see, your Docker hub credential is created.
 Now, we can build our pipeline!
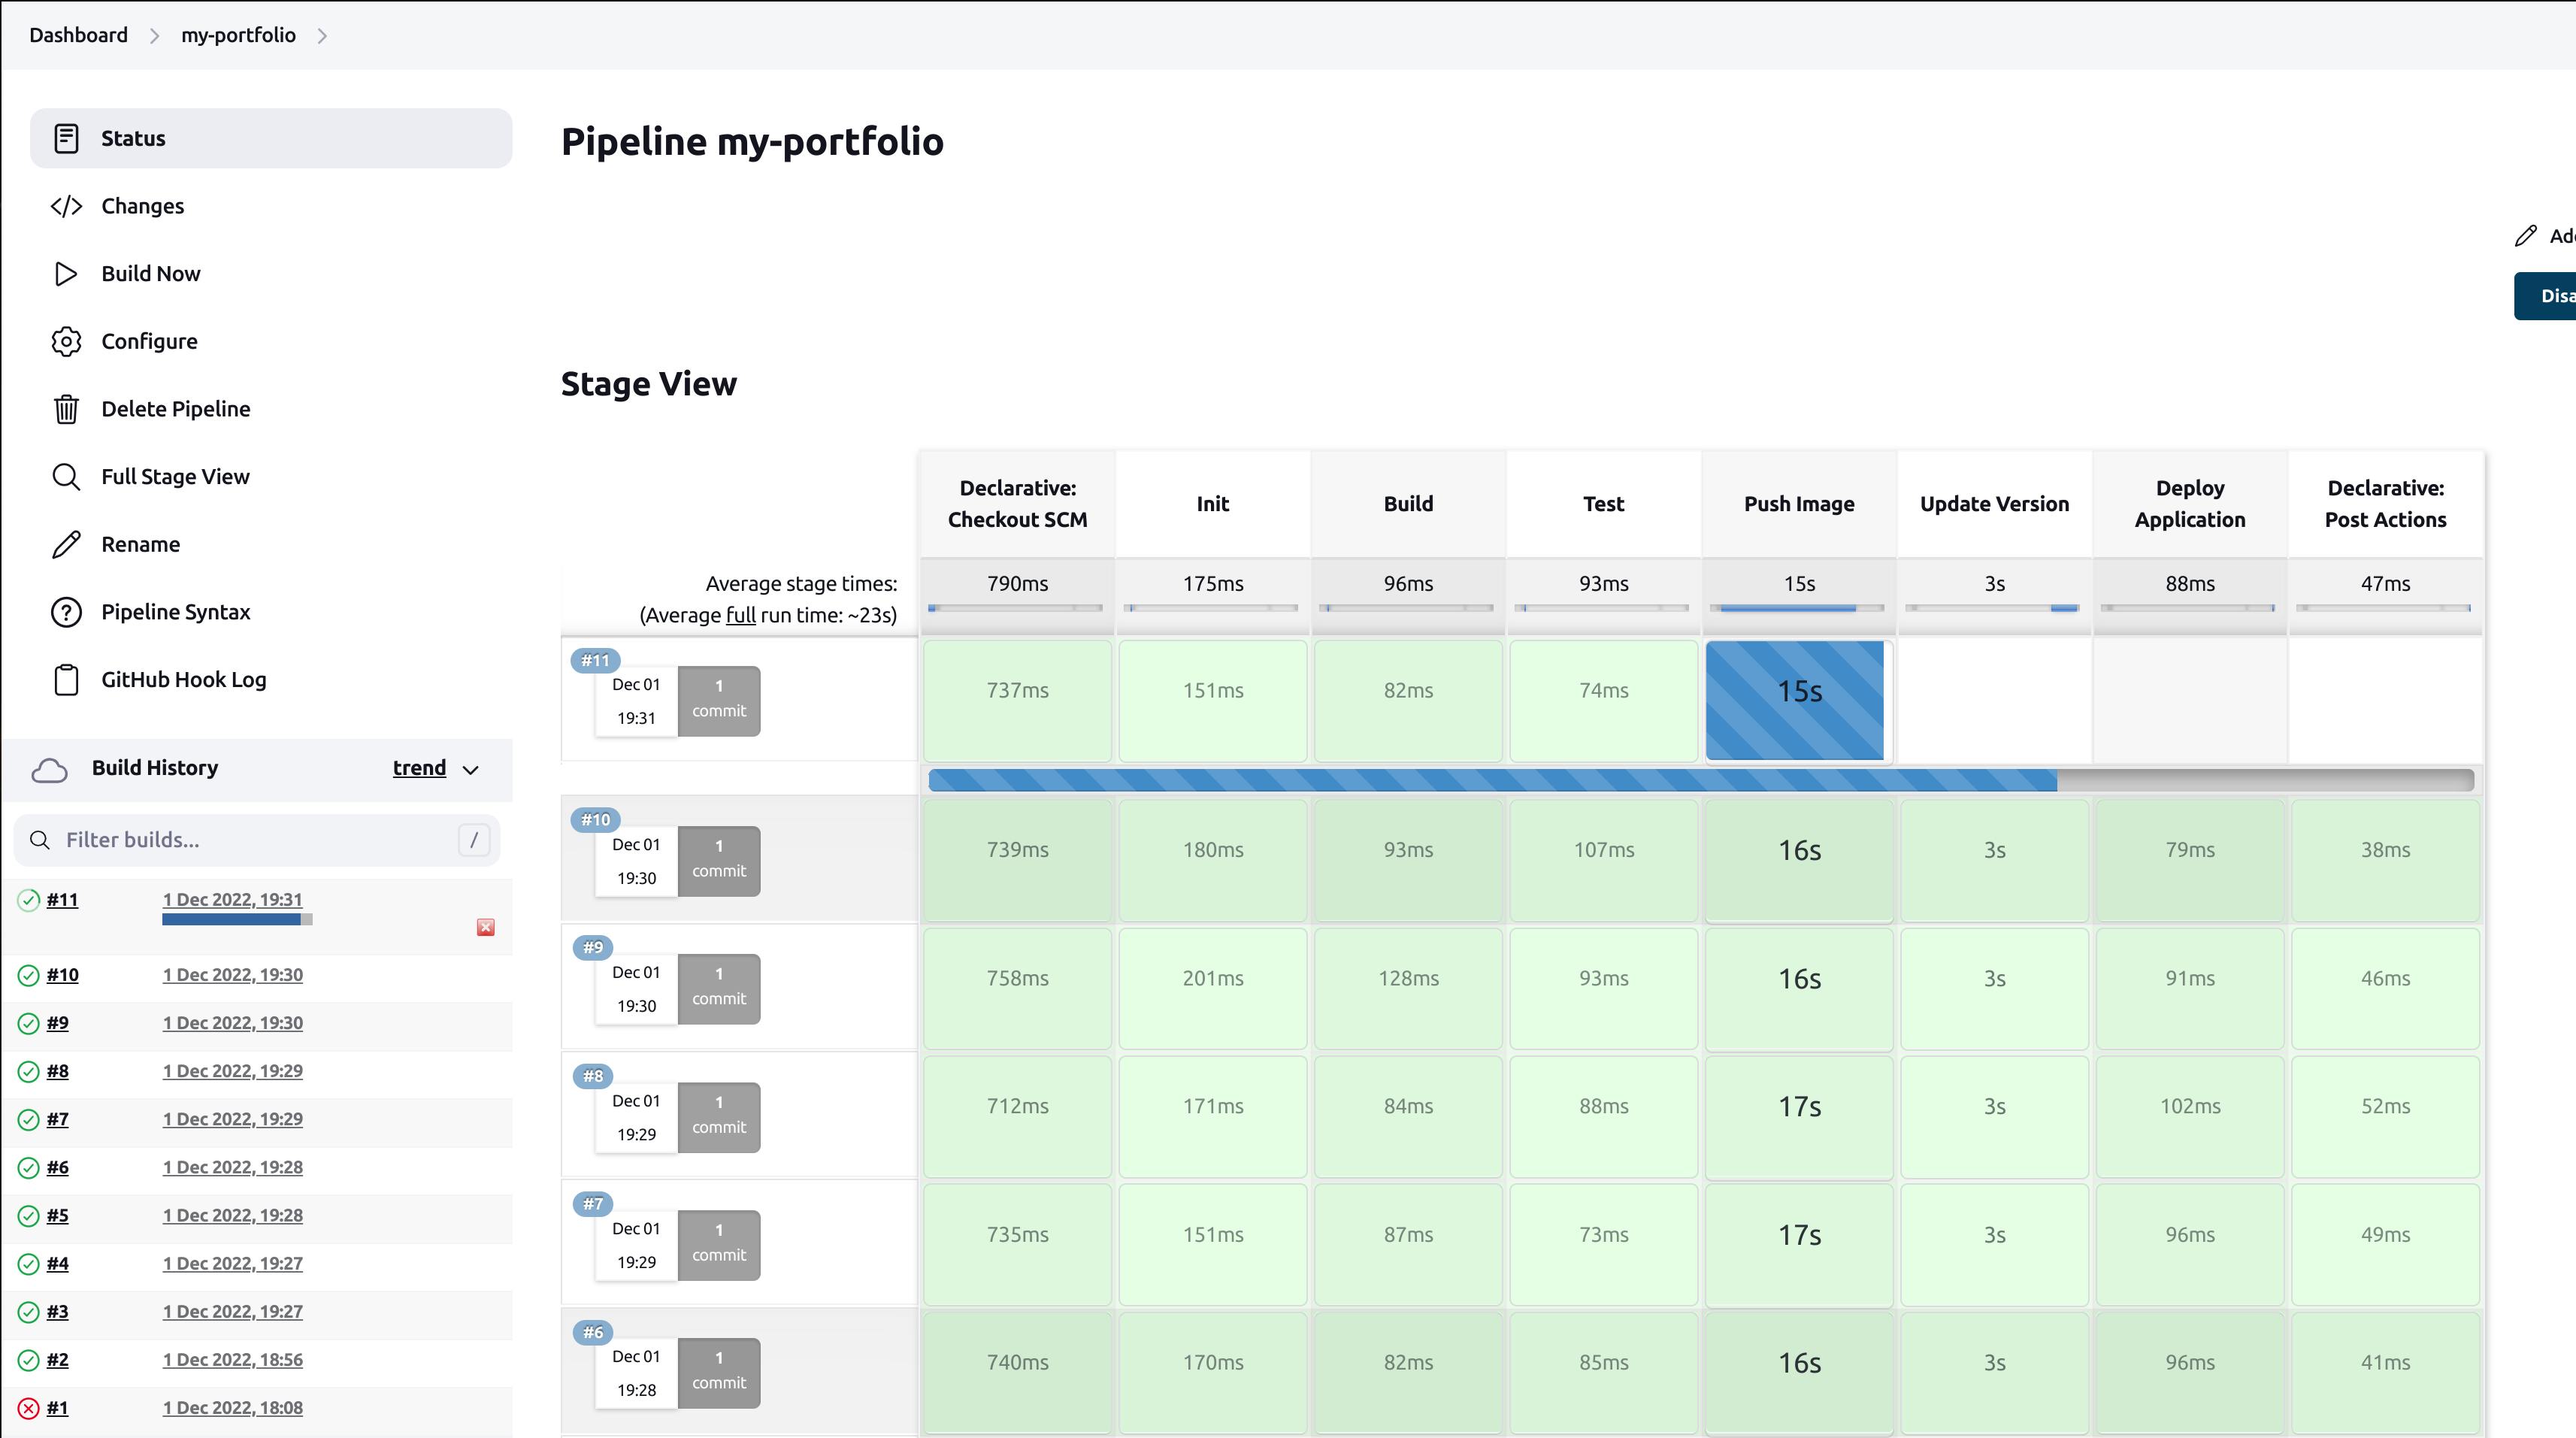
Build a Pipeline
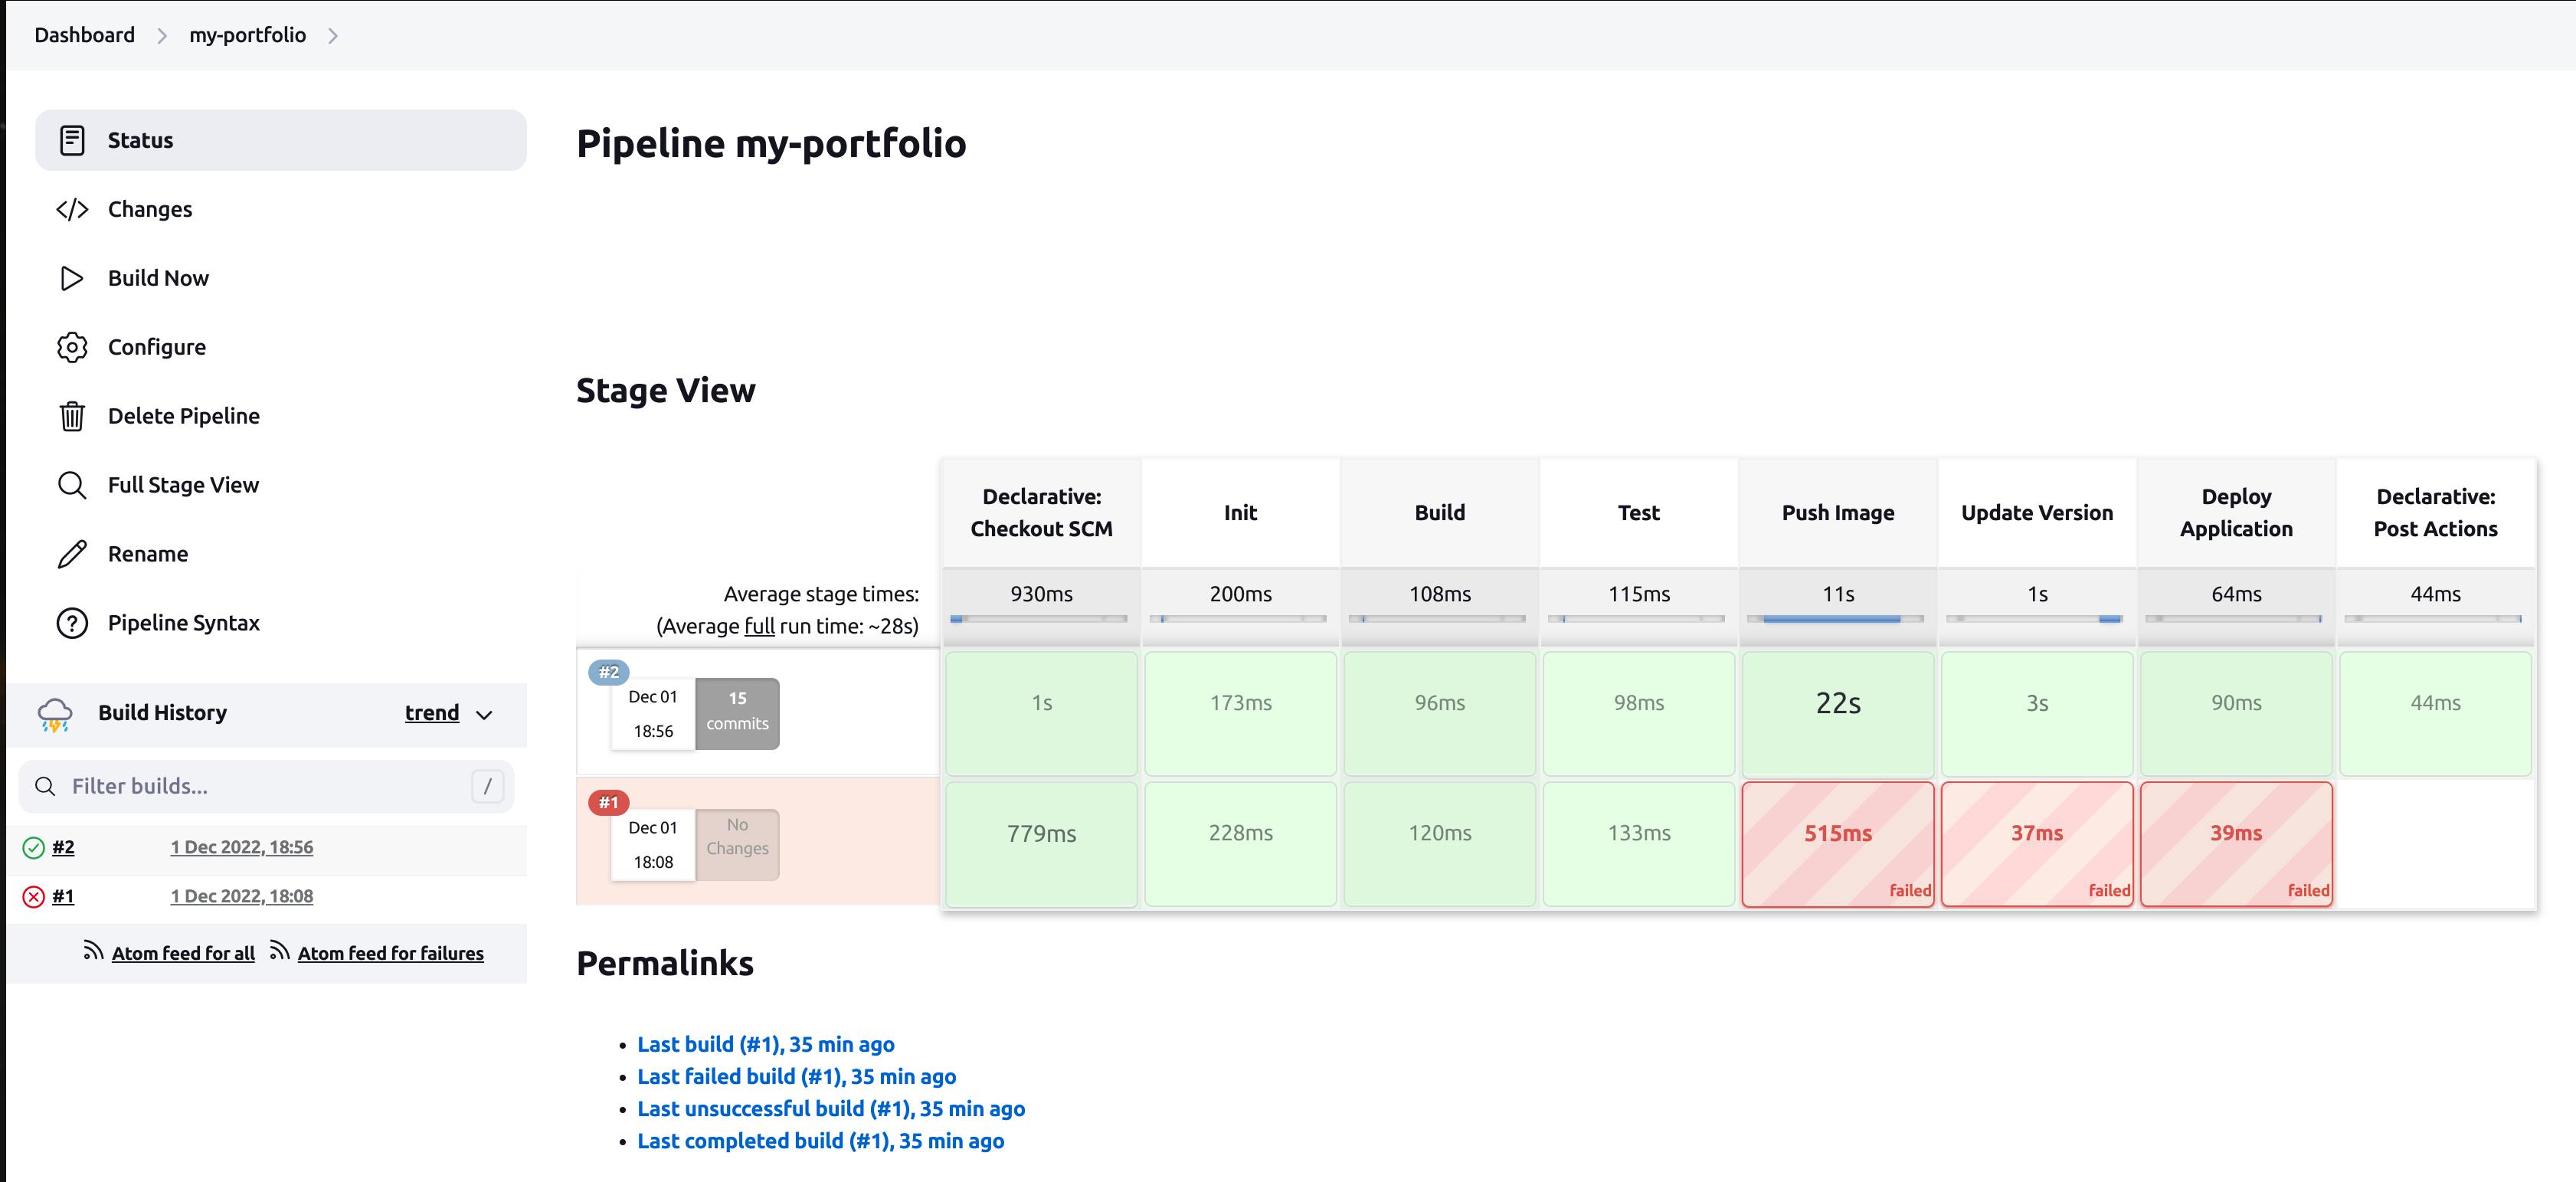
To build a pipeline, click on Build Now.

Congrats! We unsuccessfully build a pipeline! The green boxes are for those stages that ran successfully and the red one for the unsuccessful ones.
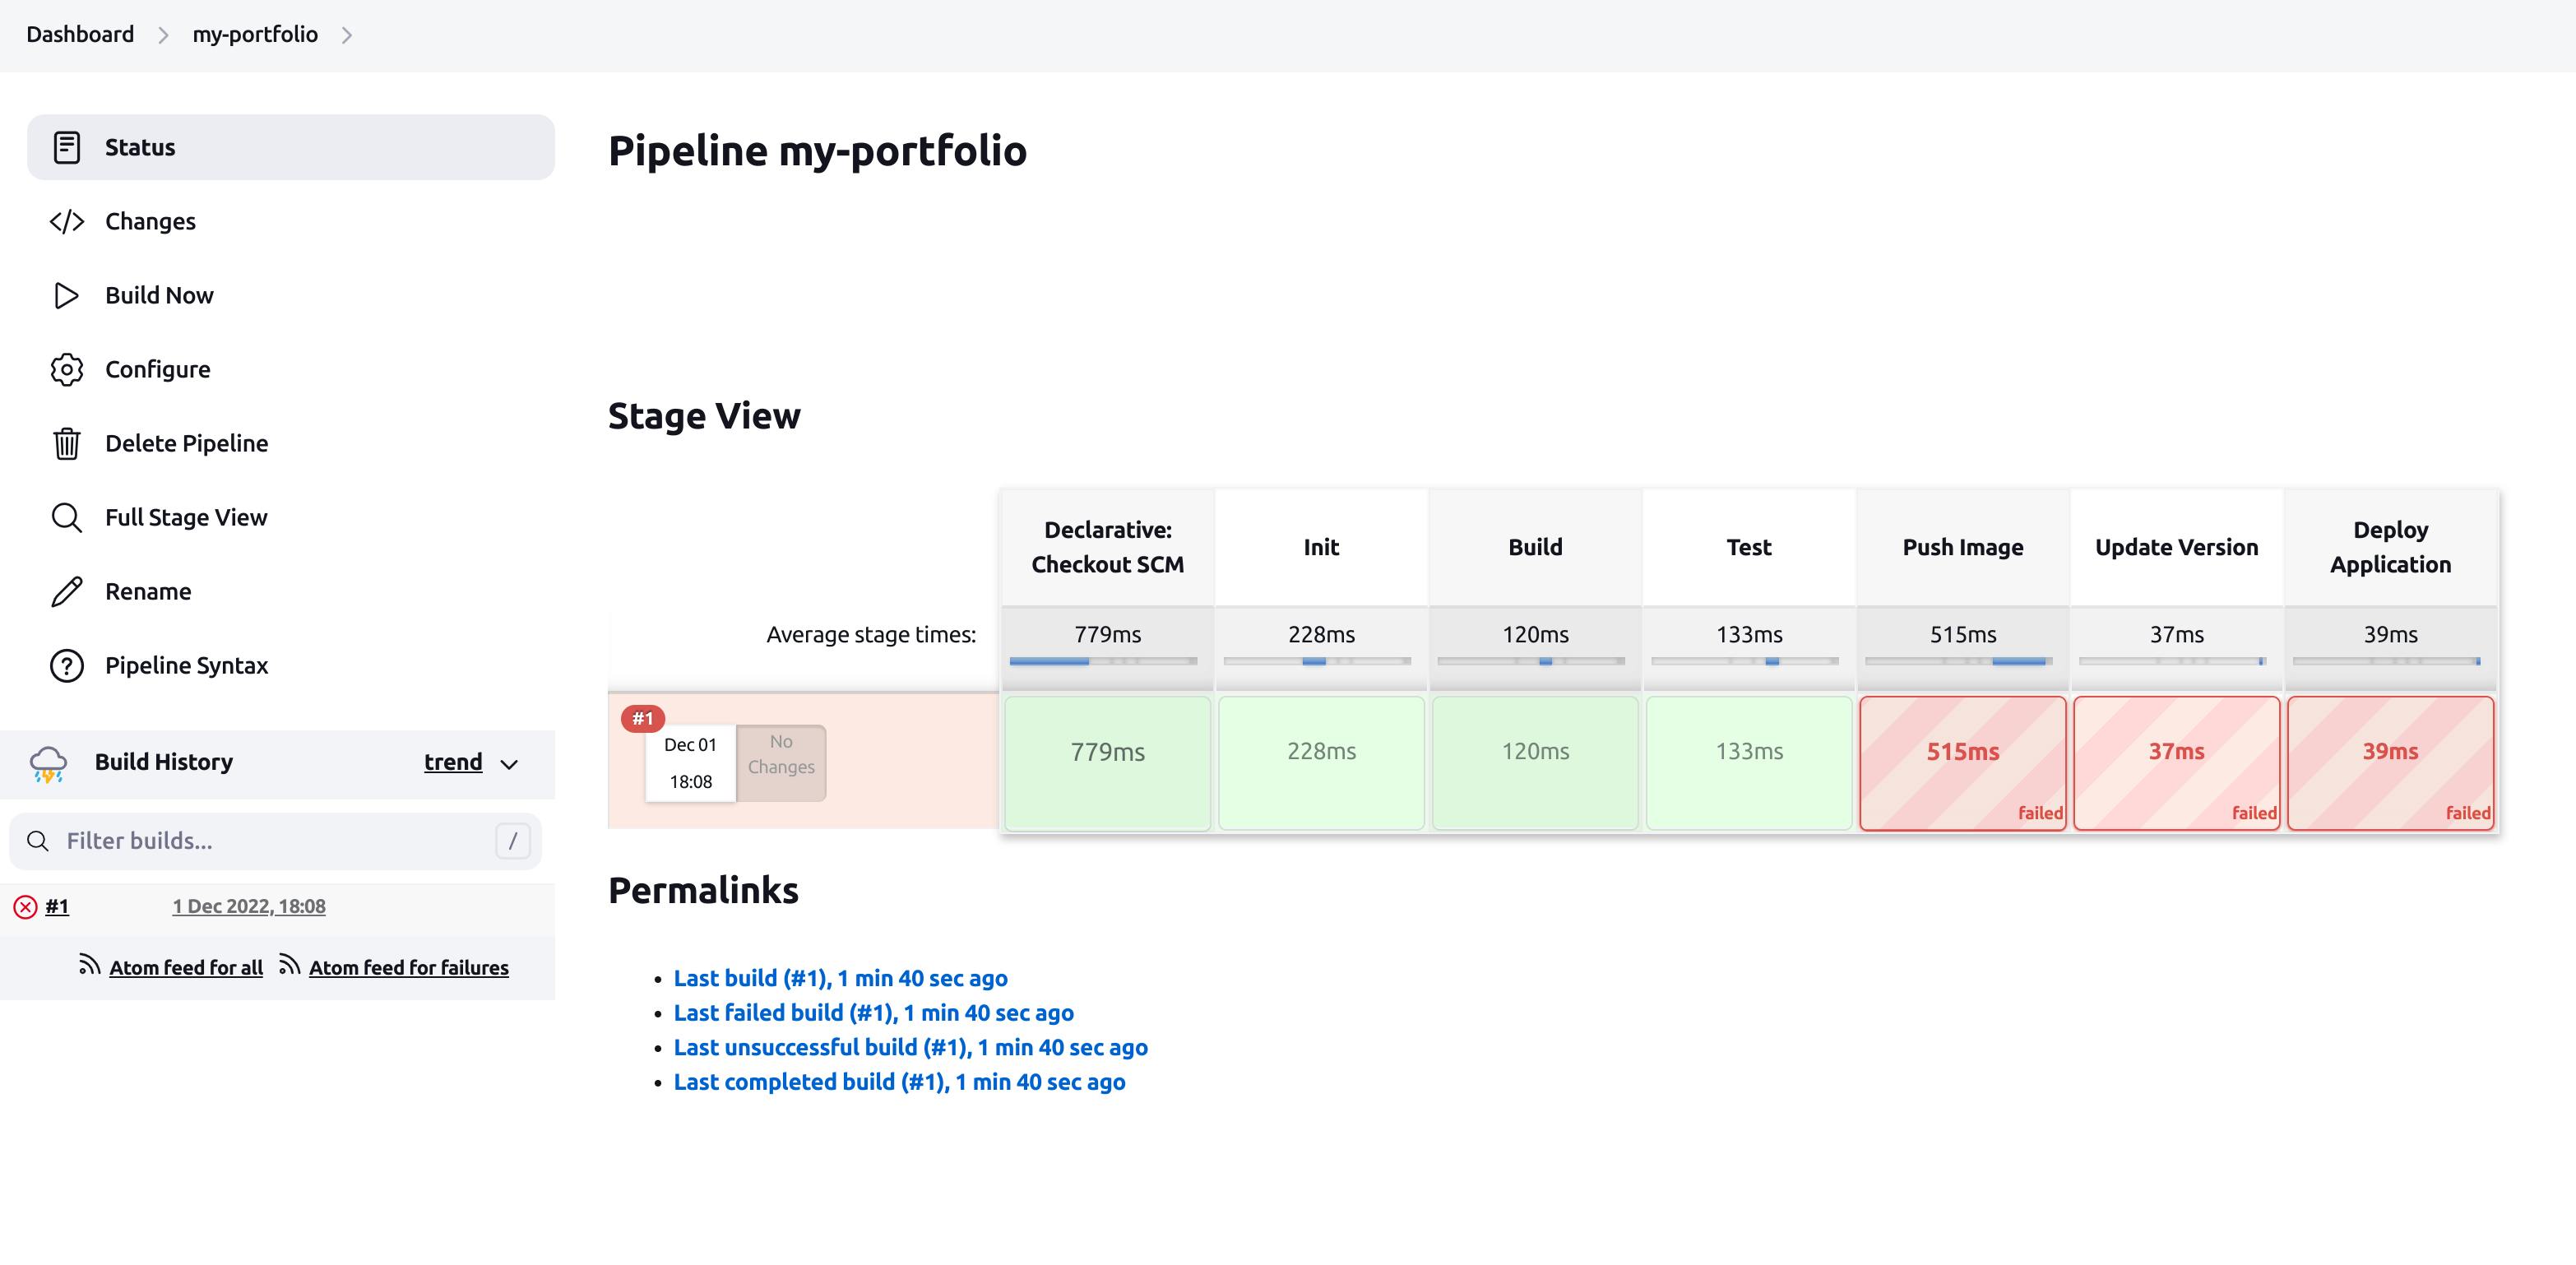 What went wrong? What is the error?
Check Logs of a Pipeline
The first step in the process of error detection is to check the logs. There are two ways to check logs in a pipeline:
- Click on the build number in the bottom-left corner, then choose Console Output and see the logs.
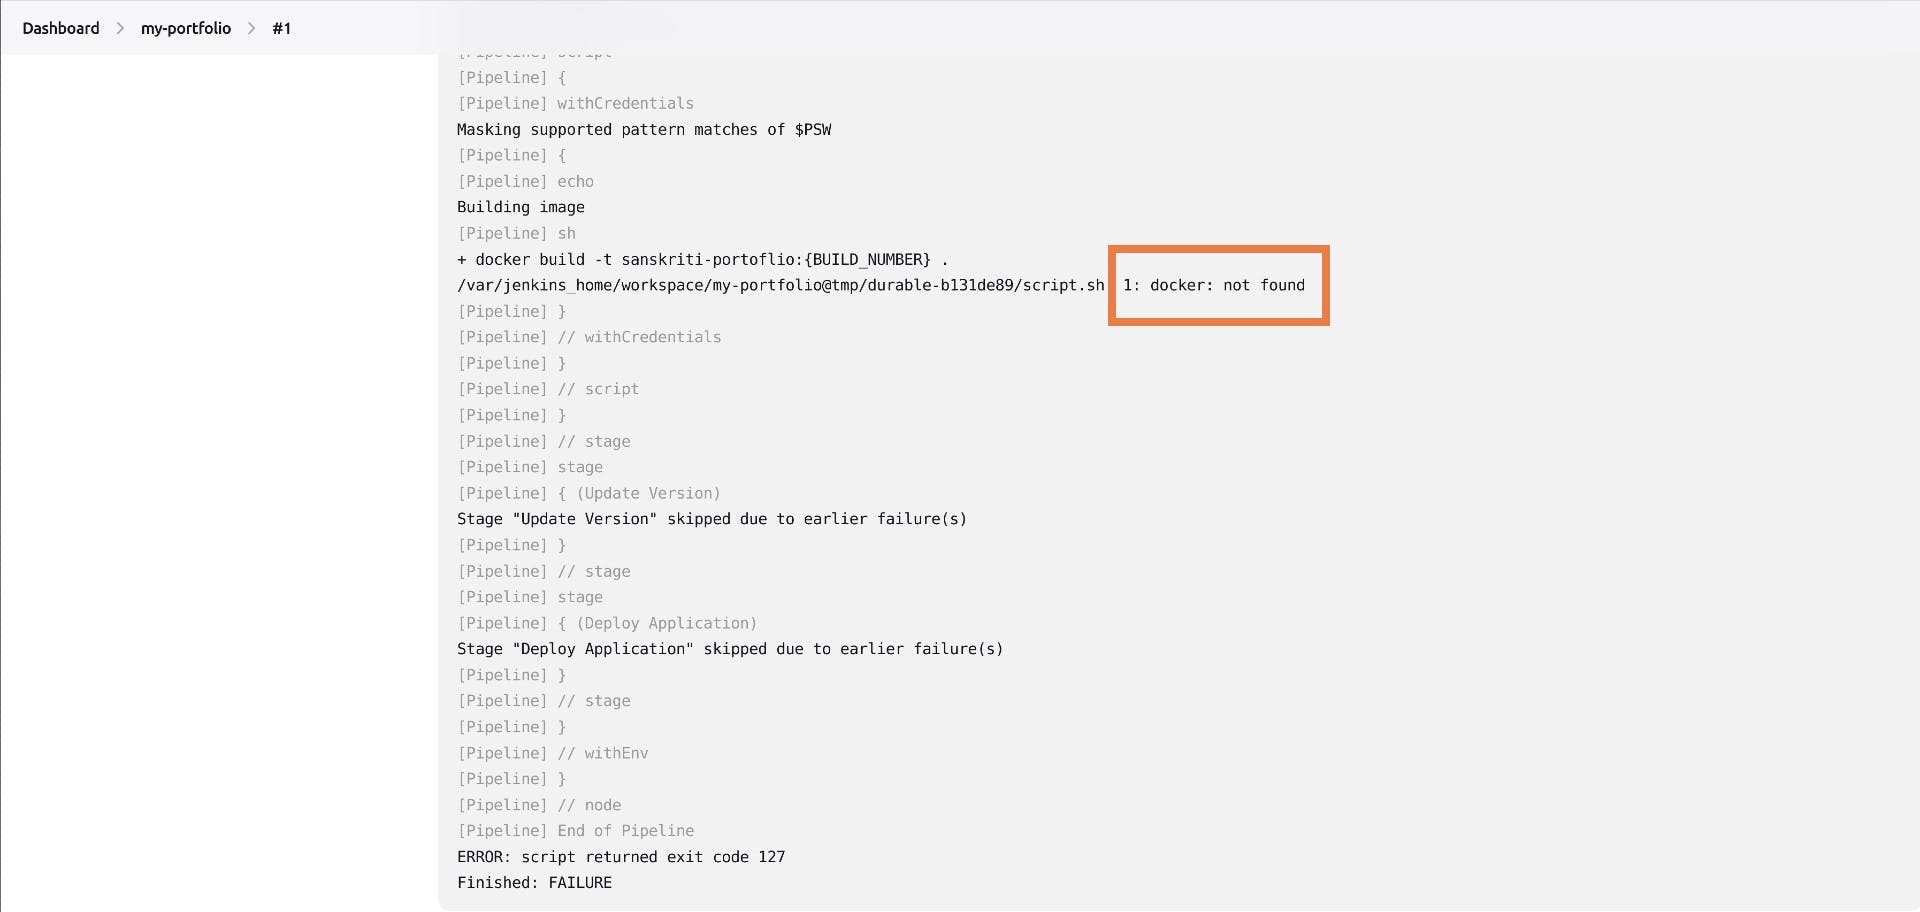
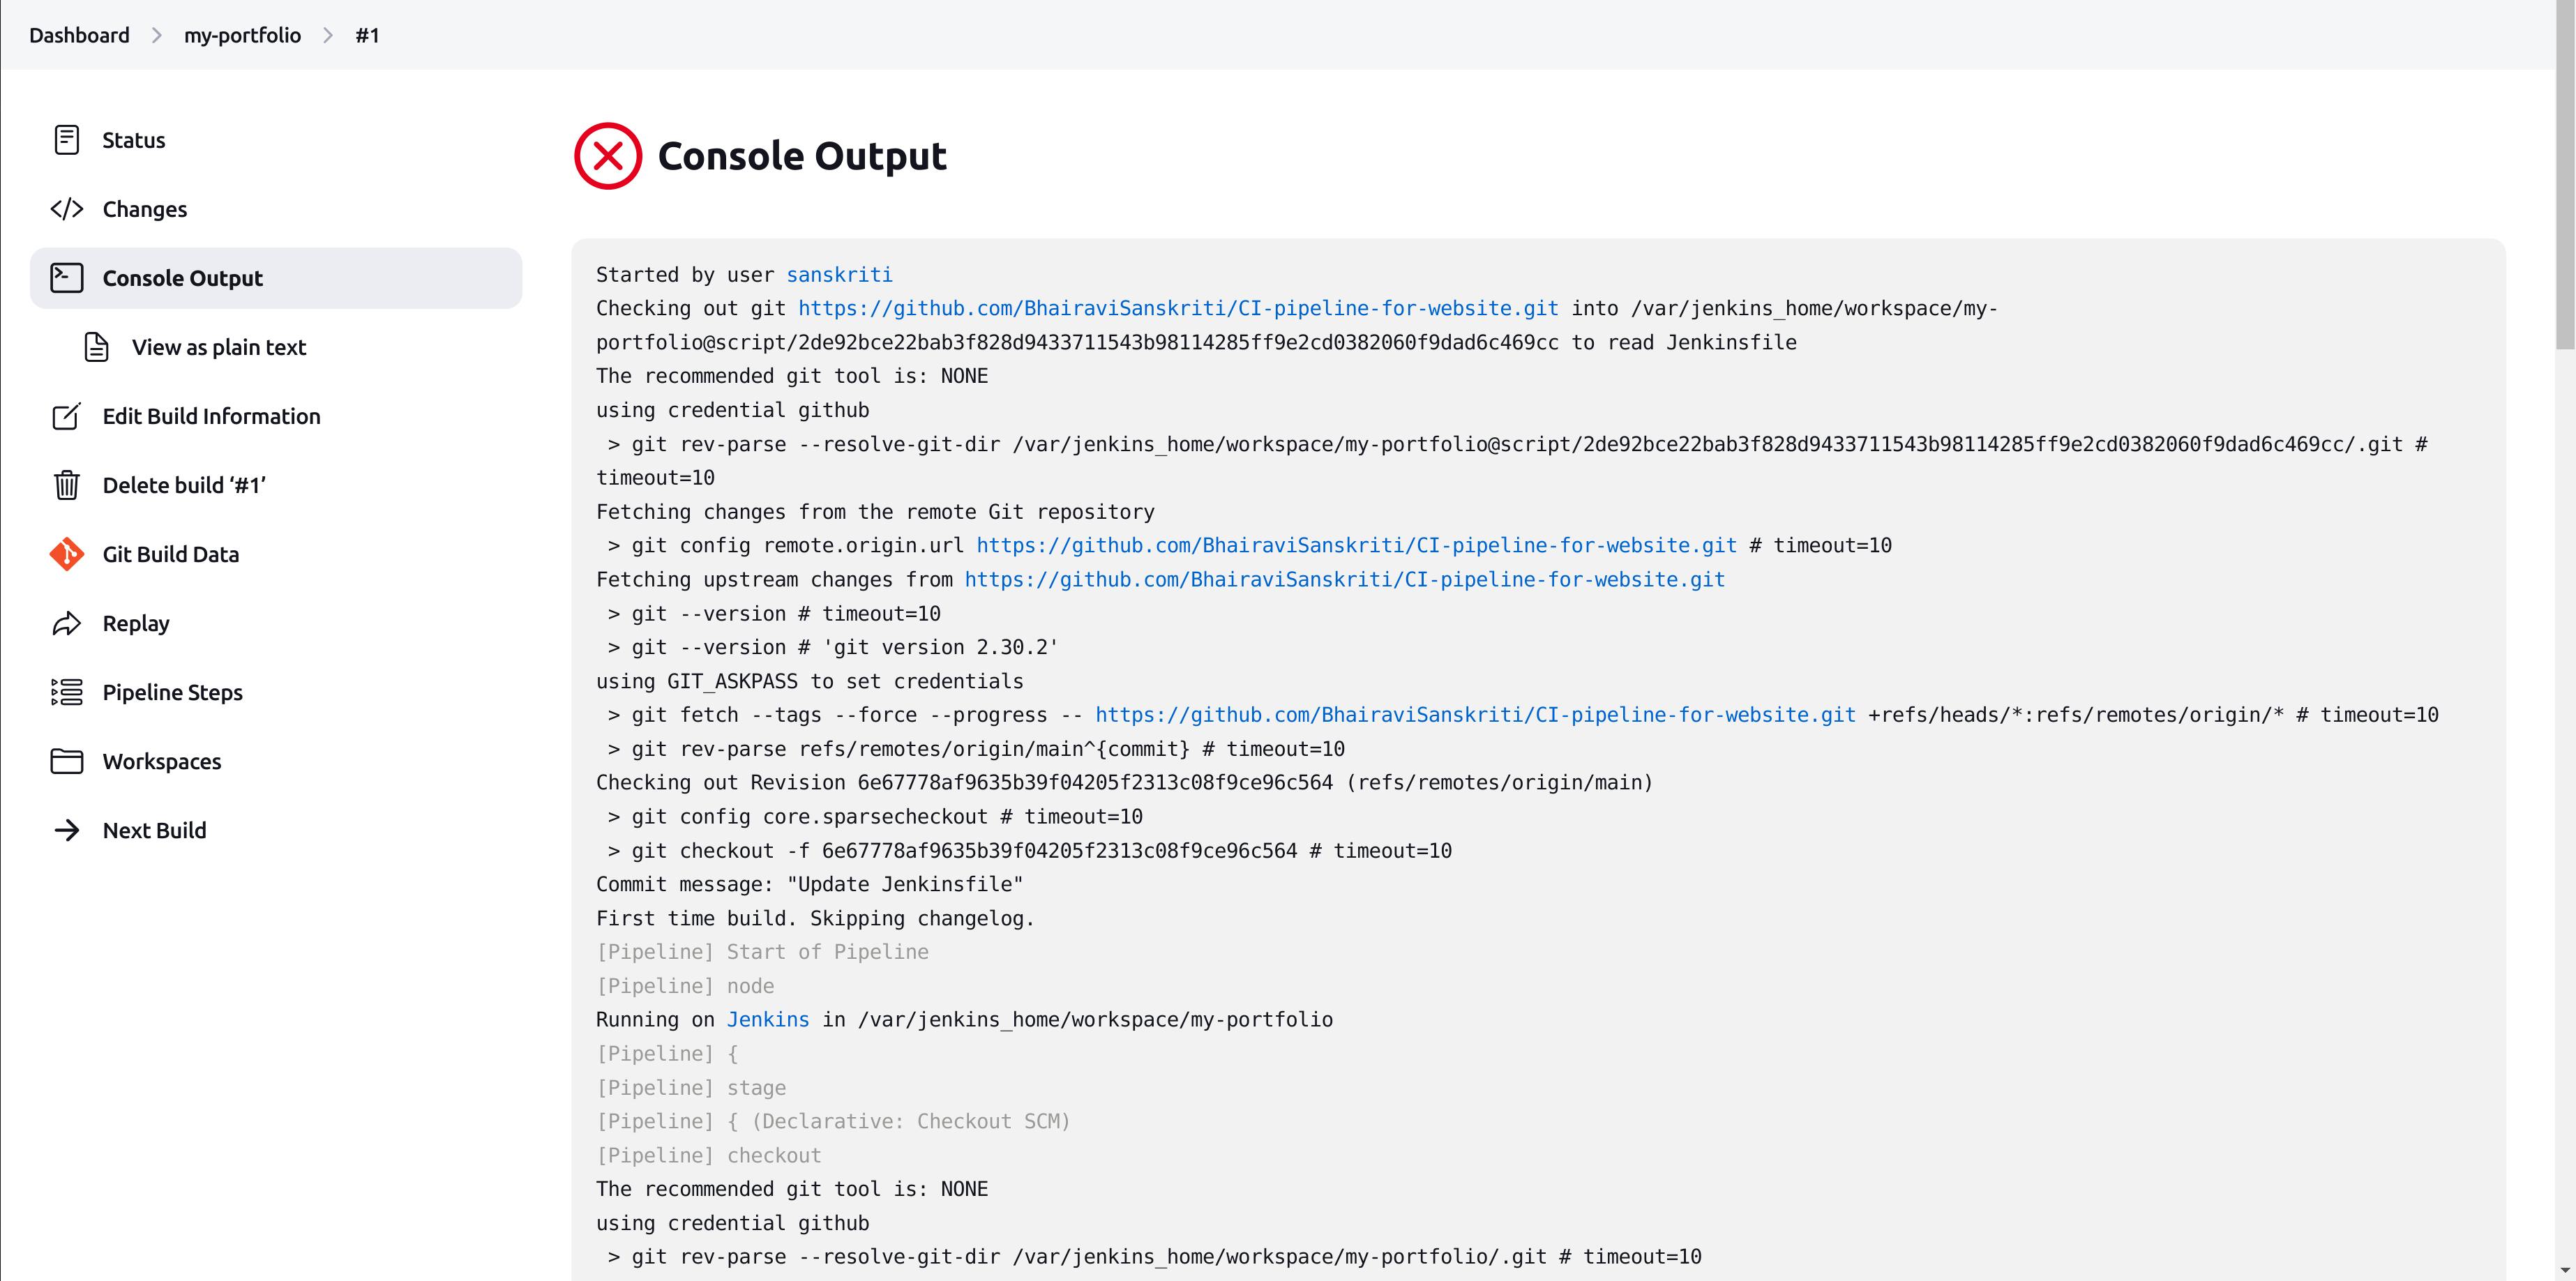 Scroll down to see the error:
- You can also check logs of a particular stage by hovering over it and clicking on the Logs.
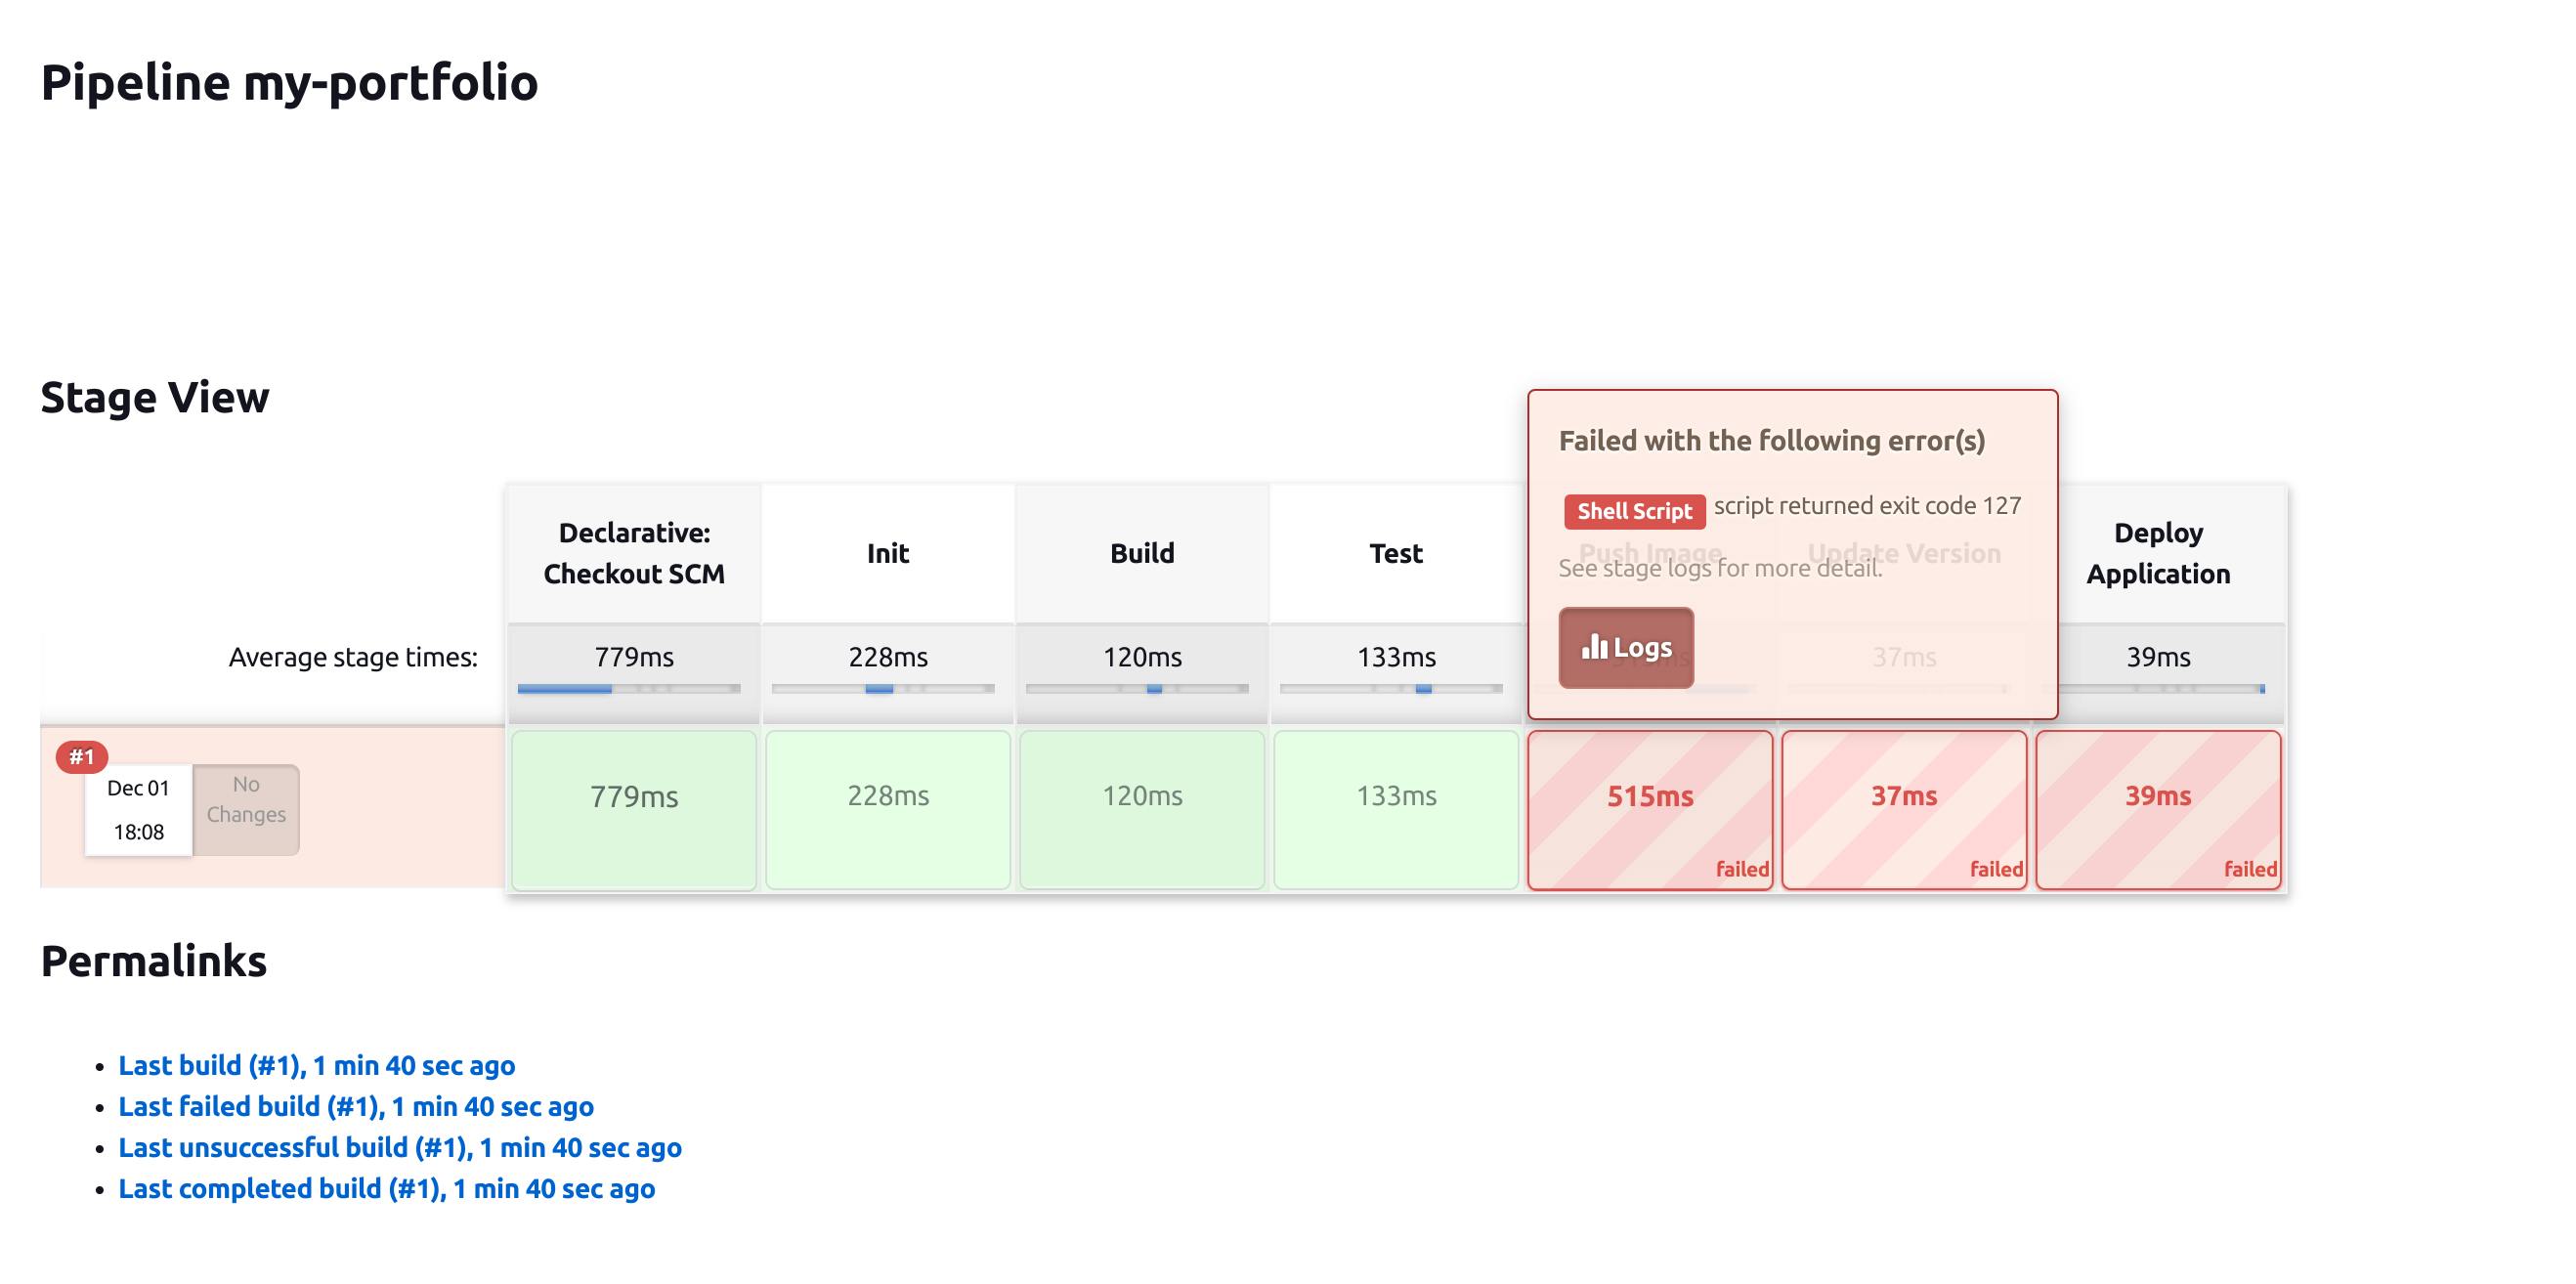
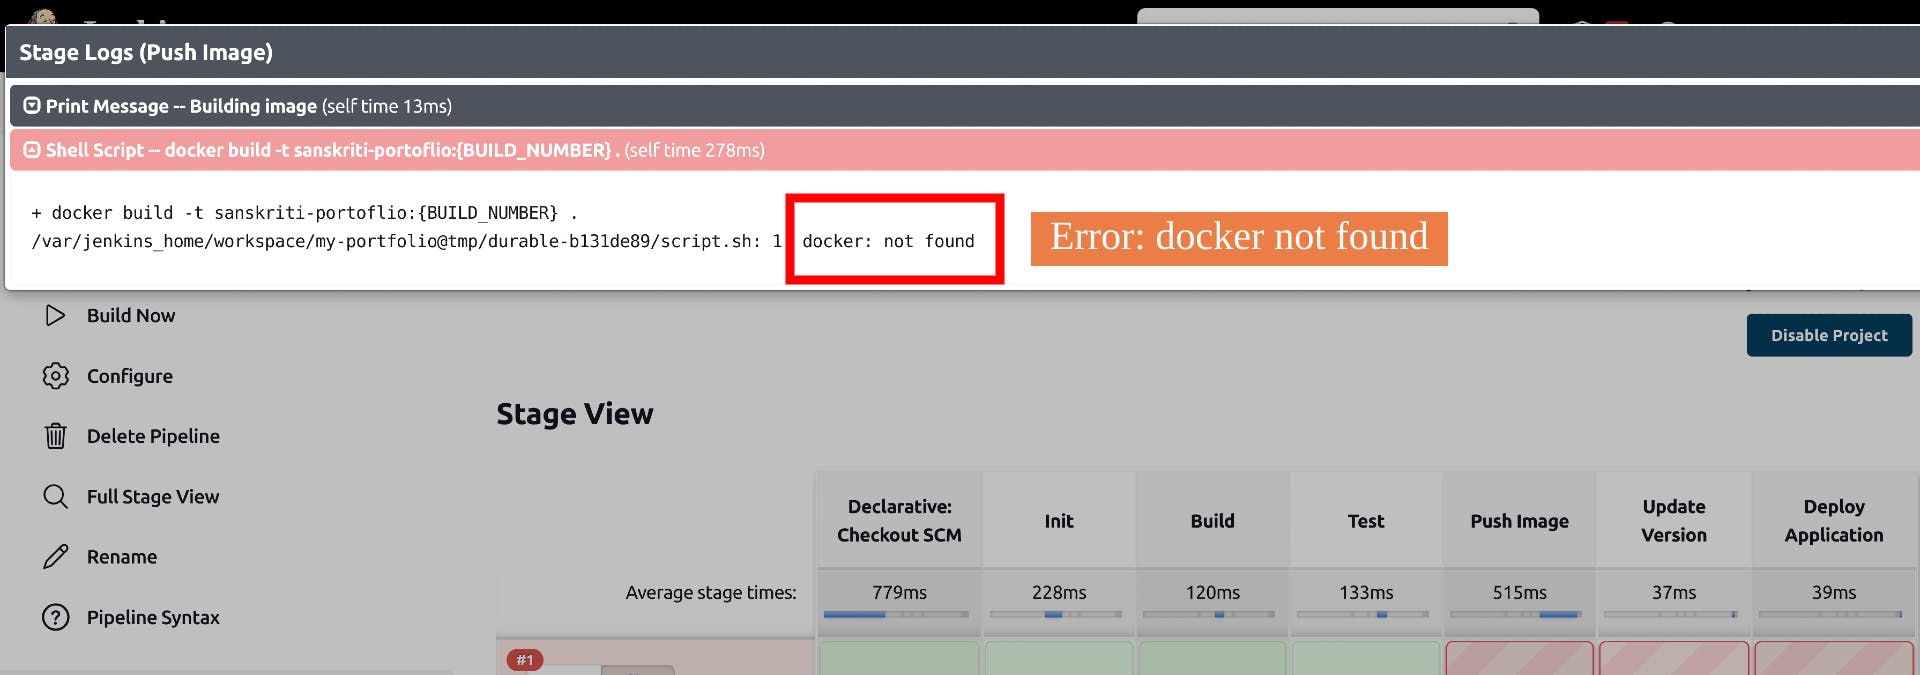 Okay, so the error is that the docker command is not found.
Resolving the error docker: not found
The reason is that we are trying to run docker commands inside a docker container.
 So what we got to do to run docker commands inside a container? Should we install docker inside the jenkins container? Well, no, that's not a good solution! So is there any other method?
Yes, there is. We can use the docker files present on the host os to run commands inside the jenkins container. It is one of the ways to run docker commands inside a container. It's pretty easy to understand, although it's not secure. Please go through this well-written blog before moving on to gain more insights.
Follow the below steps to run docker commands inside the jenkins container:
- Stop the jenkins container and remove it. Don't worry. The data won't lose because we have mounted jenkins_home volume to store the data.
docker stop jenkins && docker rm jenkins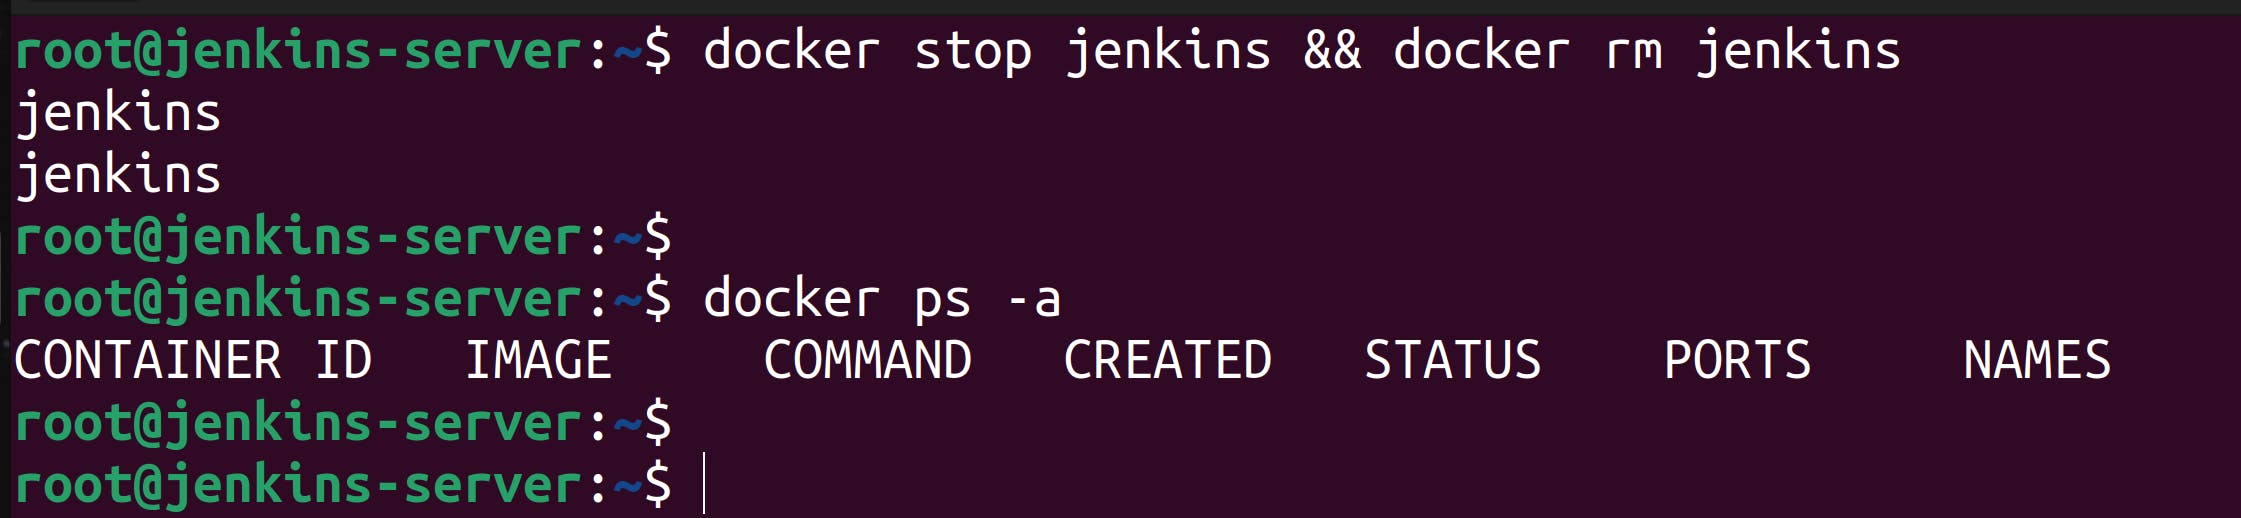
- Run the jenkins container, but this time with two more volumes attached to it. The /usr/bin/docker and /var/run/docker.sock volumes will let the jenkins container to run docker commands inside it without having to install docker.
docker run -d \ -p 8080:8080 -p 5000:5000 \ -v jenkins_home:/var/jenkins_home \ -v /usr/bin/docker:/usr/bin/docker \ -v /var/run/docker.sock:/var/run/docker.sock \ --name jenkins \ jenkins/jenkins:lts-jdk11 - Give jenkins user the permission to read /var/run/docker.sock. To do so, enter the container as a root user and grant the permission.
docker exec -it -u 0 jenkins bash
docker exec -it -u 0 jenkins bash
chmod 666 /var/run/docker.sock
Permission granted. Now, we'll build the pipeline again!
Building the pipeline again
Click on the Build Now button to build the pipeline again.
 Congrats! The build was successful :)
Adding webhooks
I am a lazy person. Too lazy to even click the Build Now button. I want to automatically start the pipeline every time I commit changes in the GitHub repository.
And to do so, I will use github-webhooks.
Follow the below steps:
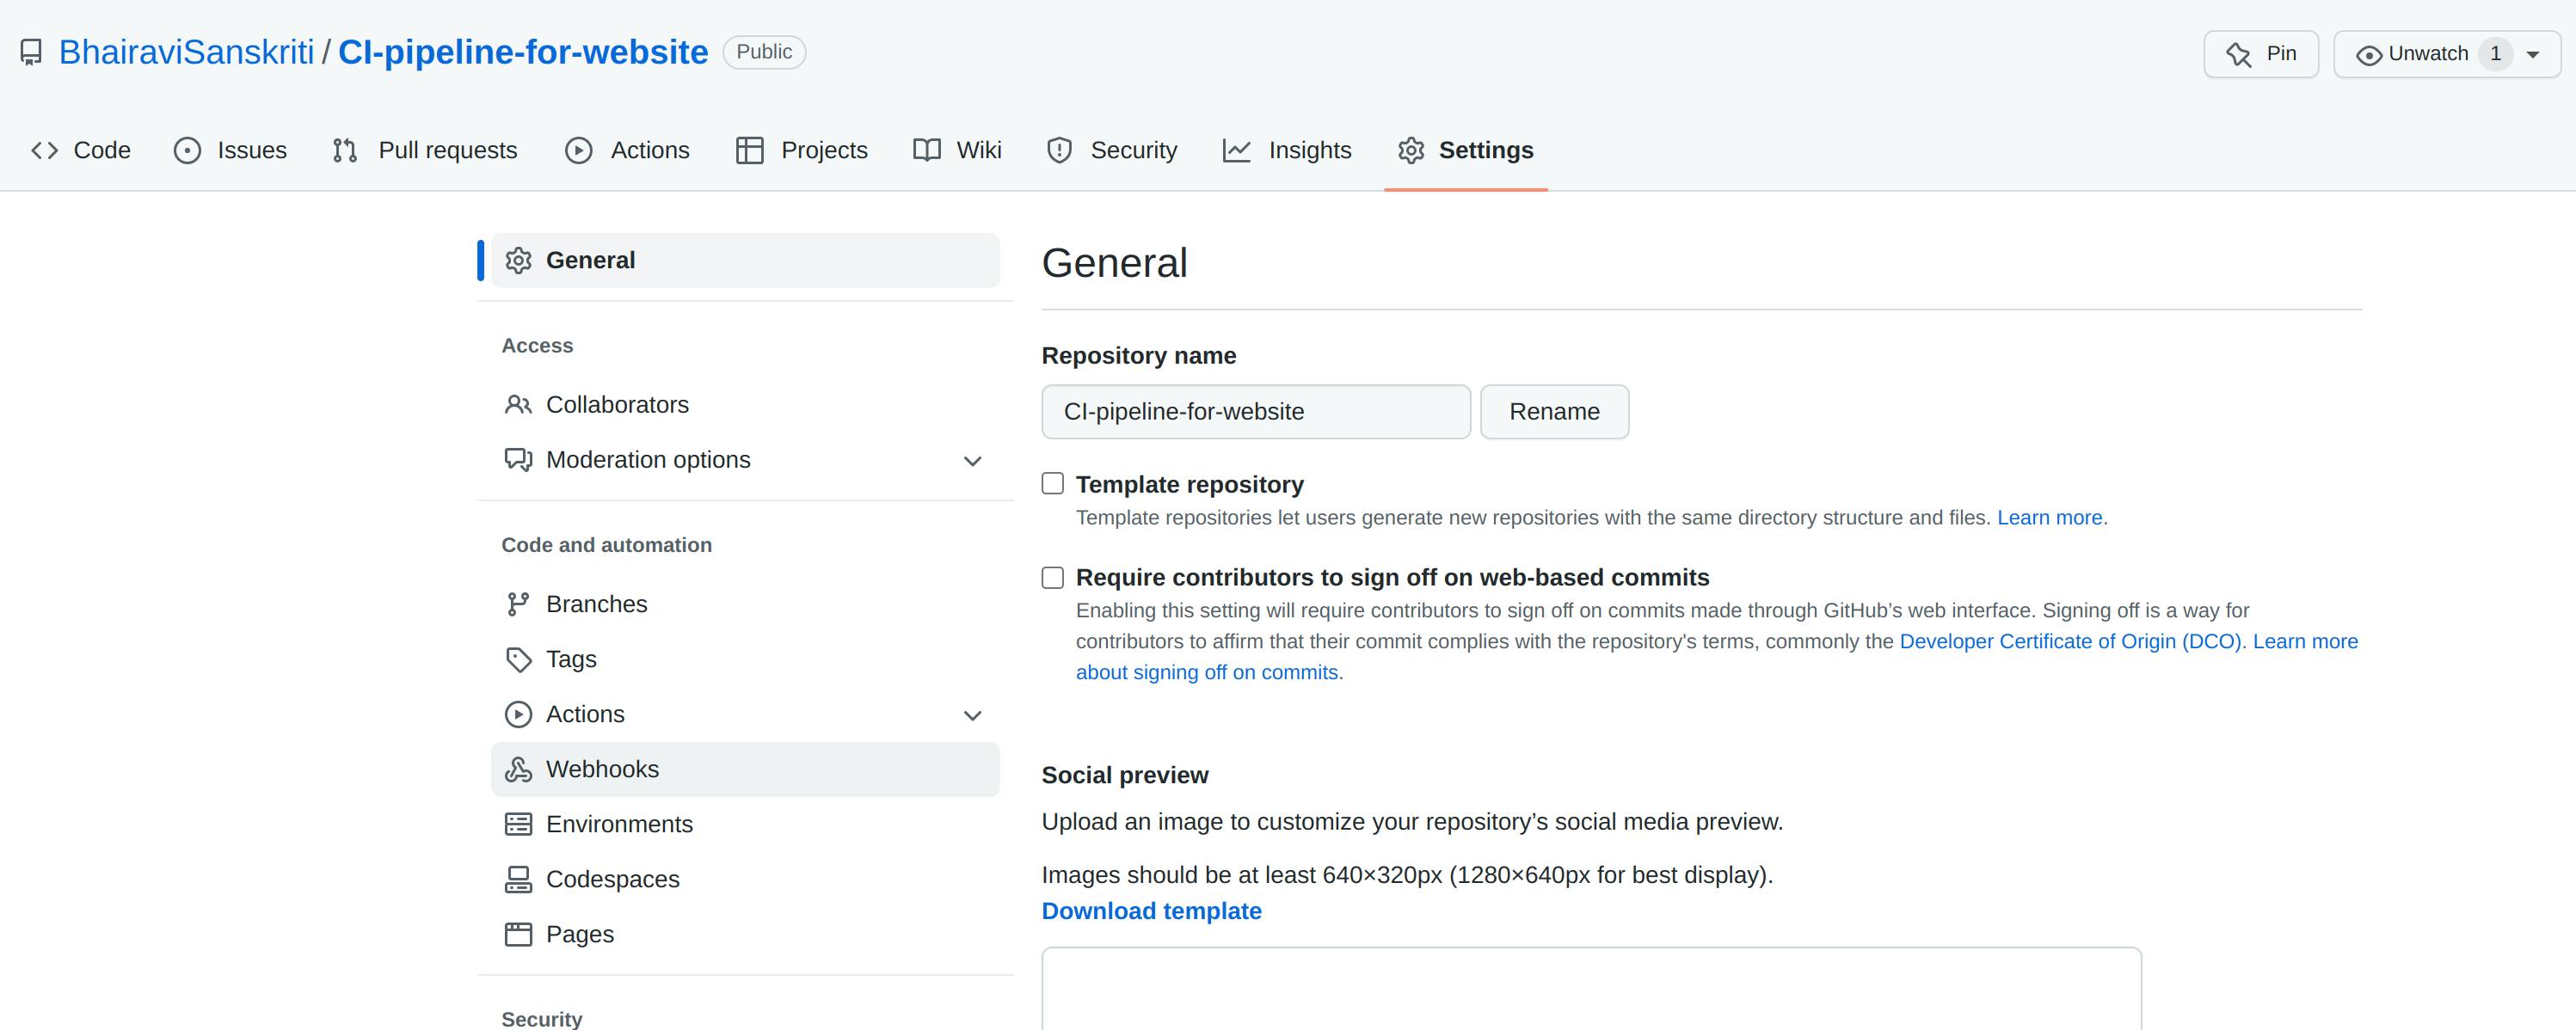
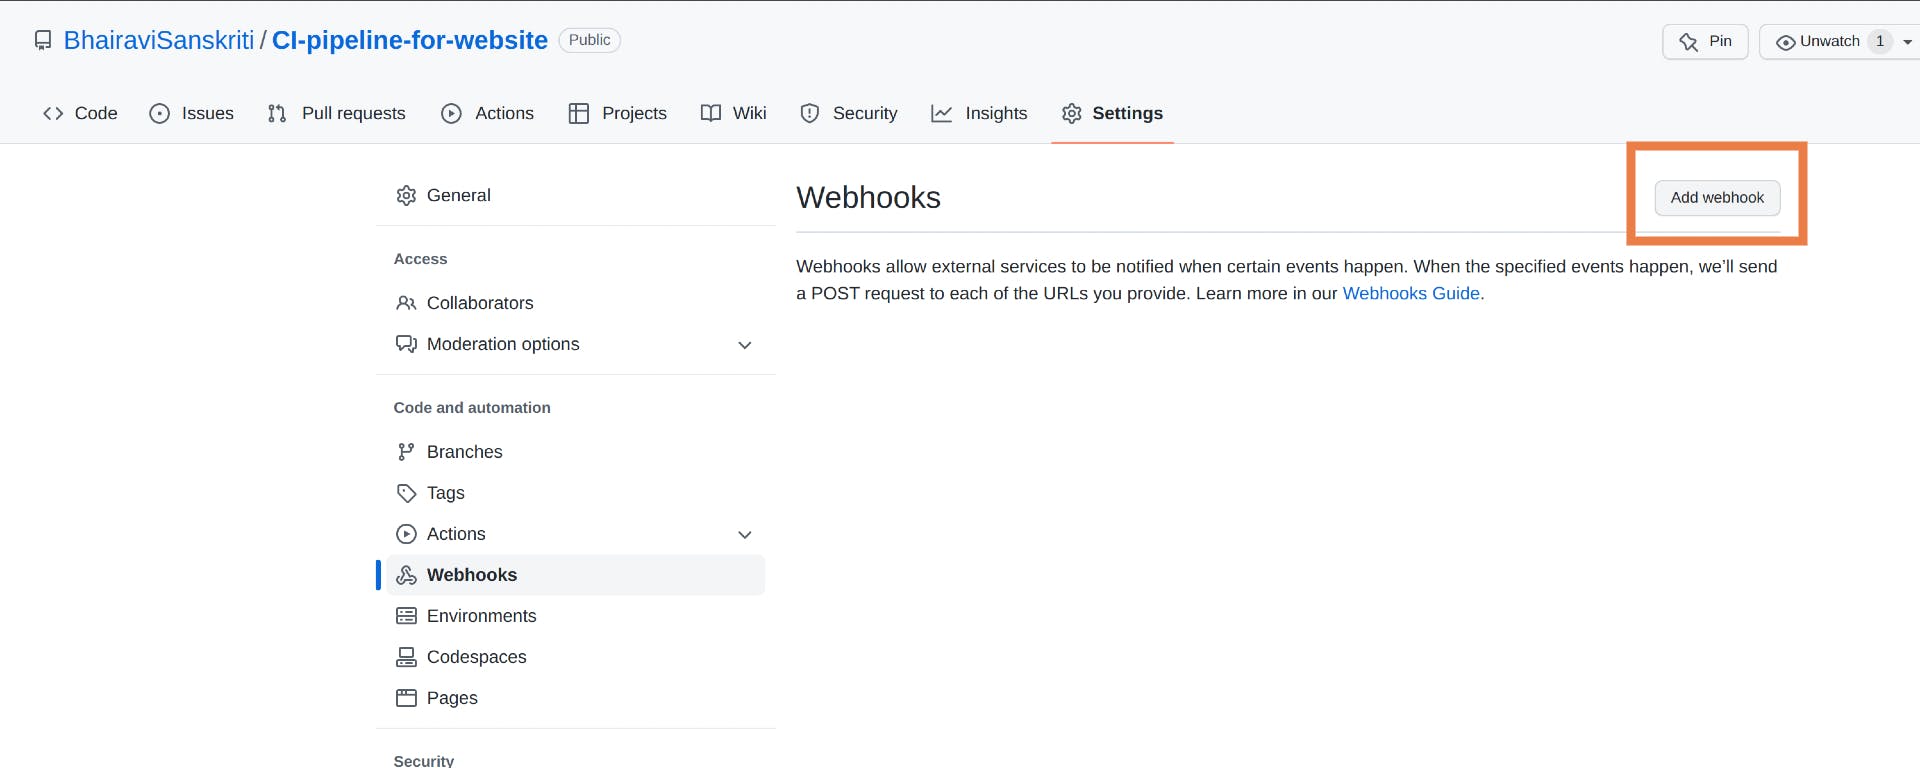
- Go to your GitHub repo where your code is present. Go to Settings -> Webhooks -> Add Webhook
- Select application/json as the Content type
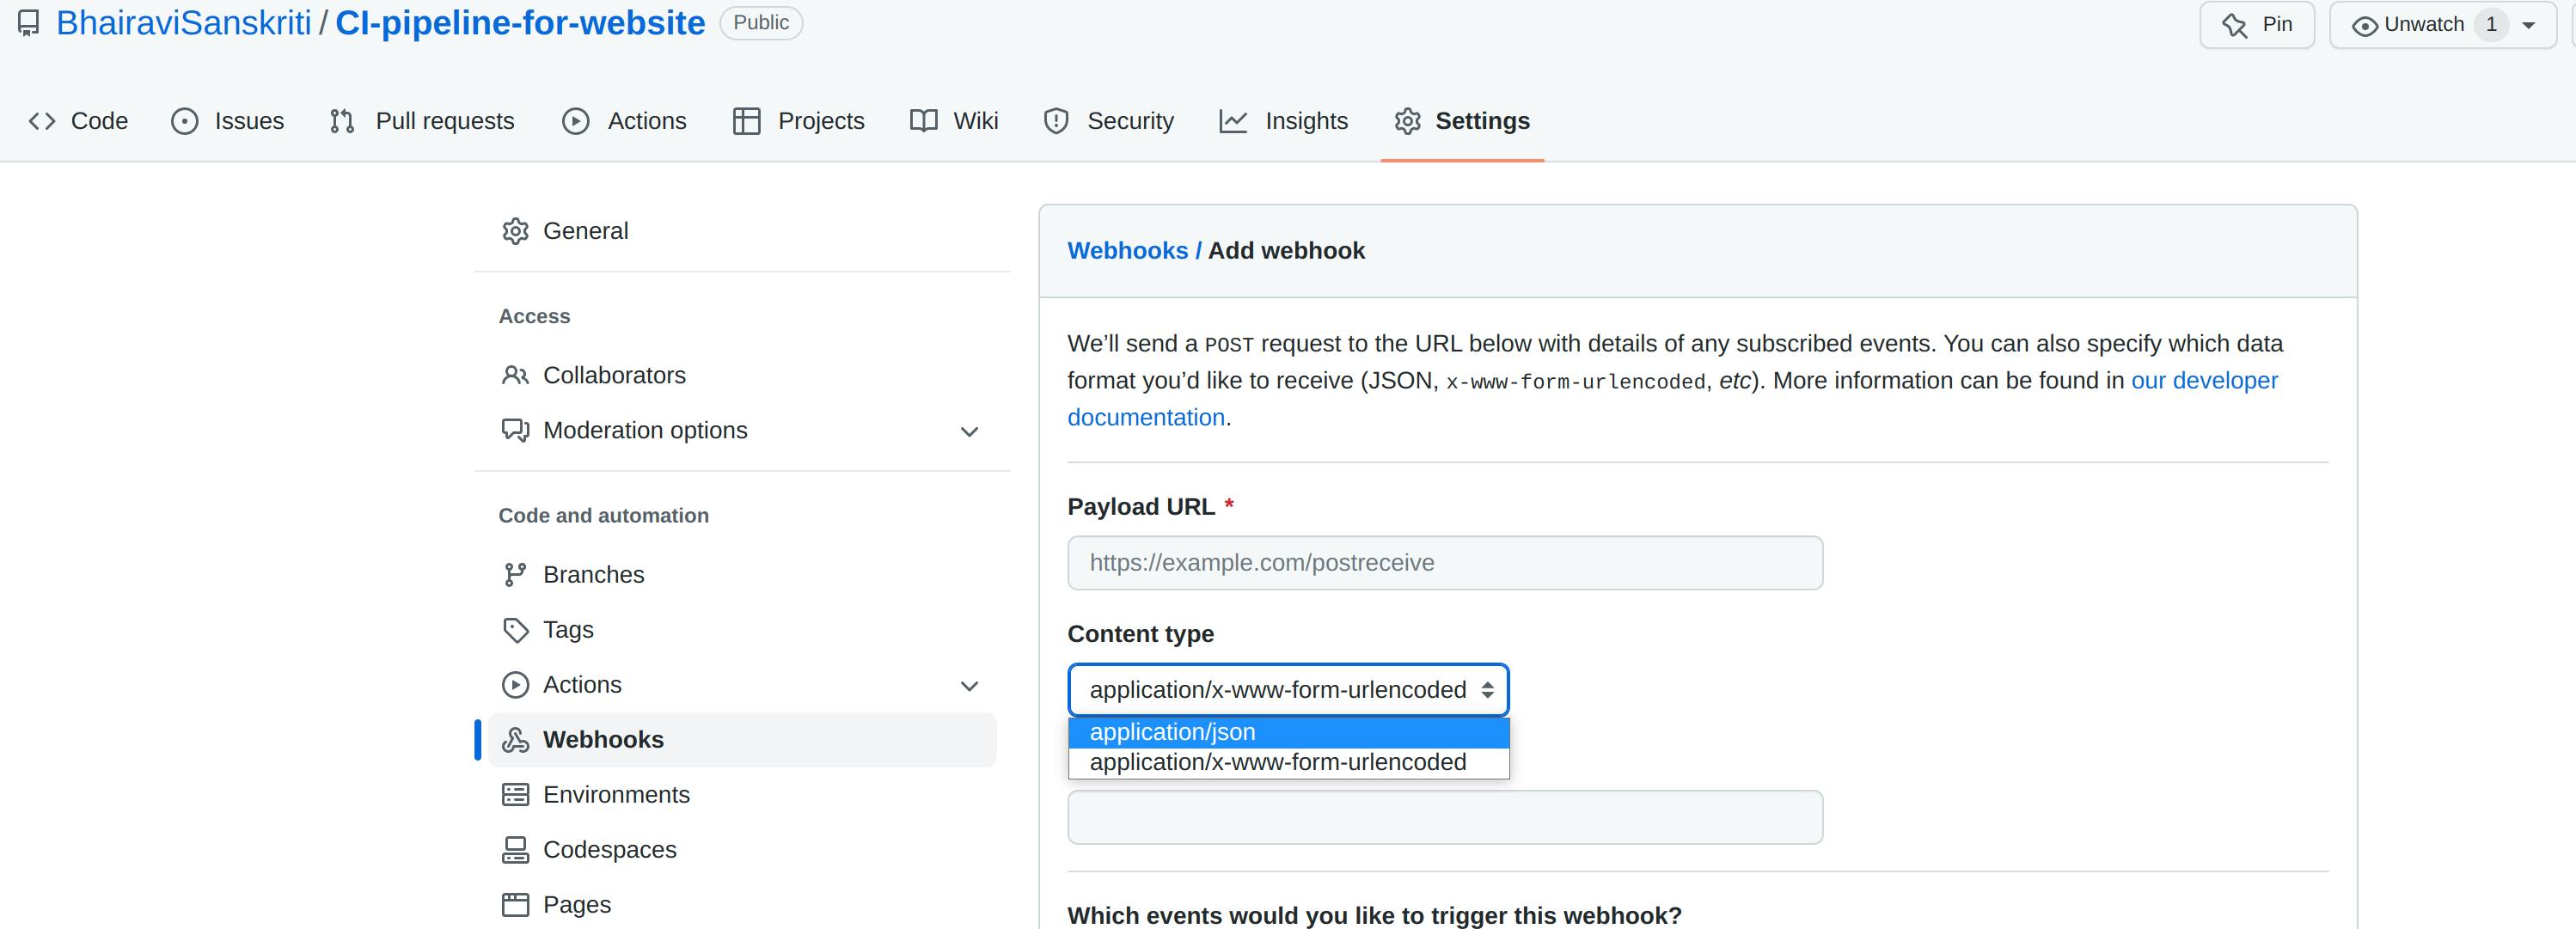
- In the payload URL, add the URL where your Jenkins application is running along with /github-webhook/

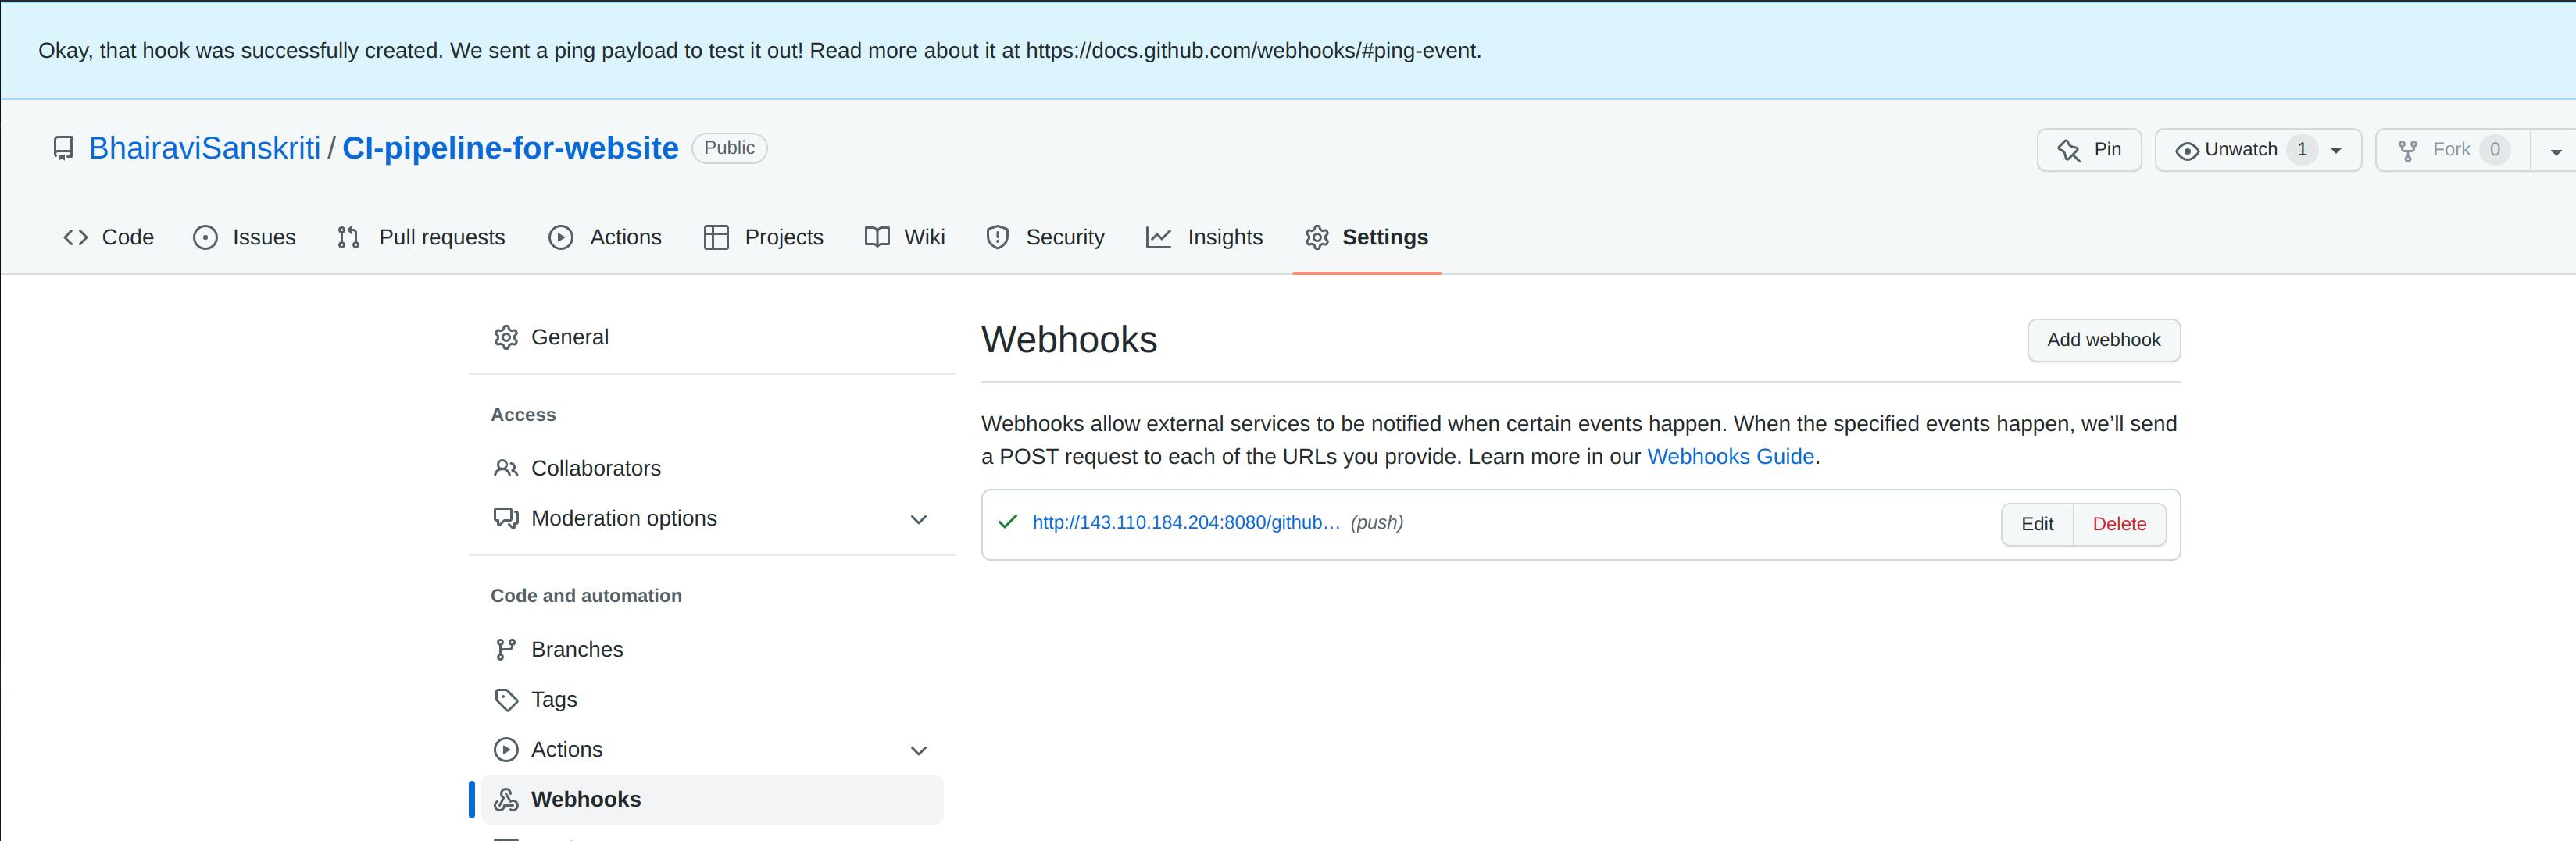
- Then, click on Add webhook
- Now, configure the pipeline by checking the GitHub hook trigger for GITScm polling box under the Build Triggers section.
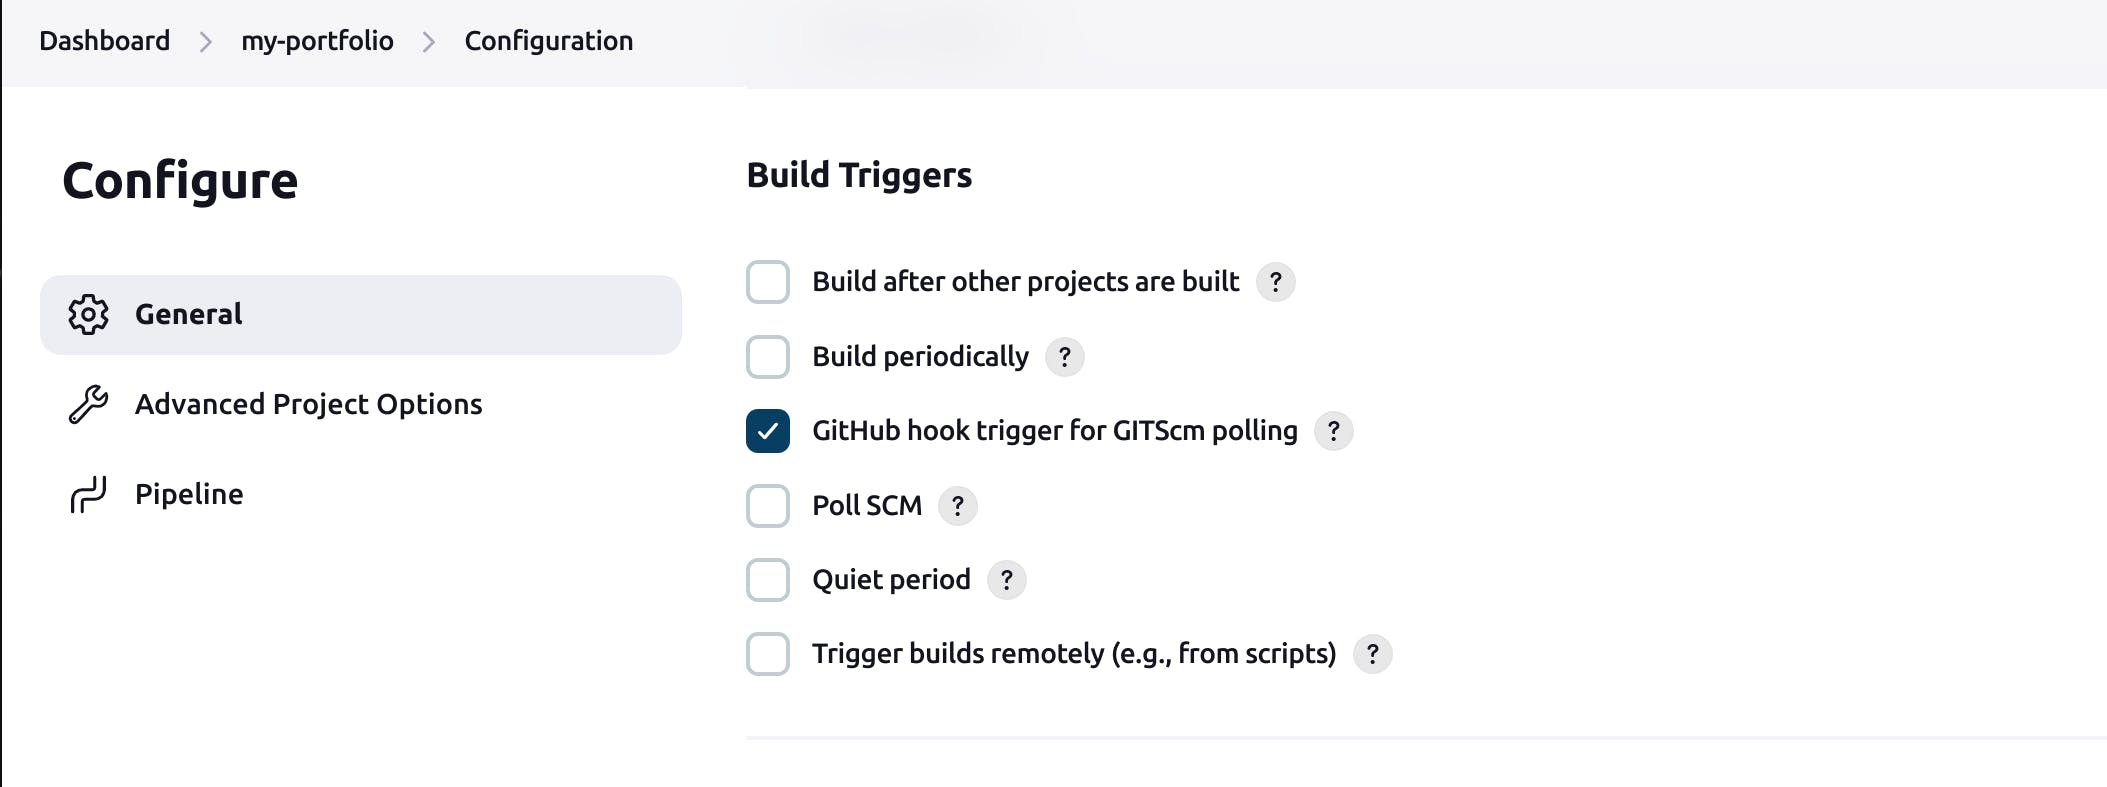 Click on save button!
Now, a git commit will trigger a pipeline build.
Ignoring commits from certain users
After successfully triggering my build by committing to the GitHub repo, I started scrolling Twitter. I was laughing at a meme until I took a look at my screen, only to find it full of green boxes. The pipeline was building again and again.
 Wait! What's happening? Why does the pipeline gets triggered again and again?
What's up?
So this happened!
Jenkins triggered a build every time there was a commit in the GitHub repo. The Jenkins pipeline was also committing changes in the GitHub repo that, in turn, was triggering another build. And the cycle continued.
The jenkins user was responsible for updating the version of the index.html file and committing changes in the GitHub repo.
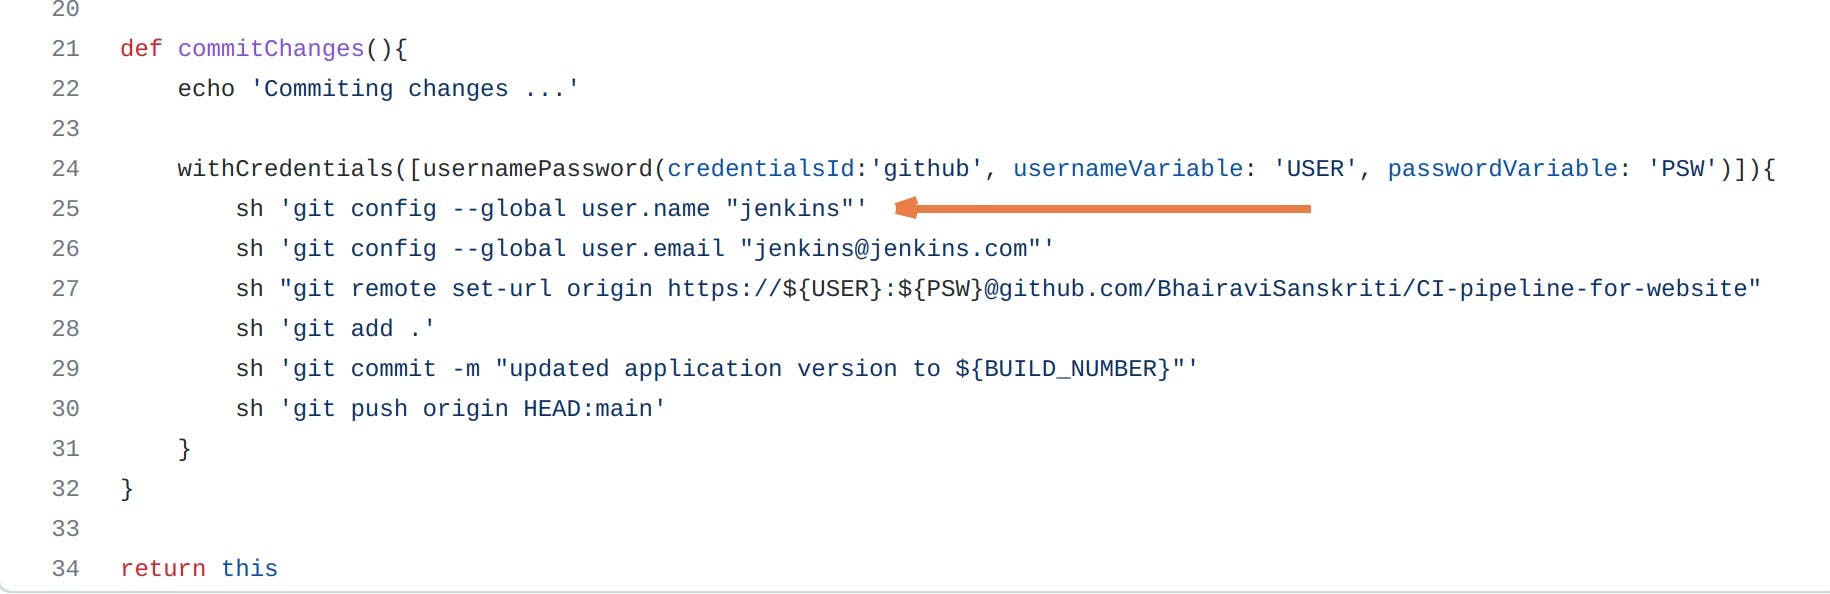
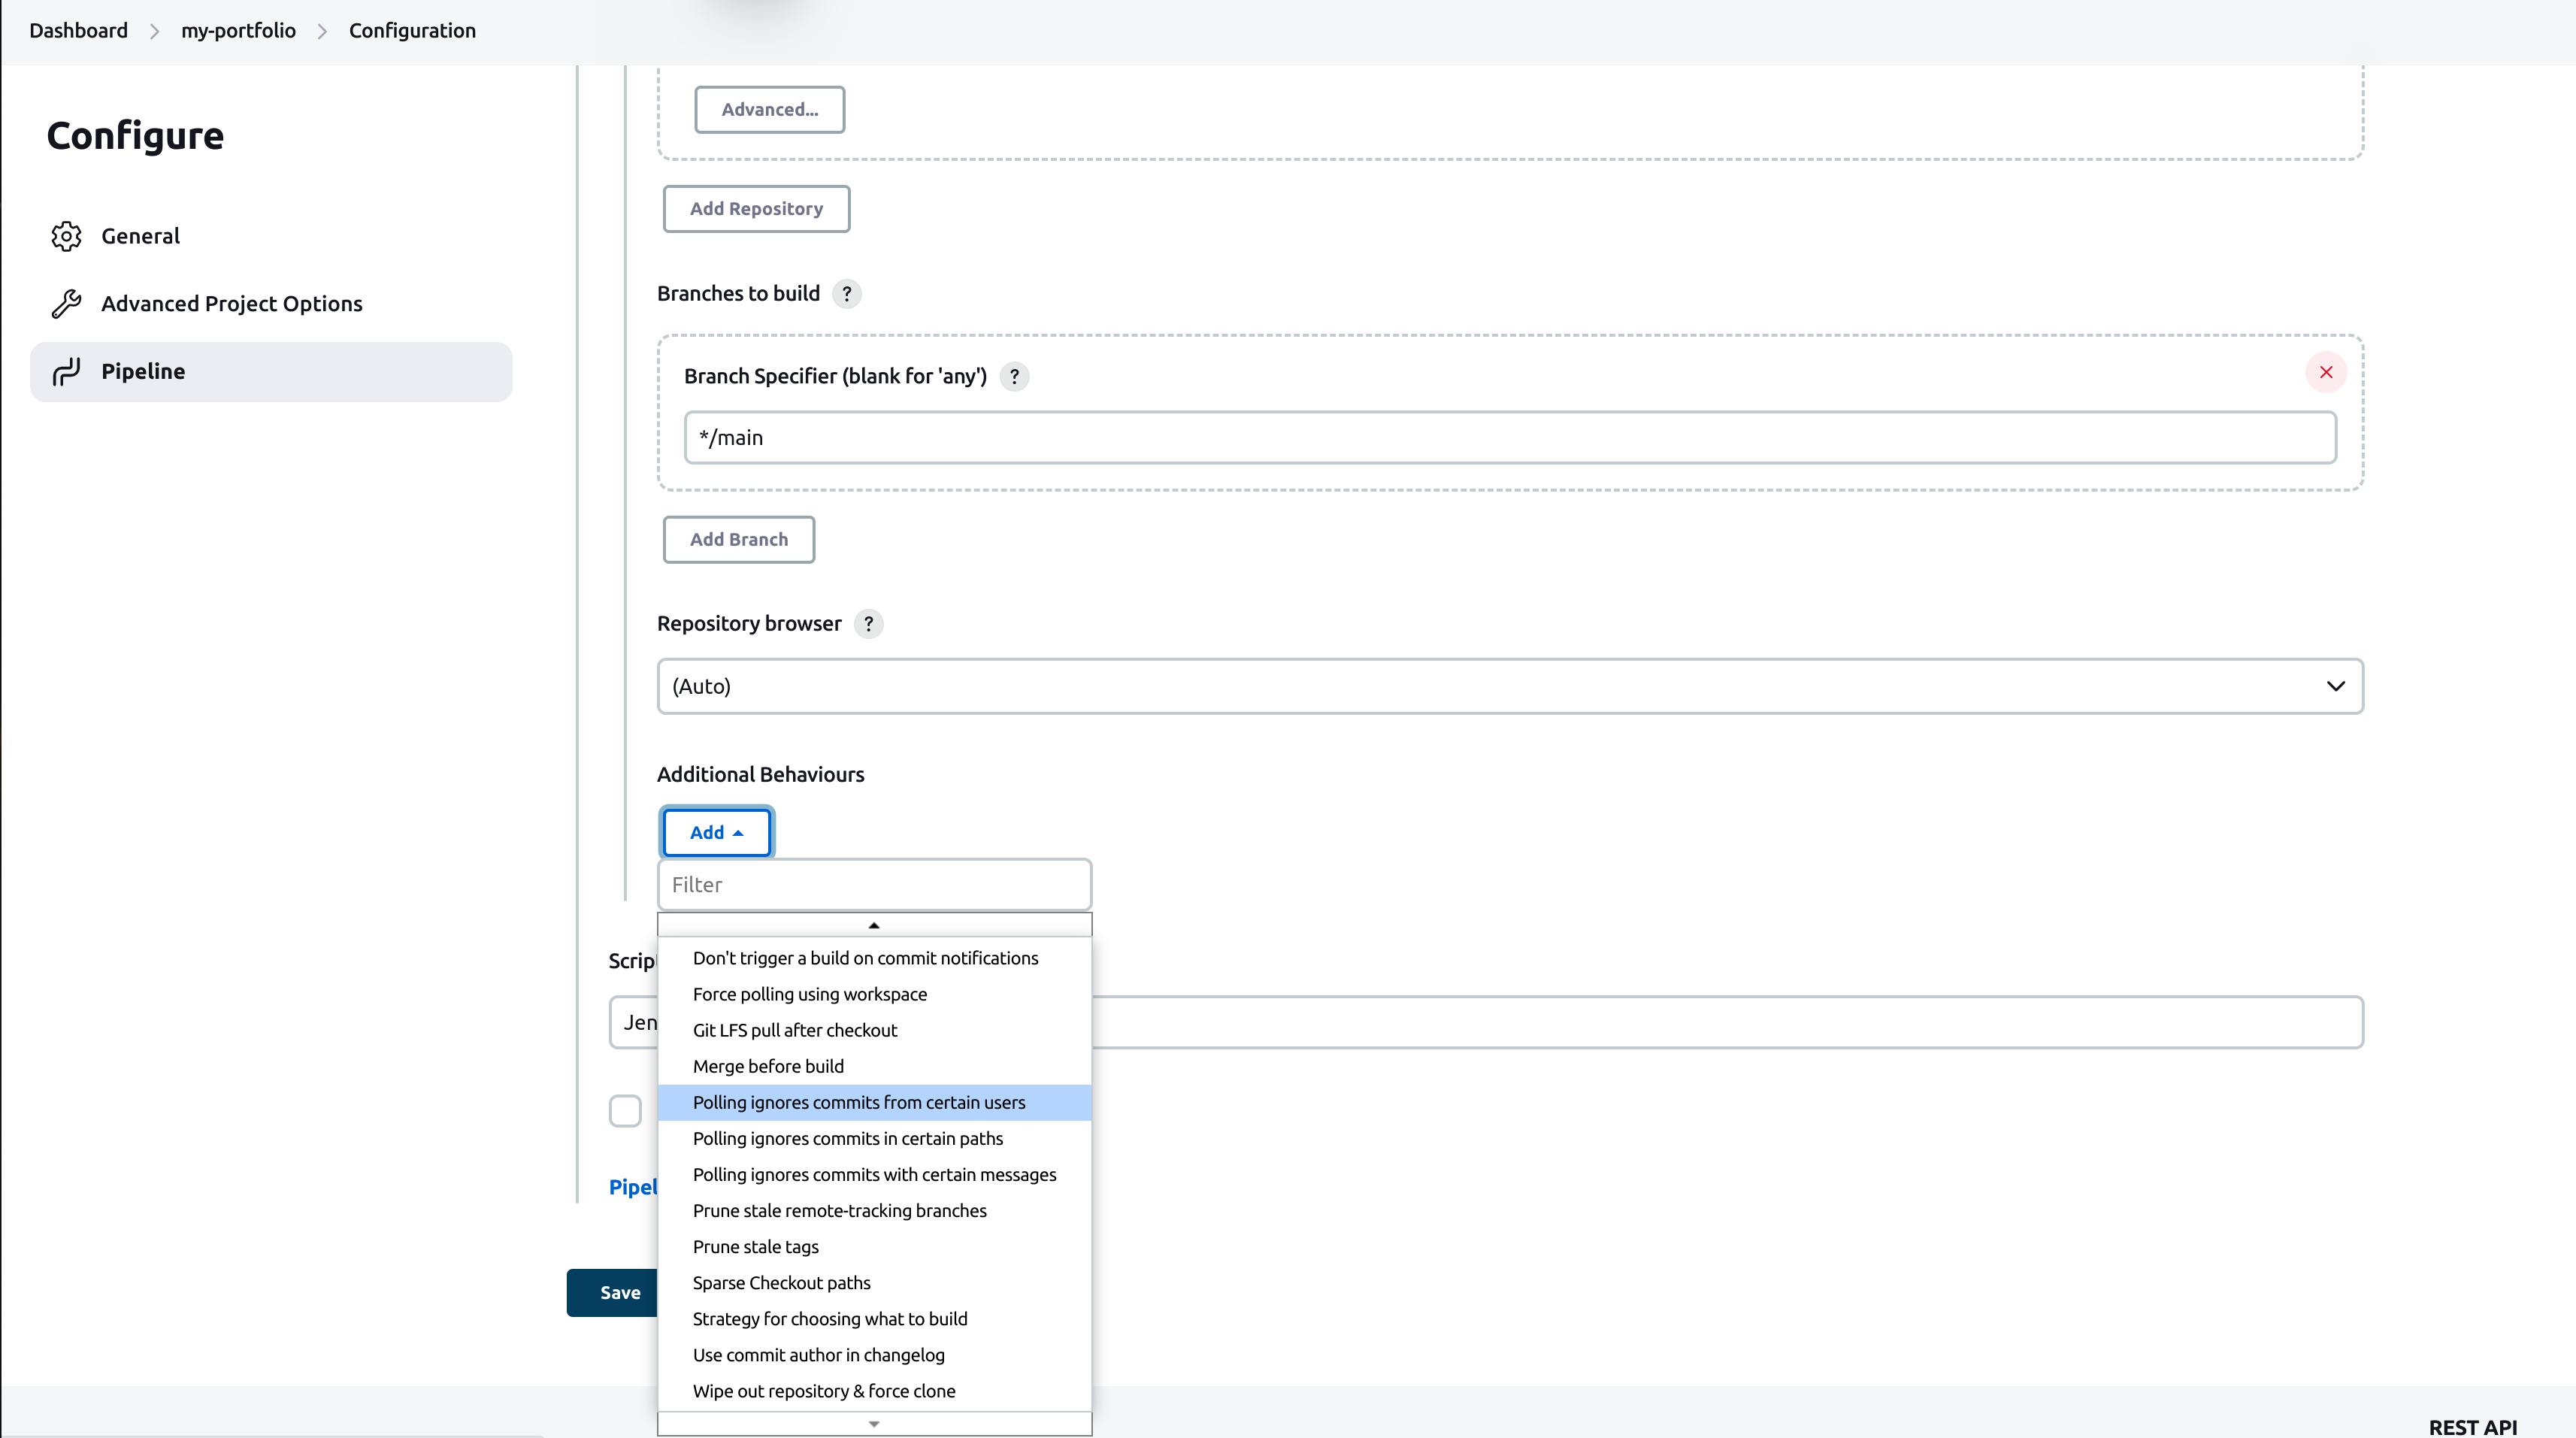
Time to resolve some issues! Configure Jenkins to ignore the commit made by the jenkins user. Follow the below steps:
- Open the configuration for the pipeline. Scroll down a bit and click on Additional Behaviours. Select Polling ignores commits from certain users from the drop-down menu.
- Add jenkins to the Excluded Users list.
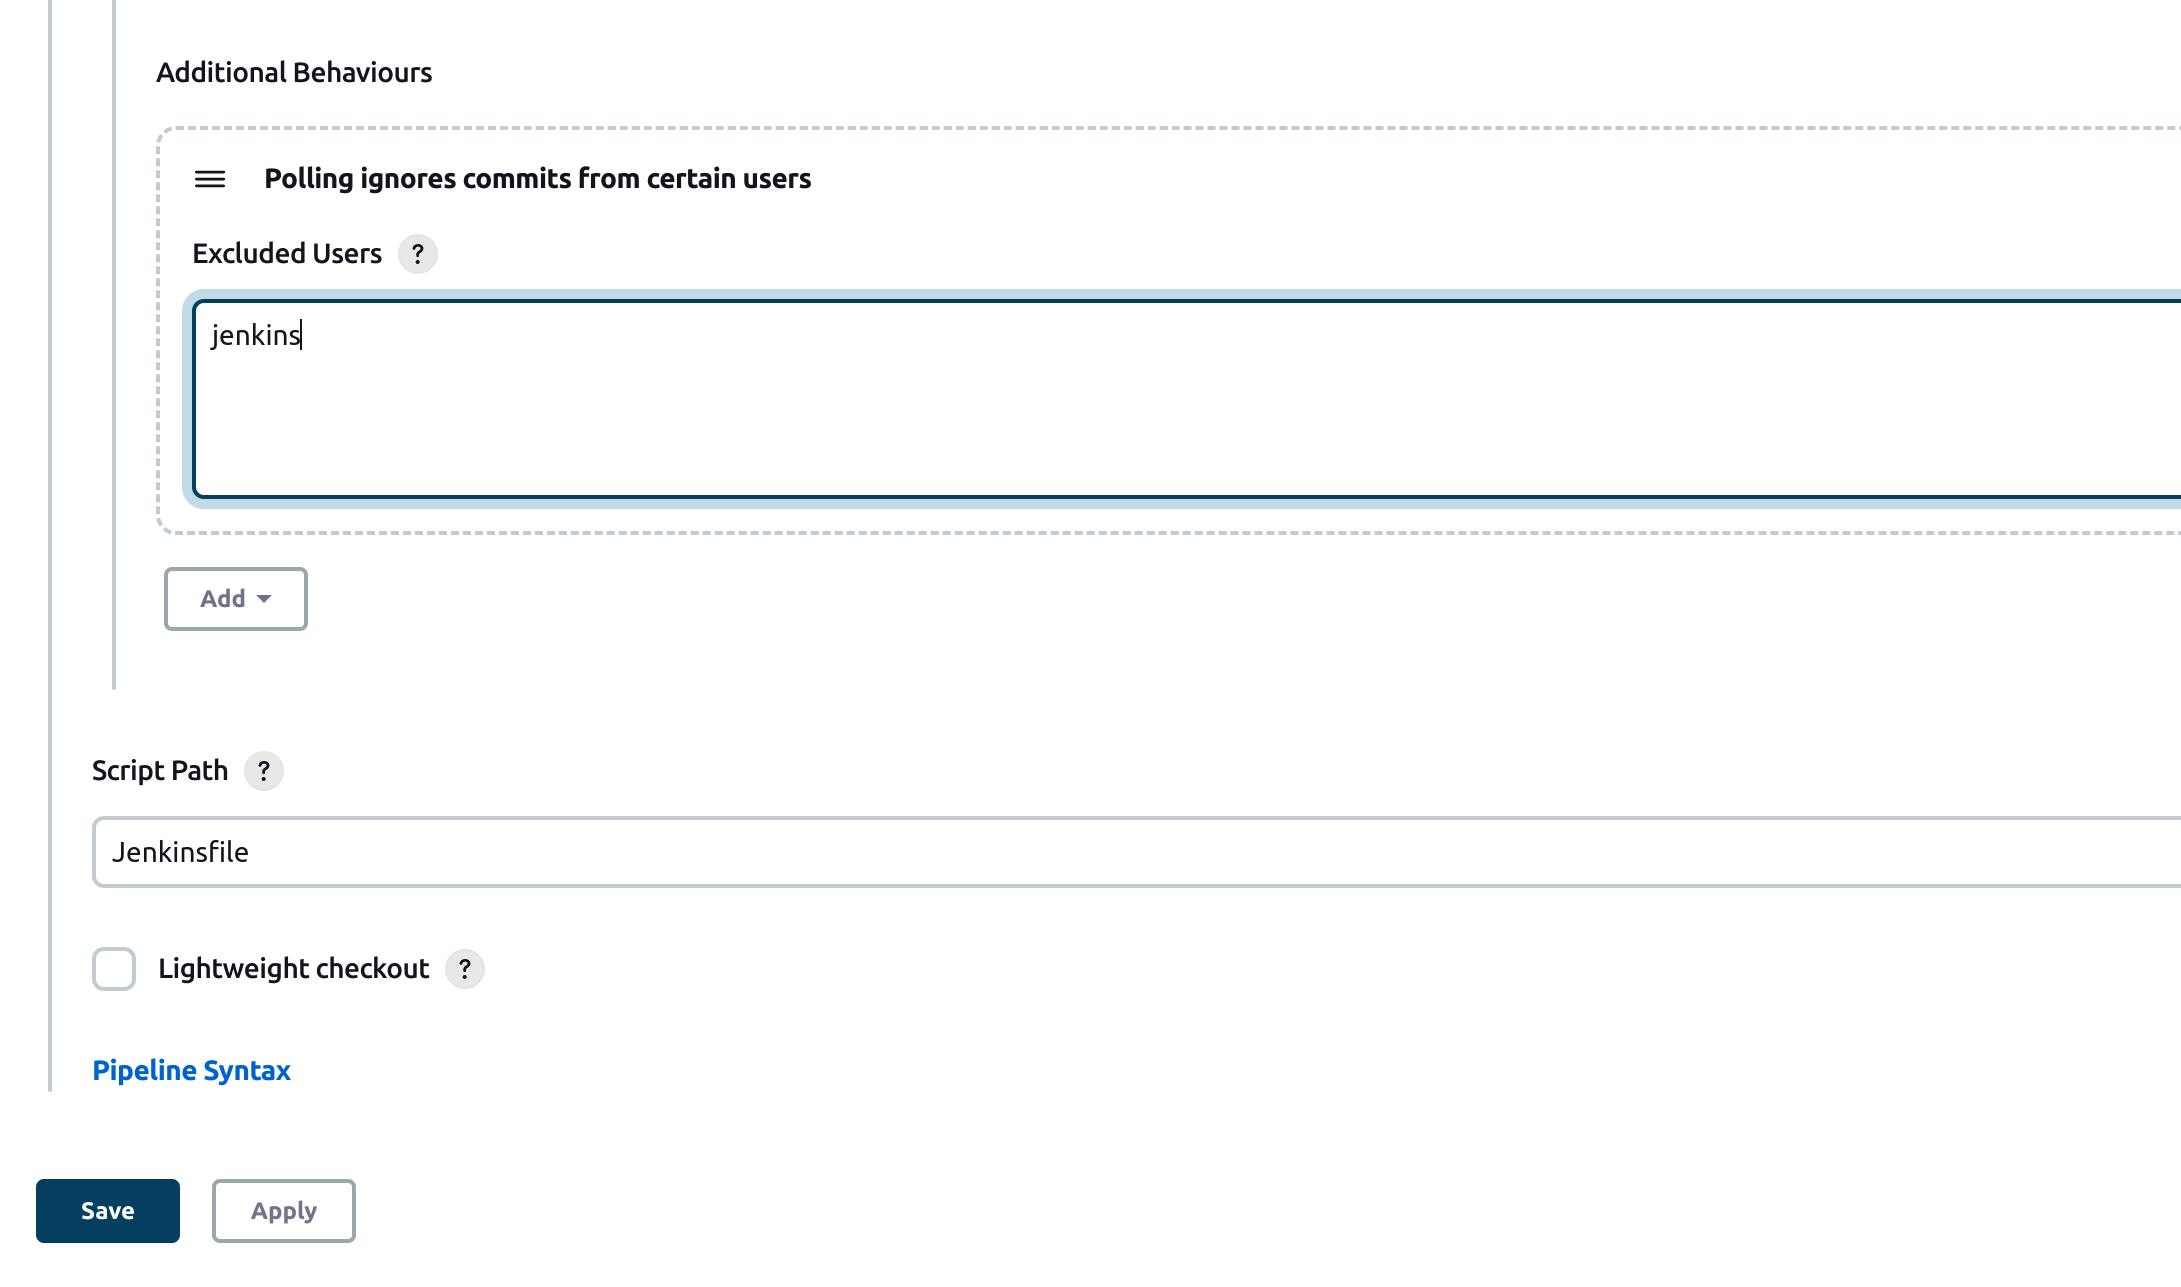
Build the pipeline again to reflect the changes. This time the build ran only once.
Congrats! Problema resuelto!
Recap
Here's an overview for a better understanding.
I wrote code for my portfolio website and pushed that code to the GitHub repo. I wanted to automate the task of building the docker image of the application and pushing it to the docker hub. I also wanted to change version no. in one of my code files. These tasks should have automatically triggered every time I commit changes in the GitHub repo.
To do this, I used Jenkins. I ran Jenkins as a container on a cloud server. I used GitHub webhooks to automatically trigger the pipeline build instead of triggering it by clicking on Build Now button.
We configured Jenkins to ignore the commit from the jenkins user. It will prevent triggering the pipeline again and again.
To Do
Now that you know how Jenkins work, try to build a Ci pipeline for your application.
What's next
In my next blog, I will tell your how to push your docker images to the Nexus repository.